


Embroidery Stabilizer Guide: Types and When to Use Each

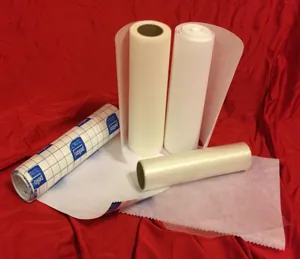
Hi! I'm Kristin from Sweet Whimsy, and I teamed up with Apex Embroidery to put together this guide to embroidery stabilizer. Stabilizer is one of the most frustrating parts of learning machine embroidery and applique, but it is also one of the most important. When I first started, I bought one kind (a tearaway, I think) and used it on every project.
Needless to say, my projects weren't all successes. Over time I realized that all the talk about matching the stabilizer to the fabric and the stitch count really mattered. What followed was a lot of trial and error, and a little too much error for my taste. I hope this guide saves you from my mistakes and shows you which stabilizers to keep on hand and when to use each one. If you are more of a visual learner, watch the video first.
What Does Embroidery Stabilizer Do?
A stabilizer is the backing you hoop with your fabric. It holds the fabric still while thousands of stitches pull on it, so the design does not pucker, shift or sink. Some stabilizers stay behind the stitches for the life of the item, and others are removed once the design is finished.
There are many brands and variations, which makes the craft store aisle very confusing very quickly. The good news is that four types cover almost every project. When you are starting out, these are all you need, so bring your list and put on your blinders.
The 4 Types of Embroidery Stabilizer at a Glance
| Type | How it is removed | Best for |
|---|---|---|
| Cutaway | Trim the excess with scissors; the rest stays behind the stitches | Anything that stretches (t-shirts, polos, knits, sweatshirts) and dense designs |
| Tearaway | Tear the excess away from the stitches | Stable, non-stretch fabrics with lighter designs: woven shirts, towels, bags, caps |
| Sticky | Tear or cut away, depending on the base | Small or hard-to-hoop items that you float on top of the hoop |
| Water-soluble | Dissolves in water | Free-standing lace, sheer fabrics, and as a topper on towels and fleece |
If you only remember one rule: if the fabric stretches, use cutaway.
Cutaway Stabilizer
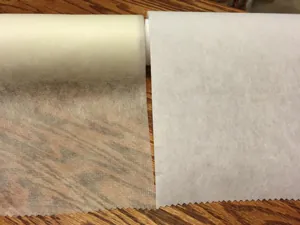
The stabilizer you will probably use the most is cutaway. You cut the excess away from the back of the project after the design is finished. It works for most designs and fabrics, and because some of it stays behind the stitches, it keeps supporting the design wash after wash. We use cutaway on any apparel that stretches, like polos and tees.
- Medium-weight cutaway works best with dense designs, such as designs with large fill areas.
- Mesh cutaway (also sold as no-show or polymesh) comes in white, black and nude. It works well on light-colored and lightweight fabrics because it won't show through or change the drape. It handles all but the densest designs.
Tip: Use fusible mesh on knit fabrics to keep the shirt from stretching while you hoop it.
Tip: For designs over about 10,000 stitches, use two pieces of cutaway and rotate one of them 90 degrees so the fibers run in opposite directions.
Tearaway Stabilizer
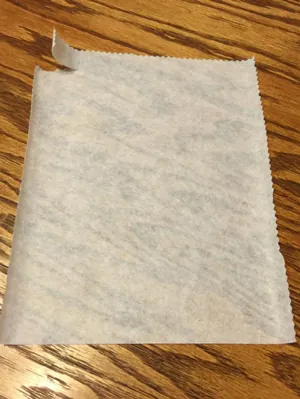
Tearaway is the other everyday stabilizer. You tear the excess away from the back once the design is stitched. Tearaway works well for lighter designs such as monograms and outline designs on fabrics that do not stretch: caps, woven button-up shirts, towels and canvas bags. For a dense design on denim or canvas, switch to cutaway (see the chart below).
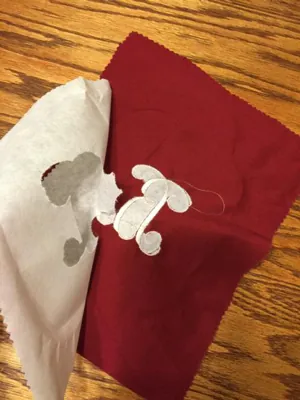
- Paper tearaway tears away cleanly, so if the back of the design will be seen, it is your best choice.
- Soft tearaway is a softer version of paper tearaway. It can leave fuzzy edges after tearing, but it handles a slightly higher stitch count. For a very dense design, use cutaway instead.
Tip: Save the large pieces of tearaway you remove. They come in handy for removing water-soluble topper, as explained in the water-soluble section below.
Sticky Stabilizer
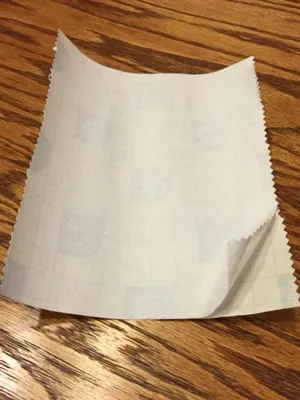
Sticky stabilizers are made for small or hard-to-hoop items, like collars, cuffs, onesies and pet bandanas. You hoop the stabilizer alone and "float" the item on top of the sticky surface. There are two kinds, but honestly, you can turn any stabilizer into a sticky stabilizer with temporary spray adhesive. That is often more cost-effective if you don't use sticky stabilizer much. It is also the better choice for dense designs, because sprayed cutaway supports dense stitching better than a sticky tearaway.
- Water-activated sticky stabilizer is hooped dry, then you brush a little water on with a foam brush to make it tacky.
- Peel-away backing can be hooped with or without the backing attached. If you hoop it with the backing on, score the backing in an X shape with a straight pin so it peels off easily.
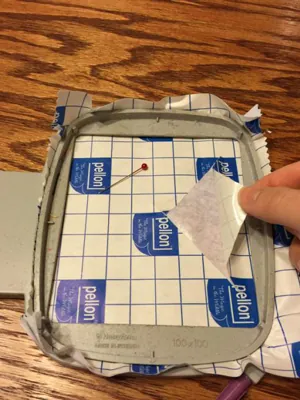
If you peel the backing off first, lay the top hoop on the sticky side, press it into the bottom hoop, then fold the corners of the stabilizer over so they stick to themselves and stay secure in the hoop.
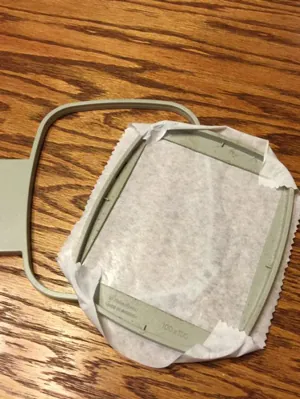
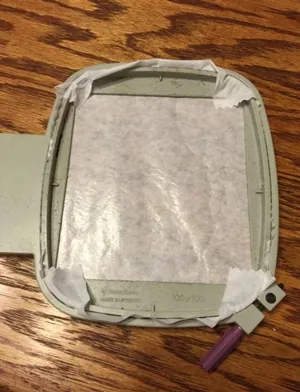
Tip: Some sticky stabilizers gum up the needle, especially cheaper ones and anything made with spray adhesive. Clean the residue off with an alcohol wipe, or prevent it by putting a drop of Sewer's Aid on the needle before you stitch.
Bonus tip: Spray adhesive goes everywhere. Spray your stabilizer inside a cardboard box lid (or just go outside). The last thing you need is a sticky embroidery machine.
Want to see floating in action? Our tutorial on how to embroider a onesie uses a sprayed stabilizer to float a baby bodysuit.
Water-Soluble Stabilizer
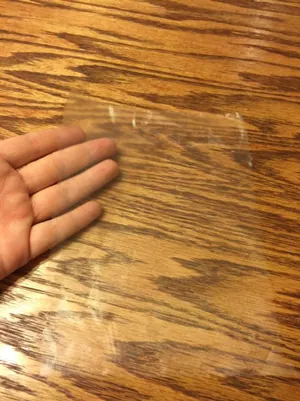
Water-soluble stabilizer dissolves completely in water once the stitching is done. You need it for light embroidery on sheer fabrics, designs with cutouts, patches that need a clean satin edge, and free-standing lace.
- Fibrous water-soluble is the one to use for free-standing lace (FSL). Use one or two layers depending on how dense the design is. This is one of the few times you may need more than one layer. Make sure the design is digitized specifically as free-standing lace, like our Snowflake Free Standing Lace ITH Embroidery Design, or it will fall apart once the stabilizer is gone.
- Film is really a topper rather than a stabilizer. It goes on top of the fabric, with another stabilizer underneath. Use it on high-pile or napped fabrics such as terry cloth, fleece and minky so the stitches don't sink into the fabric. Afterwards, tear away the excess and dissolve the rest with water.
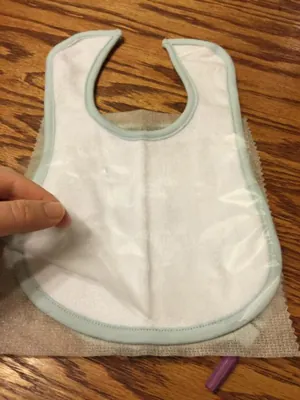
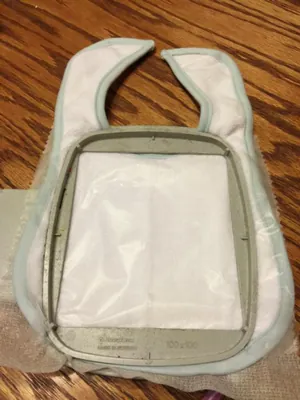
In the photos above, we used a topper because the bib is terry cloth: cutaway underneath, the bib in the middle, and film on top, all hooped together.
Tip: You can remove water-soluble stabilizer with a spray bottle, the steam setting on your iron, or the washing machine. Remember the saved tearaway? Lay a piece over the water-soluble topper and press with plenty of steam. The gooey residue sticks to the tearaway and leaves your project clean and mostly dry.
Bonus tip: It may be obvious, but make sure the fabric can get wet before you use water-soluble stabilizer. It is not suitable for silk or dry-clean-only fabrics. Ask me how I know.
How Many Layers and What Weight?
- Start with one layer of the right type. Most problems come from the wrong type, not too few layers.
- Add a second layer of cutaway for dense designs (roughly 10,000+ stitches) or very stretchy knits, with the second layer turned 90 degrees.
- Two layers of fibrous water-soluble are normal for free-standing lace.
- Heavier is not always better. A heavy cutaway behind a light design on a thin tee makes a stiff patch that shows through. Match the weight to the fabric and the stitch count.
Embroidery Stabilizer Chart by Fabric
Use this chart to choose a stabilizer based on the fabric and how dense the design is. Print it out and keep it by your machine. Sticky and water-soluble stabilizers are chosen by project rather than fabric, so they are not in the chart (add a water-soluble topper on any high-pile fabric).
| Fabric | Stabilizer | Design density |
|---|---|---|
| Broadcloth | Cutaway | Light |
| Burlap | Cutaway | Dense |
| Canvas | Cutaway (tearaway for light designs) | Either |
| Denim | Cutaway (tearaway for light designs) | Either |
| Felt | Cutaway or tearaway | Either |
| Flannel | Cutaway | Either |
| Fleece | Cutaway or tearaway + topper | Either |
| Jersey knit | Cutaway (mesh) | Light |
| Leather | Cutaway | Light |
| Linen | Cutaway | Light |
| Minky | Cutaway + topper | Dense |
| Muslin | Cutaway or tearaway | Either |
| Neoprene | Cutaway | Either |
| Nylon | Cutaway | Light |
| PUL | Cutaway | Dense |
| Quilter's cotton | Tearaway | Light |
| Ribbon | Cutaway | Light |
| Satin | Cutaway or tearaway | Light |
| Silk | Cutaway or tearaway | Either |
| Sweater knit | Cutaway + topper | Either |
| T-shirt | Cutaway | Either |
| Terry cloth | Cutaway or tearaway + topper | Either |
| Tulle | Water-soluble | Light |
| Velour | Cutaway + topper | Dense |
| Vinyl | Cutaway | Light |
| Waffle weave | Cutaway + topper | Dense |
Which Stabilizer for Your Project?
Here is what we use for the projects people ask about most, with a full tutorial for each:
- T-shirts and polos: mesh or medium cutaway, fusible if the knit is very stretchy.
- Towels: tearaway or cutaway underneath plus a water-soluble topper. See how to embroider a towel.
- Hats and caps: a firm tearaway (or cutaway for unstructured caps). See our hat embroidery ideas.
- Jean pockets and denim: tearaway for light designs, cutaway for dense ones. See how to embroider a jean pocket.
- Leather: cutaway, and float rather than hoop to avoid hoop marks. See how to embroider leather.
- Patches: heavy cutaway or fibrous water-soluble. See how to make embroidered patches.
- Applique: cutaway on knits, tearaway on wovens. See our applique embroidery guide.
- 3D puff: a firm tearaway or cutaway, since the foam adds bulk. See how to use 3D foam puff embroidery.
- Tote bags: tearaway on canvas. See our tote bag embroidery guide.
Getting the hooping right matters as much as the stabilizer. Our guide on how to use an embroidery hoop covers hooping, floating and avoiding hoop burn.
Common Stabilizer Mistakes
- Puckering around the design: the stabilizer is too light for the stitch count, or the fabric was stretched while hooping. Use cutaway or add a second layer, and hoop the fabric smooth, not stretched.
- Outline out of line with the fill: the fabric shifted. Use a firmer stabilizer and a little spray adhesive.
- Design sinking into towels or fleece: you forgot the topper.
- Stabilizer showing through a light shirt: switch to a nude or white mesh cutaway.
- Design distorted after washing: tearaway was used on a stretchy fabric. Knits need cutaway.
Now It's Your Turn!
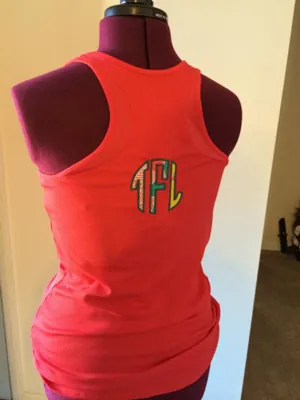
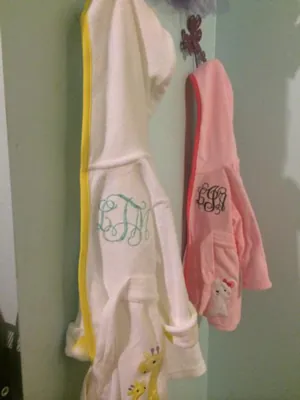
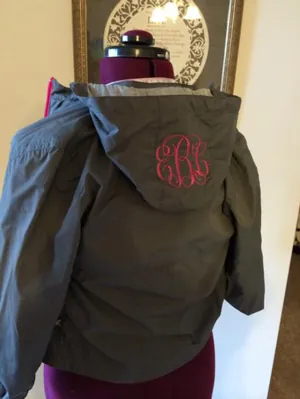
From left to right: the Circle Full Applique Embroidery Font on a knit tank, and the Vine Interlocking Monogram Embroidery Font on terry cloth towels and on a nylon jacket. Each used a different stabilizer setup from this guide.
Whew, that was a lot of information, but I hope you now feel more confident choosing a stabilizer. Don't be afraid to experiment and make mistakes. That's how you learn. And don't forget to have fun!
Embroidery Stabilizer FAQ
Can you machine embroider without stabilizer?
Only on very firm, thick items such as some leather goods or heavy canvas, and even then results are better with stabilizer. On ordinary fabric, embroidering without stabilizer leads to puckering, shifting and a misaligned design.
What is the difference between cutaway and tearaway stabilizer?
Cutaway is trimmed with scissors and part of it stays behind the stitches permanently, so it supports stretchy fabrics and dense designs through many washes. Tearaway is torn off after stitching and leaves little behind, so it suits stable, non-stretch fabrics and lighter designs.
What stabilizer is best for t-shirts?
A cutaway. Mesh (no-show) cutaway is the most popular choice for tees because it is soft and does not show through. Fusible mesh stops the knit from stretching while you hoop.
Do you need a topper for towels?
Yes. A water-soluble film topper keeps the stitches on top of the terry loops so letters stay crisp. Use it with tearaway or cutaway underneath.
Can I use two different stabilizers together?
Yes. A common combination is cutaway or tearaway underneath with a water-soluble topper on top. You can also use two layers of cutaway for dense designs on stretchy fabric.