Hidden


A plain canvas tote carries groceries. An embroidered one carries a story. That single difference — a few hours of thread and needle, or the quiet hum of a digitized machine — transforms the most ordinary accessory into something people reach for deliberately, something they keep for years, something they actually want to be seen carrying.
Tote bag embroidery designs have found their moment not because embroidery is new, but because people are returning to things that feel made rather than manufactured. This guide covers both sides of that desire: the design ideas that make embroidered tote bags so irresistible, and the practical steps that allow you to create them yourself, whether you are picking up a needle for the first time or setting up a small embroidery business.

Before getting into technique, it helps to understand why embroidery on a tote bag produces a result that printing, iron-on transfers, and fabric markers simply cannot match.
Embroidery is structural. The threads are woven through the fabric itself rather than sitting on top of it, which means the design becomes part of the material. It does not crack, peel, or fade in the same way surface-applied graphics do. After dozens of washes, a well-executed embroidered design looks largely the same as it did on the day it was finished.
Embroidery is also dimensional. Thread caught at specific angles under light creates highlights and shadows within the design. Satin stitches on a petal curve gently. French knots cluster with a soft, rounded texture. This physical depth gives embroidered tote bags a presence that even the highest-resolution print cannot replicate.
These qualities are exactly why tote bag embroidery designs occupy a premium position in both the handmade market and commercial merchandise. Customers feel the difference immediately when they hold an embroidered bag, and that feeling translates directly into perceived value.
Choosing your embroidery design is the most creatively exciting part of the process, and knowing which styles tend to work best on tote bags helps you make decisions that result in a finished product you are genuinely proud of.
Single-line illustrations — a continuous curved line forming a face, a leaf, a simple vessel, a reclining figure — are among the most elegant options for modern tote bag embroidery. These designs rely on precision rather than volume. A single row of stem stitch or split stitch executed cleanly reads as refined and intentional rather than simple.
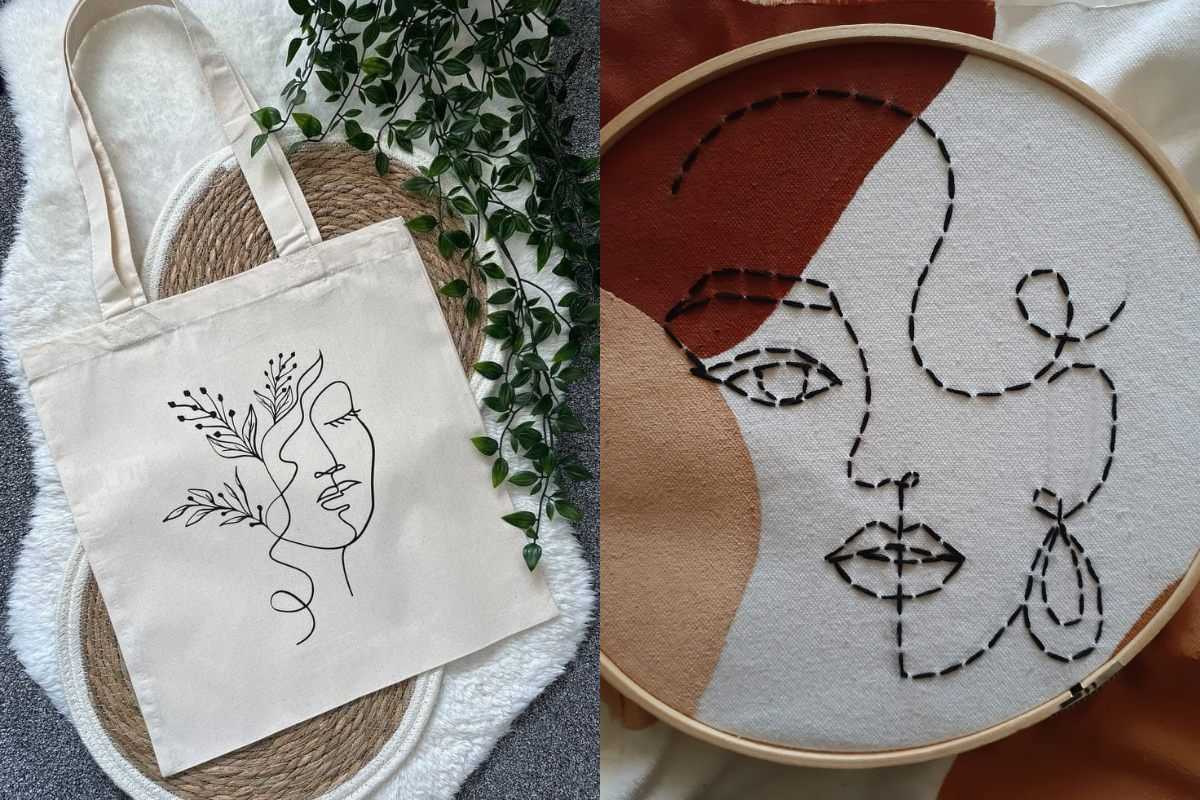
Minimalist designs also require less thread and less time, which makes them ideal for beginners and for businesses looking to offer embroidered totes at accessible price points without sacrificing aesthetic quality.
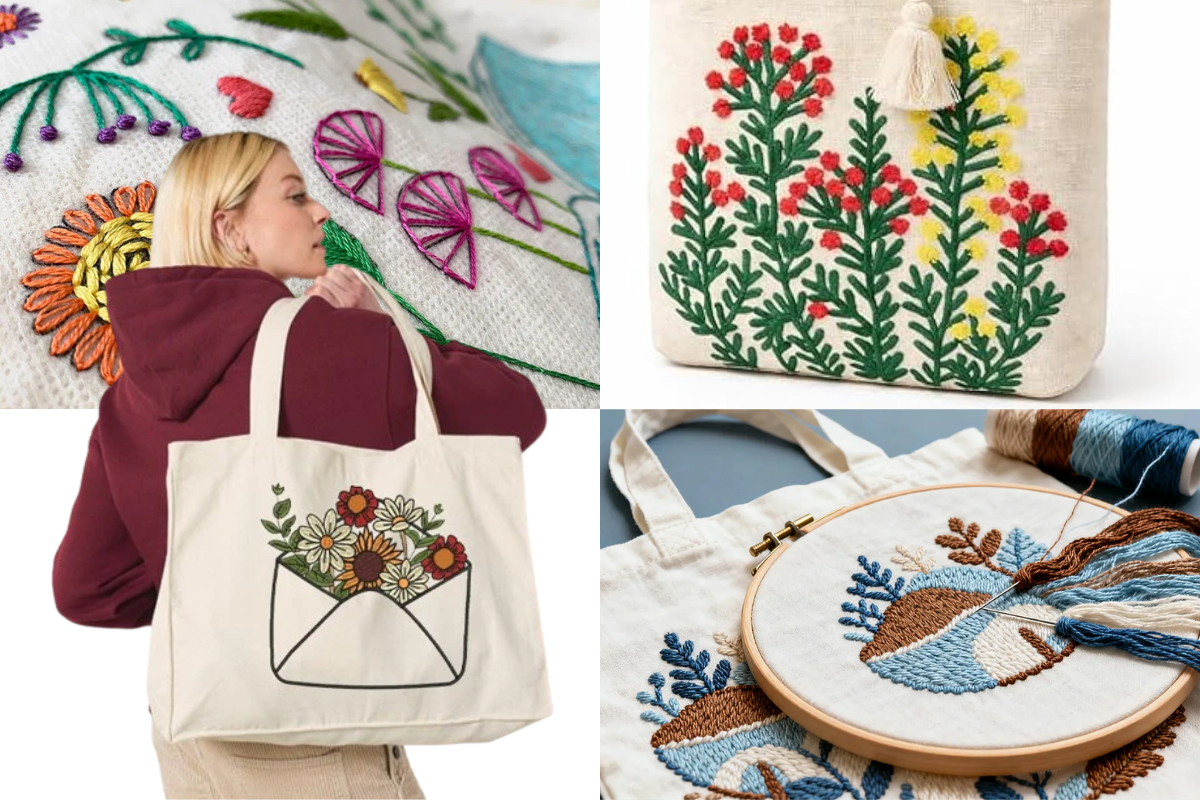
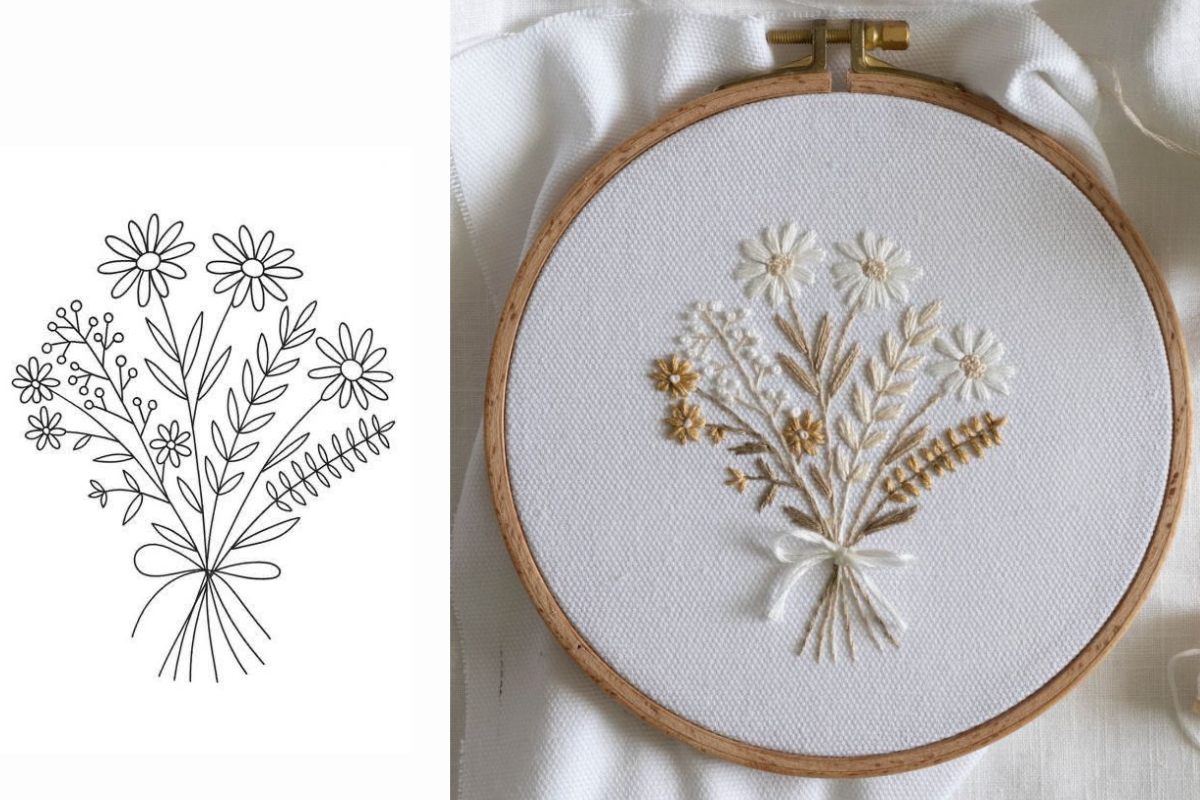
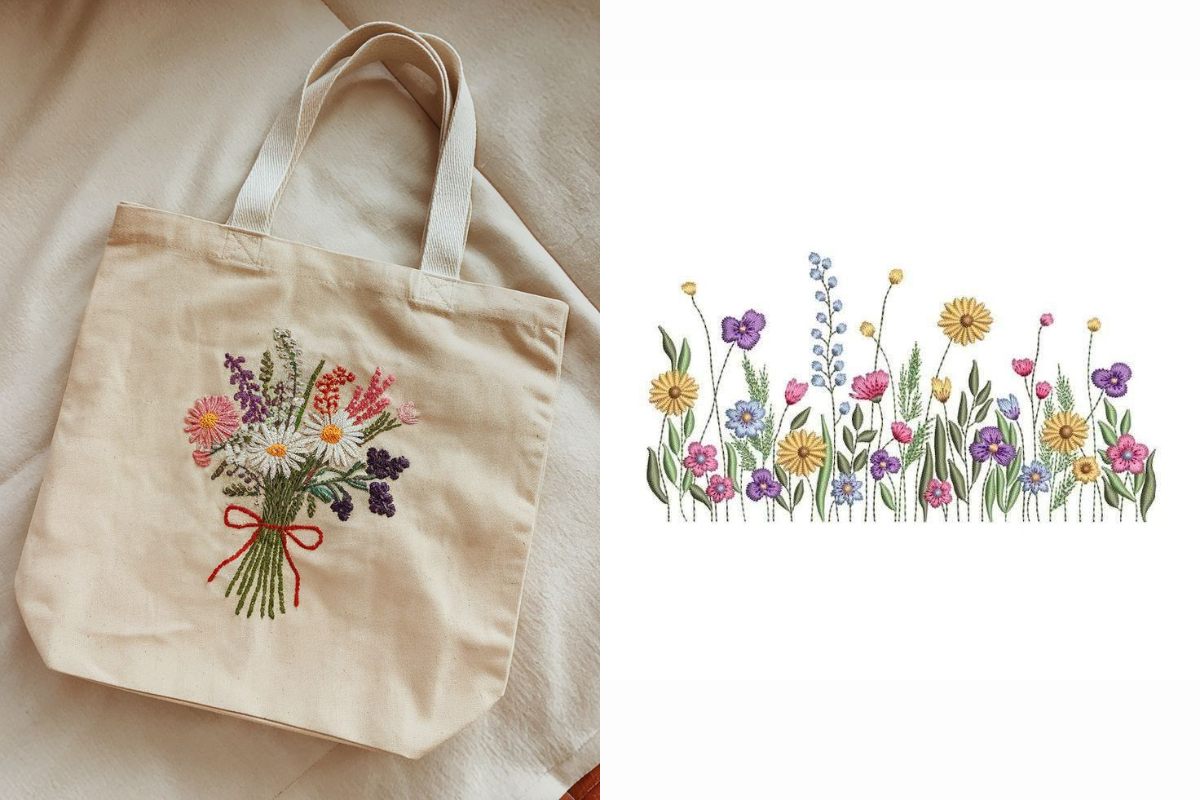
Flowers and plant life are the most naturally suited subjects for embroidery. Organic shapes invite varied stitch techniques — satin stitches filling rounded petals, long-and-short blending creating gradients in larger blooms, French knots dotting flower centers, stem stitch tracing delicate vines.
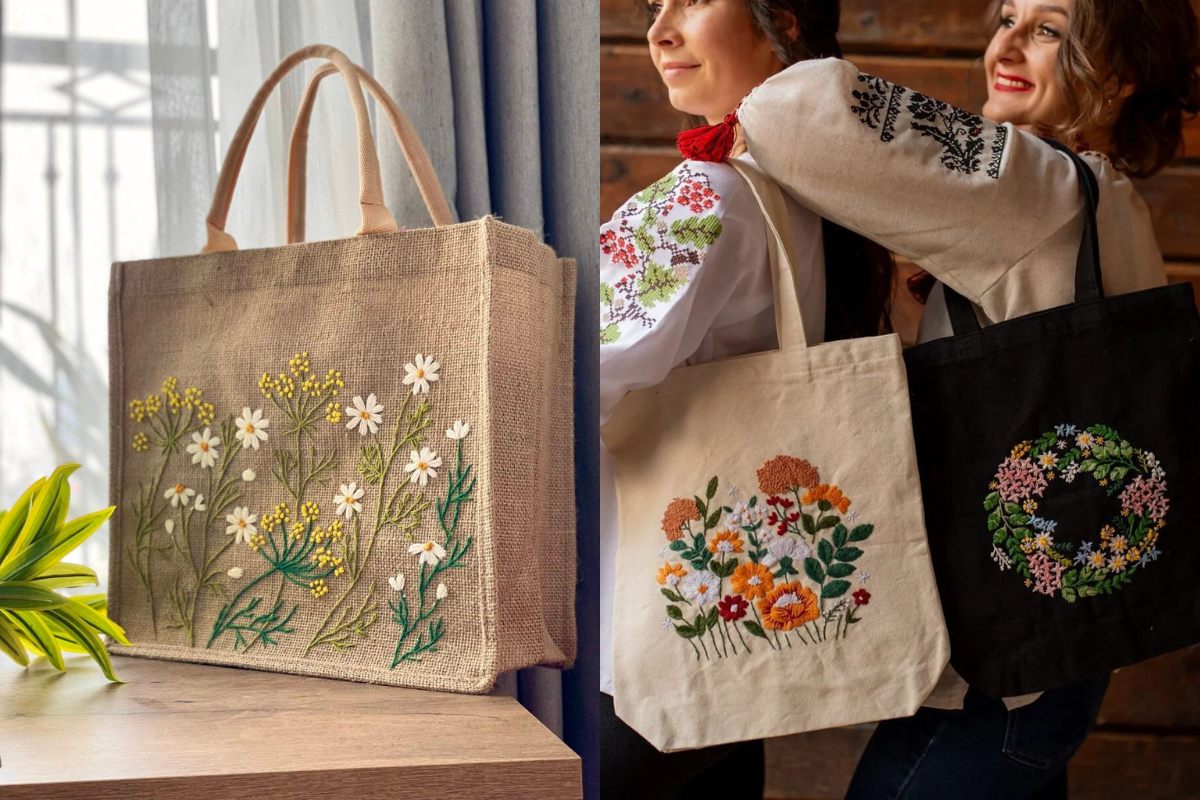
Popular choices for tote bags include wildflower clusters, single rose studies, lavender stems, eucalyptus branches, mushrooms surrounded by trailing foliage, and simple daisy arrangements. The softer end of the floral palette — dusty rose, sage green, warm cream, soft gold — reads beautifully on natural canvas and linen.
Floral tote bag embroidery designs perform well commercially because they appeal across age groups and aesthetic preferences. They photograph well, they gift beautifully, and they carry a handmade warmth that customers genuinely respond to.
A tote bag embroidered with someone's initials or name becomes something categorically different from a generic product. It becomes a keepsake. Monogram embroidery in classic serif fonts communicates timeless refinement. Script lettering in flowing, connected characters creates something more intimate and personal.
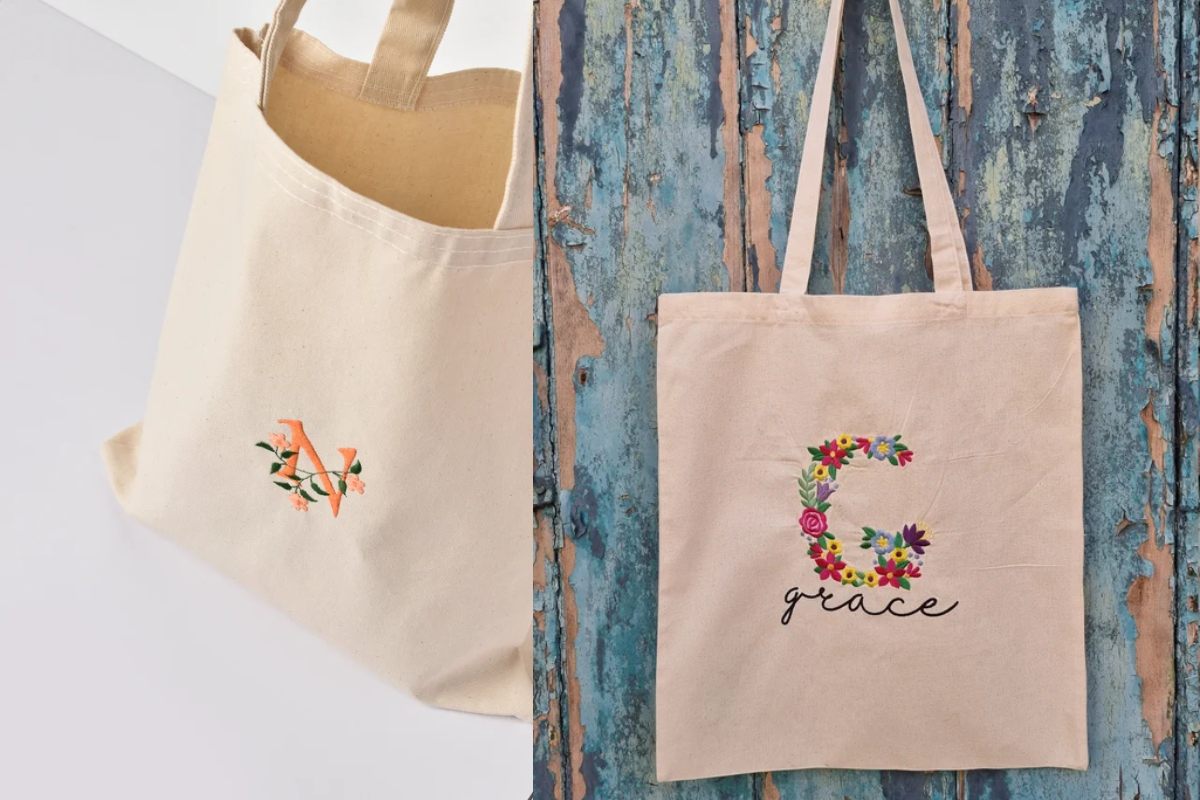
For businesses, personalized tote bag embroidery designs open access to the gifting market — bridal parties, baby showers, birthdays, holidays — where customers are actively seeking something that feels chosen rather than grabbed off a shelf.
A short phrase or single word, stitched in a thoughtful font, carries surprising emotional weight on an embroidered tote bag. The deliberateness of stitched lettering — the visible effort in each formed character — makes the words feel meaningful in a way that printed text rarely achieves.

Handwriting-style fonts work particularly well because they suggest the personal even when produced by machine. Block lettering in a single color creates bold, graphic impact with minimal visual complexity.
Moons, stars, constellations, suns, mountains, waves, and botanical illustrations tied to broader natural themes continue to resonate strongly with contemporary tote bag buyers. These designs align with current aesthetic movements centered on mindfulness, sustainability, and a more intentional relationship with the natural world.
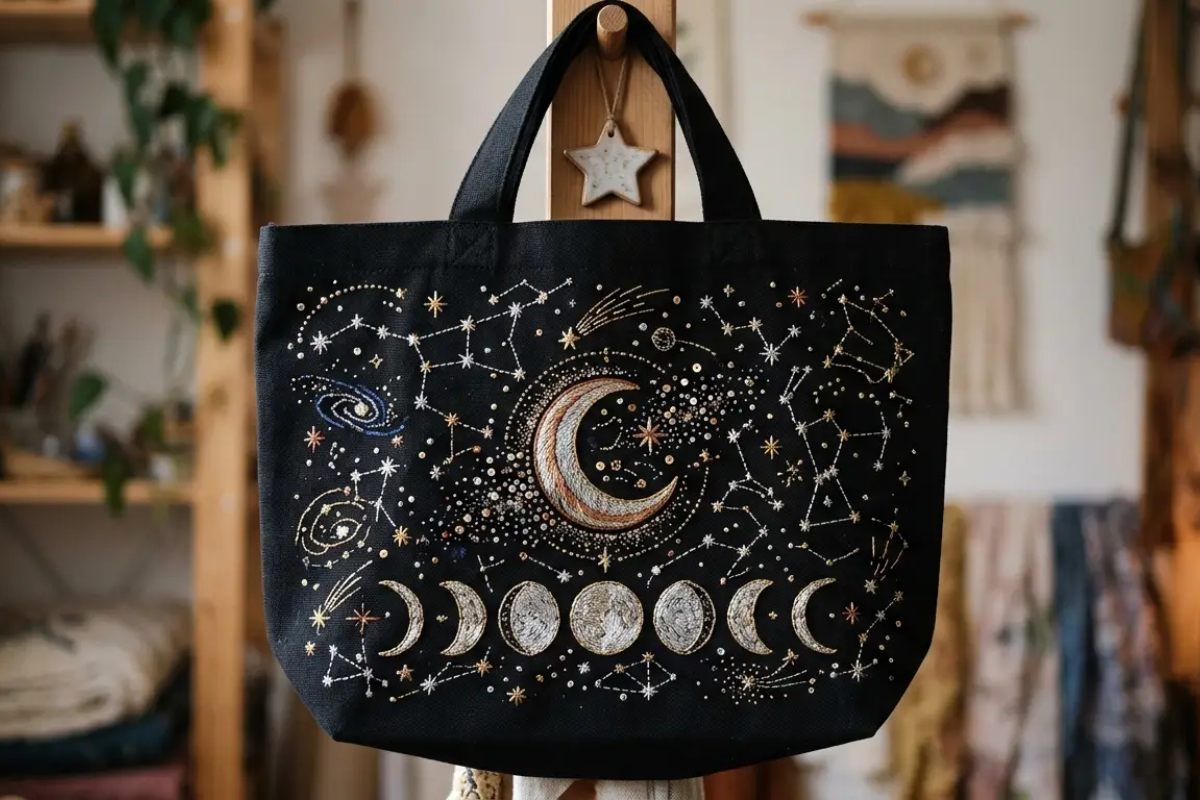
Cottagecore embroidery — soft florals, woodland creatures, trailing herbs, simple homestead imagery — has developed a devoted audience that responds strongly to the handcrafted and the organic.
Whether you are approaching this by hand or by machine, gathering the right materials before you begin makes the process significantly smoother.
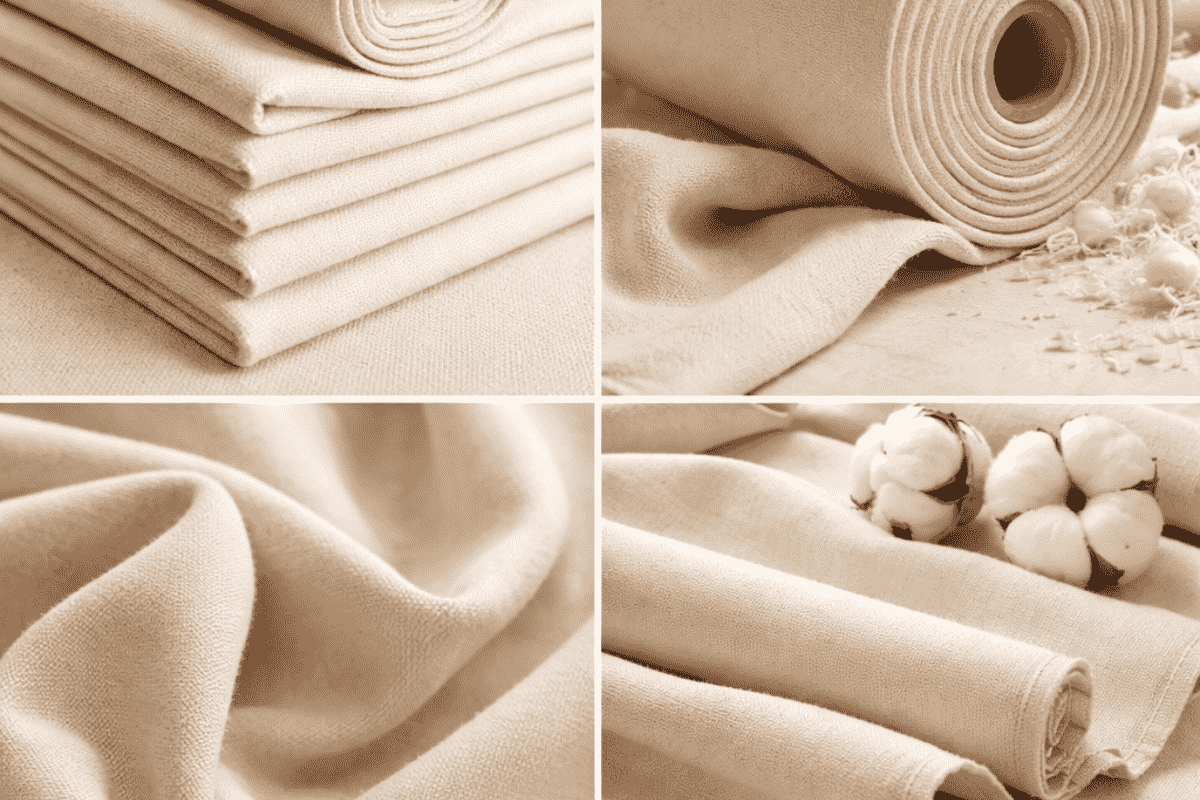
The tote bag itself is the first decision. Heavy cotton canvas in natural, cream, or black gives you a stable surface that supports detailed stitching without stretching or distorting. Linen totes offer a softer, more textural ground that suits botanical and cottagecore aesthetics particularly well. Avoid very lightweight or loosely woven fabrics for your first projects, as they require additional stabilization and are less forgiving of uneven tension.
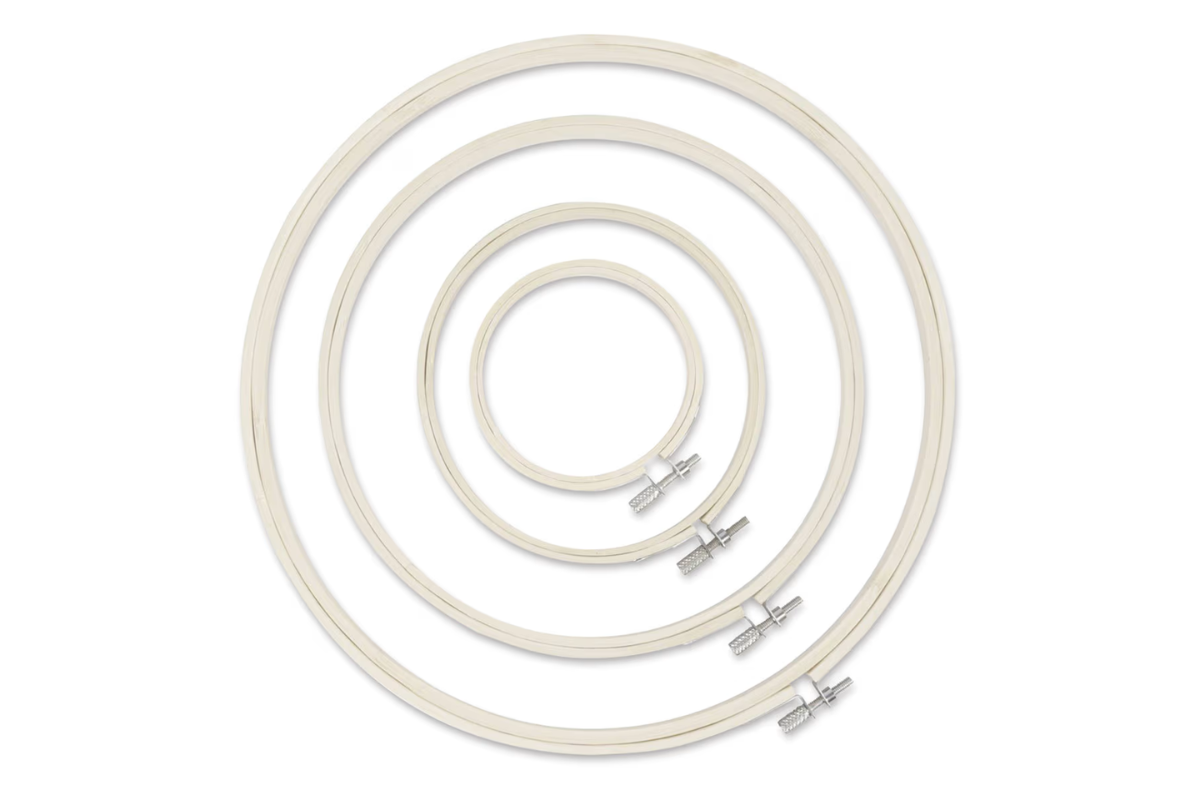
Embroidery hoops keep your fabric taut while you stitch, which is essential for maintaining consistent stitch tension and preventing puckering. A hoop that fits comfortably within the bag's interior panel is ideal — typically between five and eight inches in diameter for most tote bag designs. Spring tension hoops damage fabric less than traditional screw hoops, though either works well for canvas.
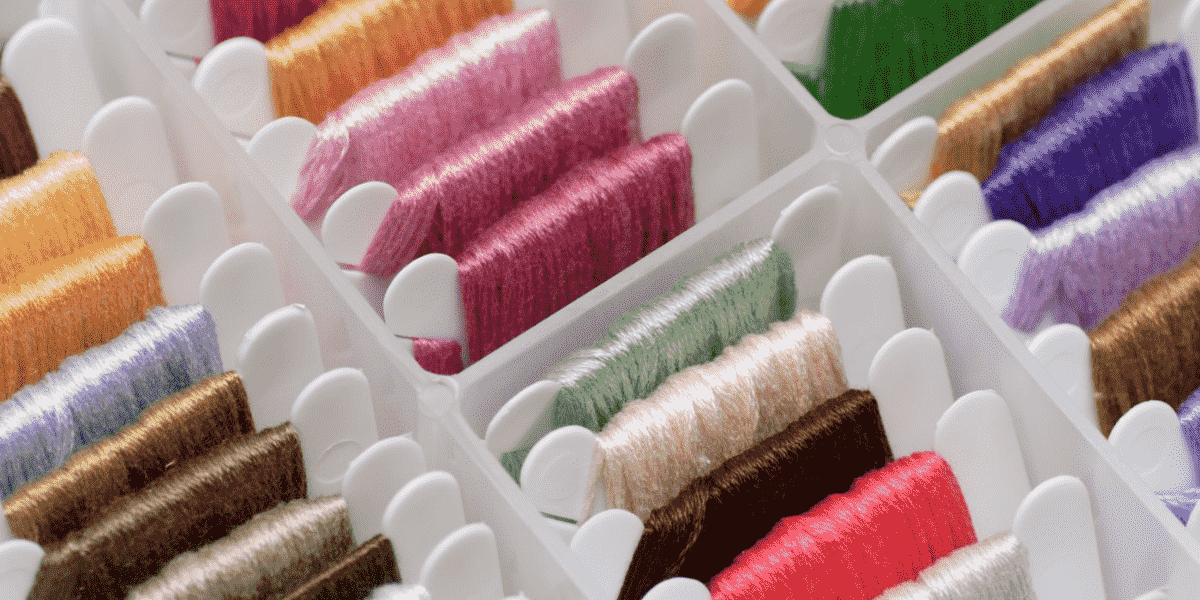
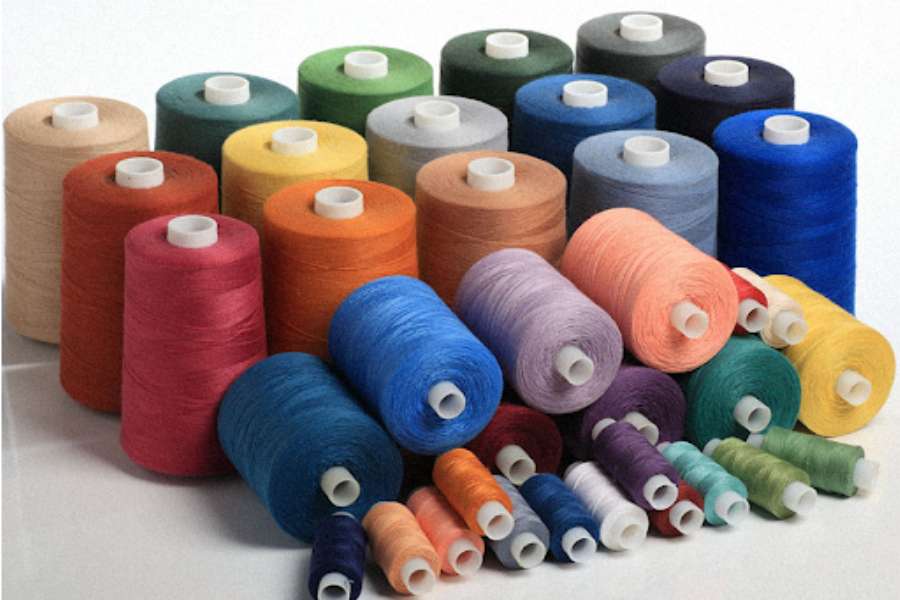
Embroidery thread, also called stranded floss, typically comes in skeins of six twisted strands. For most tote bag embroidery, you will separate these into two or three strands depending on the thickness and texture you want in your stitches. Thicker thread coverage reads as bolder and more graphic. Finer thread work produces a more delicate, detailed result. Cotton floss is the standard choice. Silk thread creates a beautiful sheen but costs more and can be more difficult to manage for beginners.
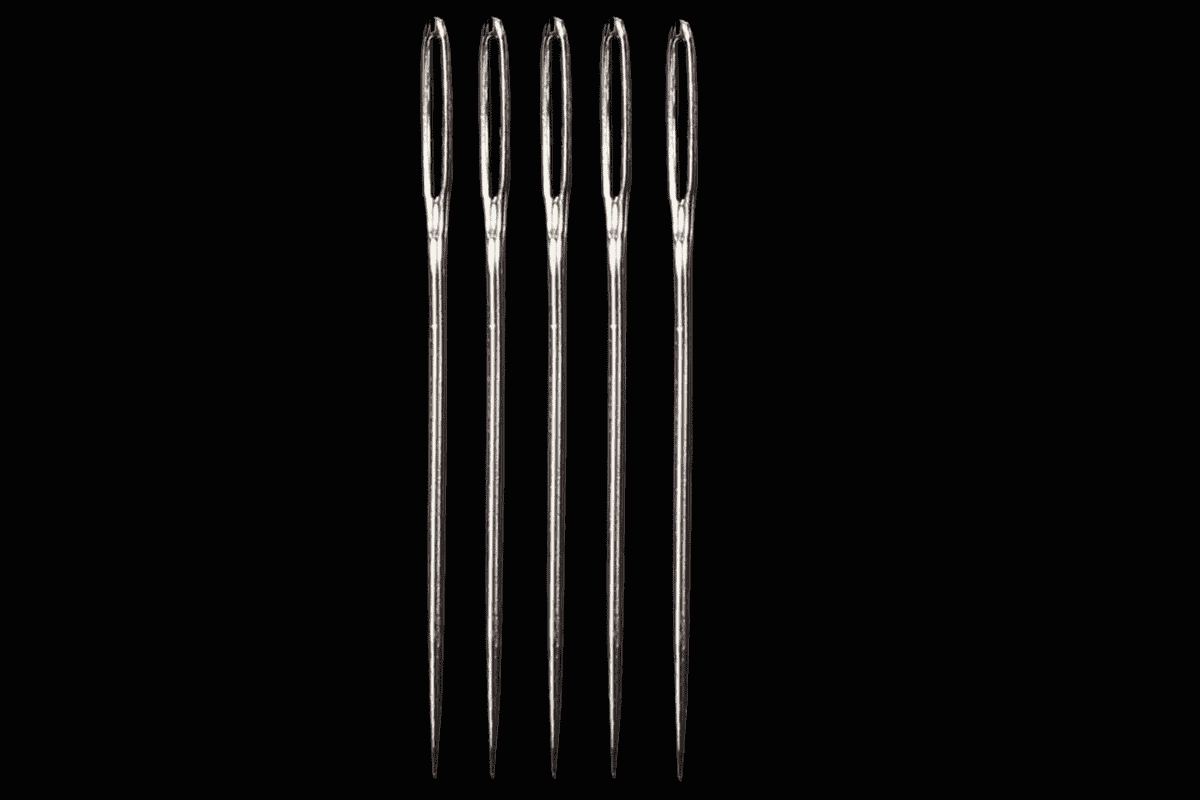
Embroidery needles have larger eyes than standard sewing needles to accommodate multiple strands of floss. A size 5 to 7 embroidery needle covers most tote bag work comfortably. Keep a small variety on hand so you can match needle size to the thread weight you are using for each part of the design.
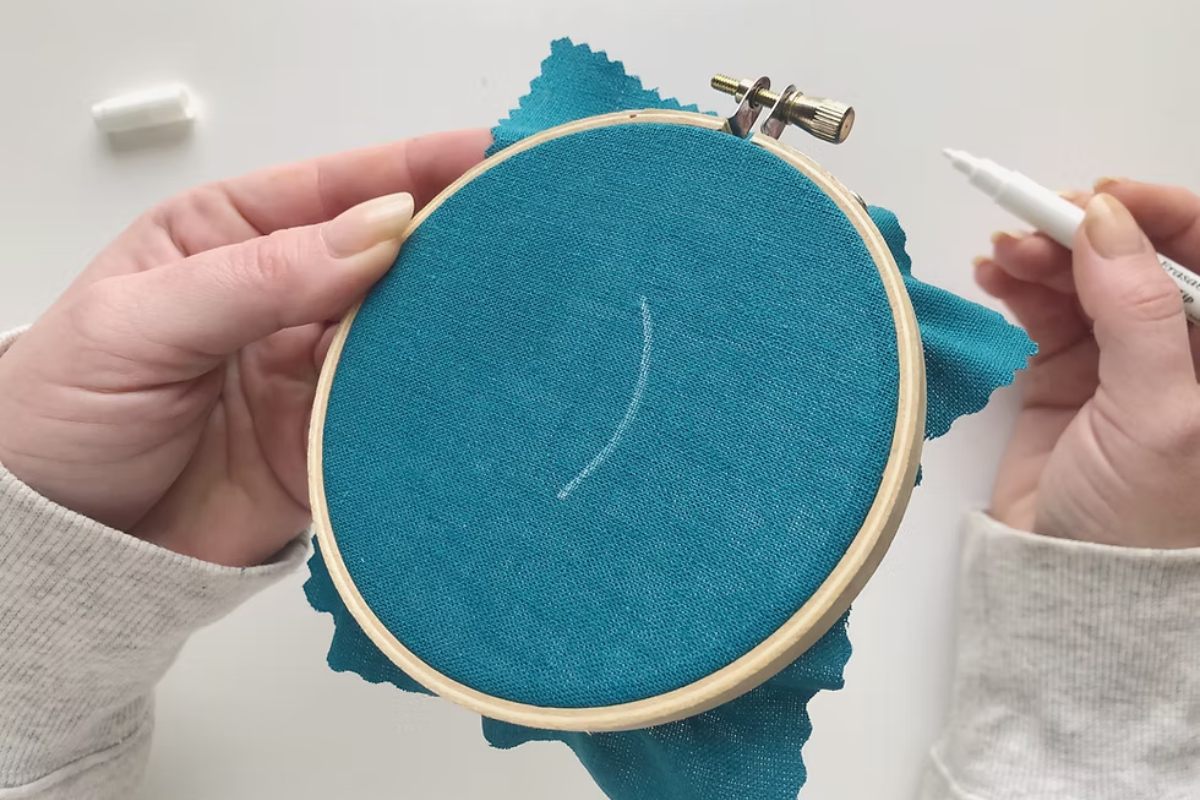
Transfer paper or an erasable fabric pen lets you draw your design onto the fabric before stitching begins. You can also place a printed design beneath fabric held up to a light source and trace directly onto the tote if the fabric is light enough to allow it. Water-soluble stabilizer with the design printed on it is another option — you stitch through both the stabilizer and the fabric, then dissolve the stabilizer away after stitching is complete.
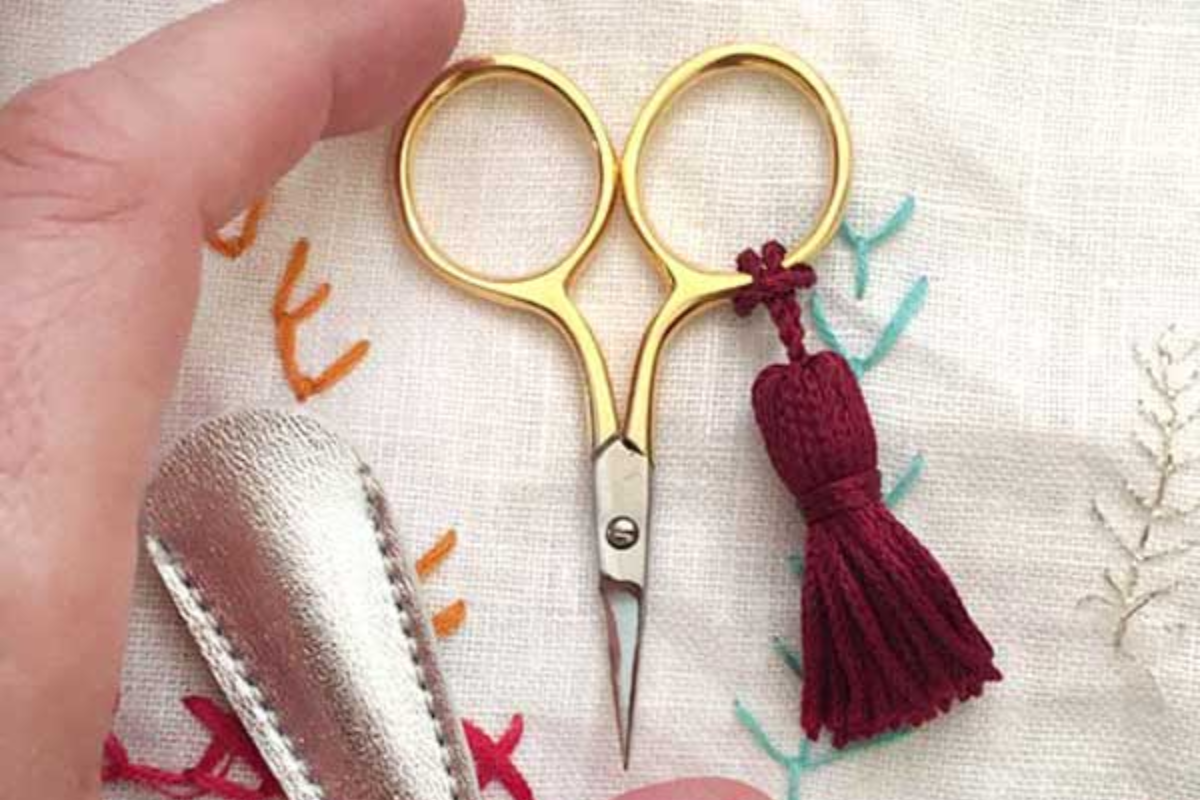
A small pair of embroidery scissors with sharp pointed tips helps you trim thread tails cleanly and work precisely around detailed stitch areas.
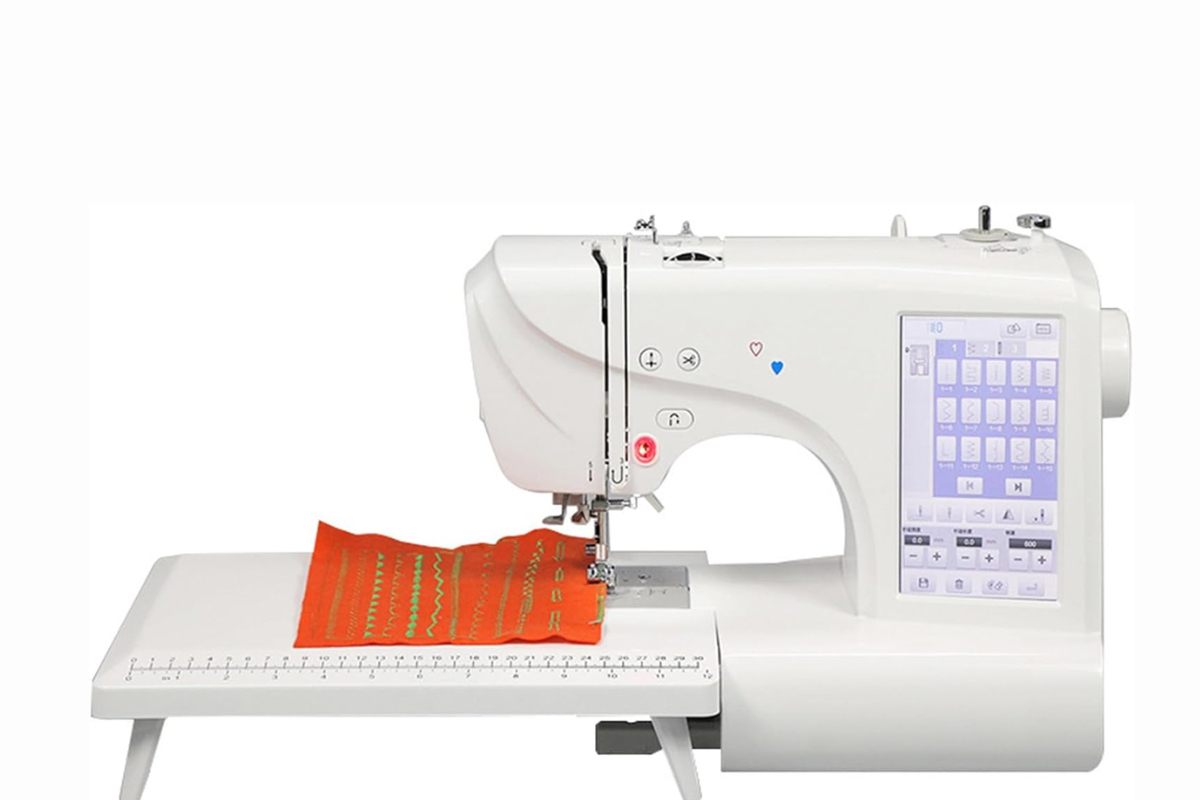
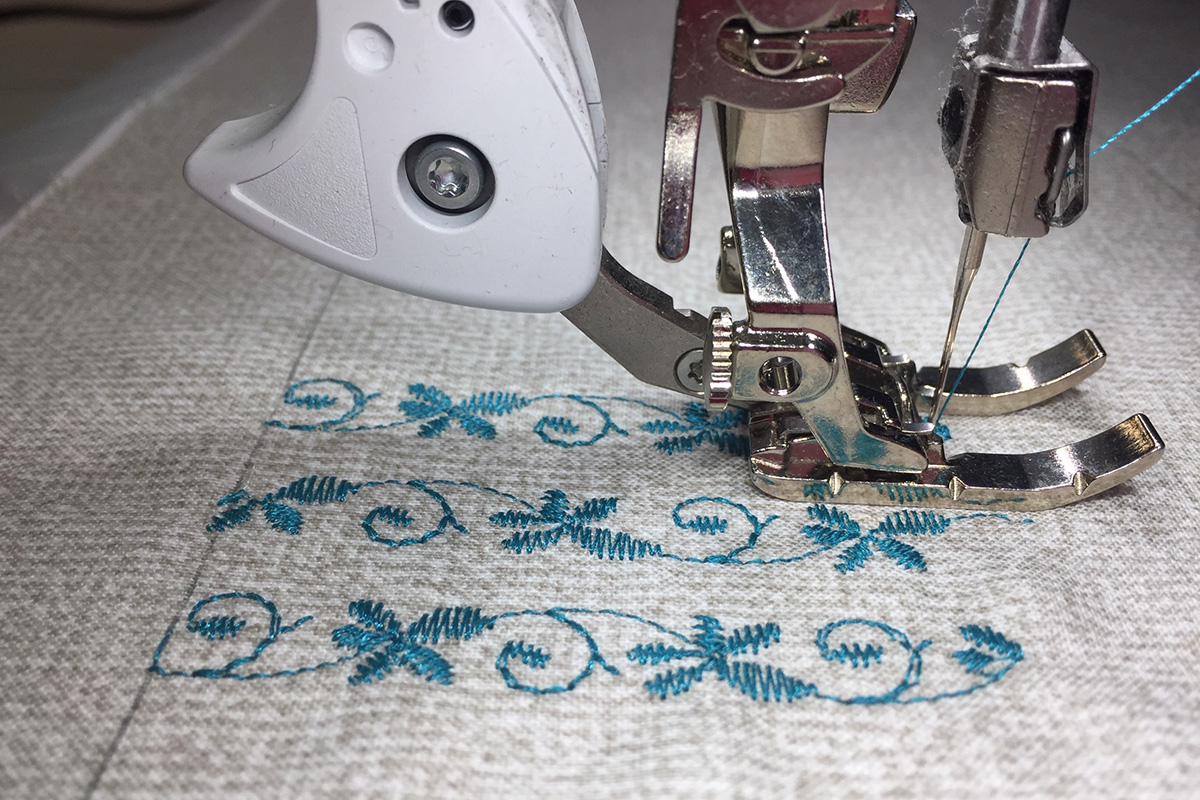
Machine embroidery requires a few additional considerations, though the setup pays off significantly in speed and consistency for anyone producing multiple pieces.
An embroidery machine with sufficient hoop size for your design area is the central tool. Multi-needle commercial machines offer greater speed and color-change efficiency for production work. Single-needle home embroidery machines work well for smaller-scale projects and custom orders.
Embroidery thread for machines is typically sold on larger spools and has a finer, smoother twist than hand embroidery floss, which allows it to feed cleanly through machine mechanisms. Rayon thread produces a subtle sheen. Polyester thread is more colorfast and slightly more resistant to fading through washing.
Stabilizer becomes even more critical for machine embroidery than for hand work. Cut-away stabilizer, which remains permanently attached to the back of the embroidery after stitching, provides the strongest structural support and is the recommended choice for most tote bag work. Tear-away stabilizer suits lighter designs on stable fabrics. Water-soluble topping stabilizer placed on top of the fabric surface helps maintain clean stitch registration on textured materials like linen.
Digitizing software, or a professionally digitized embroidery file, translates your chosen artwork into the stitch instructions the machine follows. Well-digitized files balance stitch density appropriately for tote bag fabric, sequence color changes efficiently, and avoid excessive underlay that would create unnecessary stiffness in the embroidered area.
Begin with a clear idea of what you want to stitch and how large the design should appear on the finished bag. Sketch your design on paper first, or source artwork that translates well into thread. Designs with clear, defined areas and organic shapes generally work better as embroidery than photographs or highly complex illustrations with fine gradients.
Transfer your chosen design onto the tote bag fabric using your preferred method. Ensure the design is centered or positioned exactly where you intend it to sit on the finished bag. Take time with placement — a small adjustment at this stage is simple, while a design embroidered in the wrong position requires unpicking and restarts.
For hand embroidery, cut a piece of stabilizer slightly larger than your hoop and place it behind the fabric in the area you will be stitching. This backing prevents the fabric from distorting under the tension of your stitches.
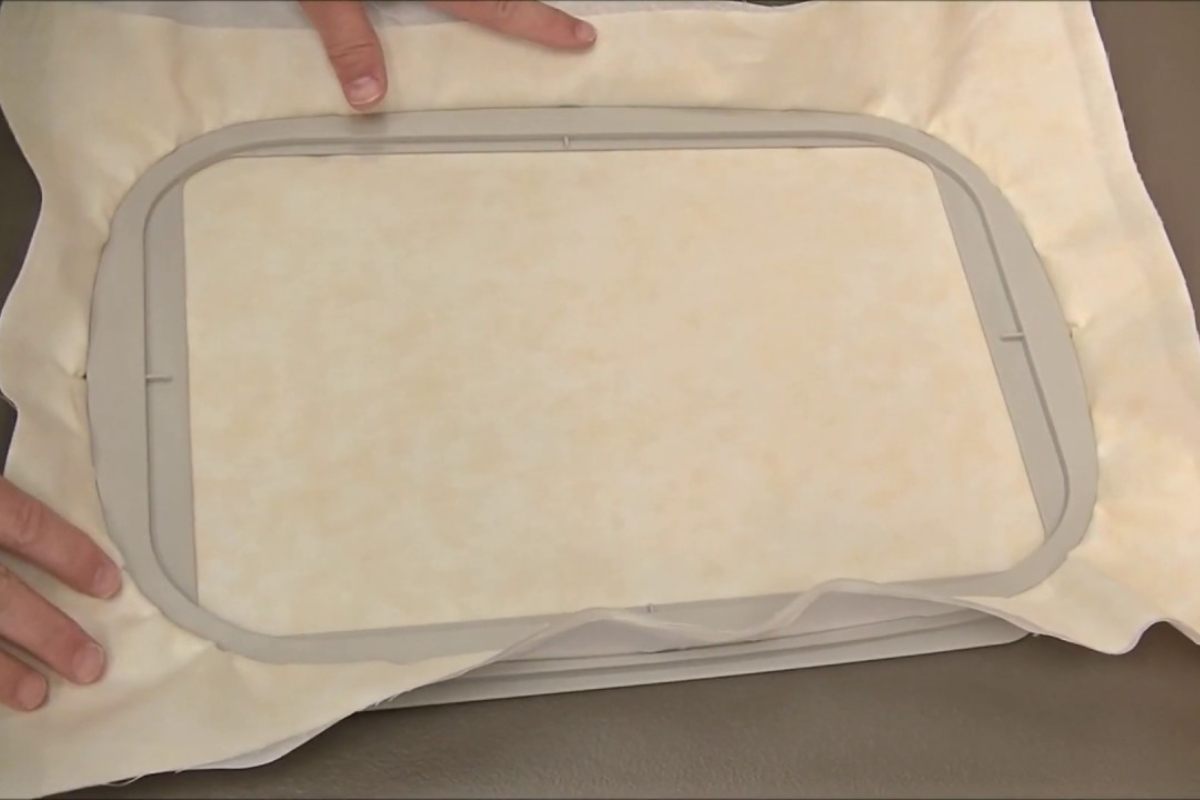
For machine embroidery, hoop the stabilizer first, then float or hoop the tote bag on top. If hooping the bag directly, ensure you hoop only the front panel without catching the bag's back panel, seams, or handles in the hoop. Many embroiderers use adhesive stabilizer or temporary spray adhesive to hold the bag in position on a hooped stabilizer backing, which allows precise placement without distorting the bag fabric through tight hooping.
For hand embroidery, separate your floss to the desired number of strands before threading your needle. Start with an away waste knot or a small anchor stitch on the back of the fabric rather than a knot, as knots can create lumps visible from the right side on finer tote fabrics.
Work through the design logically — typically starting with elements that sit beneath others in the visual composition, then building forward. Outline stitches first, then filled areas. Leave thread tails clean and secure on the back of the fabric as you move between design areas.
Common stitch types used in tote bag embroidery designs include stem stitch for outlines and lettering, satin stitch for filled areas of solid color, long-and-short stitch for shaded fills and gradients, French knots for textural accents and flower centers, straight stitch for simple geometric marks, and lazy daisy stitch for small petal shapes.
Maintain even tension throughout. Stitches pulled too tight distort the surrounding fabric. Stitches laid too loosely sit unevenly and catch light inconsistently. Consistent tension comes with practice, and tote bag canvas is forgiving enough to allow for learning as you work.
For machine embroidery, load your digitized design file, thread your machine in the appropriate colors, and run the design according to your machine's standard process. Check the stitching at each color change to ensure proper registration and catch any thread breaks early before they create gaps in the design.
Once stitching is complete, remove the hoop and carefully tear away or trim any stabilizer visible around the design edges. For hand embroidery, secure any remaining thread tails on the back with a small anchoring stitch before trimming them close.
Press the finished embroidery gently from the reverse side, using a padded pressing surface such as a folded towel to prevent crushing the dimensional texture of the stitches. Steam pressing helps relax any minor distortion in the fabric around the embroidered area. Never press directly on the right side of the embroidery with a hot iron.
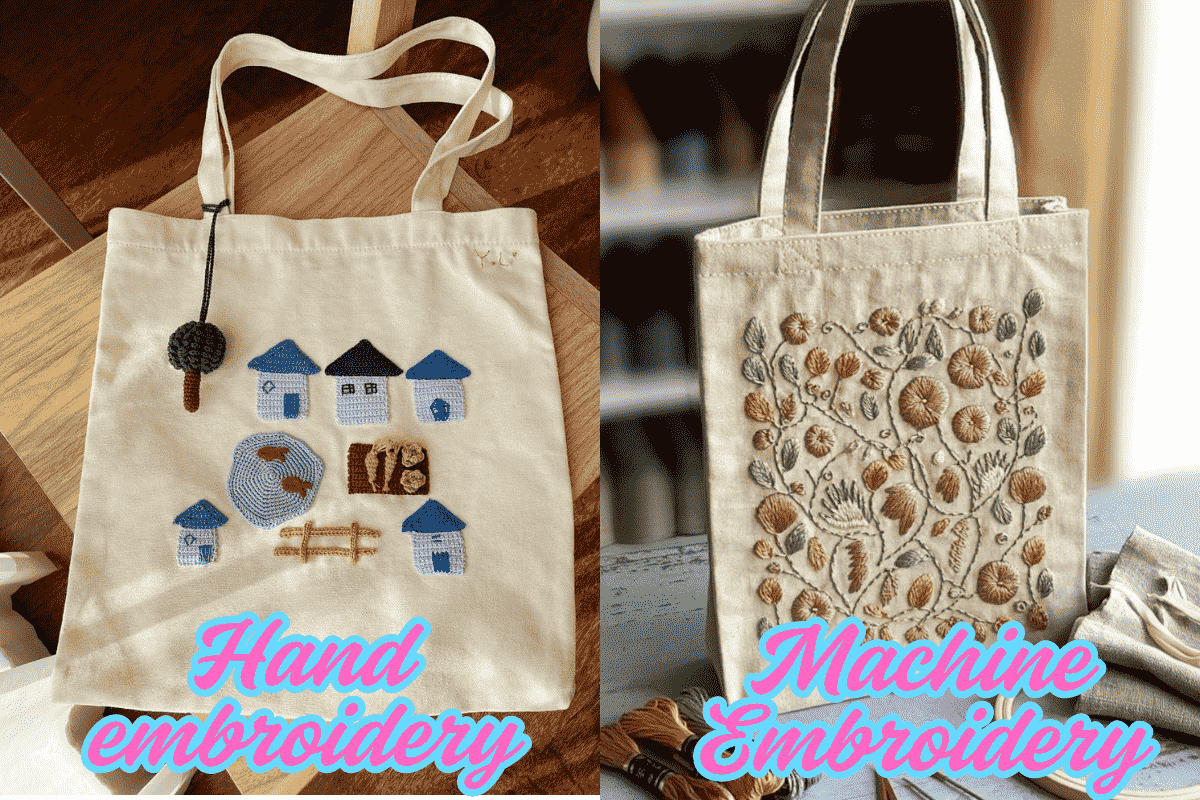
Both approaches produce beautiful results. The right choice depends on your goals, your timeframe, and the volume you intend to produce.
Hand embroidery is slower and requires more skill and patience, but it produces a result with genuine artisan character. Slight irregularities in hand embroidery are not flaws — they are evidence of the human hand at work, and many customers actively value this quality. Hand embroidery is well suited to truly bespoke tote bag designs, limited edition art pieces, and highly personalized work where the maker's presence in the finished object is part of the appeal.
Machine embroidery scales in a way hand embroidery cannot. Once a design is digitized and the machine is set up correctly, each subsequent embroidered tote requires only a fraction of the time needed for hand work. This scalability makes machine embroidery the foundation of any serious embroidery business offering tote bags at volume. Machine embroidery also produces extremely consistent results across multiple pieces, which is important for branded merchandise and commercial orders where uniformity matters.
A small number of embroiderers combine both approaches — using machine embroidery for filled background areas and dense structural elements, then adding hand-stitched detail work on top for texture and artisan character.
Consistent stitch tension makes more difference to finished quality than almost any other single factor. Uneven tension is the most common cause of puckering, distortion, and designs that look unpolished even when the artwork itself is strong. Take time to practice on a fabric scrap before working directly on your tote bag.
Matching thread weight to stitch type and fabric density produces cleaner results. Heavy canvas can support dense satin stitch fills. Lighter fabrics require lighter thread coverage and more open stitch structures.
Color testing before committing to a final thread palette is worth the time. Thread colors read differently on white versus natural canvas versus black fabric, and colors that look harmonious on a color chart sometimes clash once stitched at full size. Stitch small samples of your planned palette on a scrap piece of your tote fabric before beginning the final piece.
Designing with the bag's structure in mind rather than ignoring it produces more thoughtful results. Consider how seams, handles, and the bag's dimensions interact with the design placement. A design that sits slightly higher or lower on the bag can change how it reads when the bag is held and carried.
A well-embroidered tote bag, properly cared for, looks beautiful for years. Cold water washing on a gentle cycle protects thread fiber integrity and prevents stitch distortion that hot water causes. Turning the bag inside out before washing reduces friction on the embroidered surface. A mild detergent without bleach or optical brighteners preserves thread color through repeated wash cycles.
Air drying flat is strongly preferred over machine drying. High dryer heat weakens synthetic thread fibers over time and can flatten the dimensional quality of stitched designs. Ironing, when needed, should always be done from the reverse side with a pressing cloth between the iron and the fabric.
Heavy cotton canvas is the most reliable choice for embroidery because it provides stable, even support for both light and dense stitch work. Linen and medium-weight cotton also work well with appropriate stabilizer backing.
The most common methods are tracing through light-held fabric with an erasable pen, using iron-on or wash-away transfer paper, or stitching through printed water-soluble stabilizer laid on the bag surface.
A simple small design takes two to four hours. A more complex floral or detailed piece with multiple colors and stitch types may take eight to fifteen hours or more. Machine embroidery reduces this to minutes per piece for most tote bag designs.
Yes. Hooping keeps the fabric taut and prevents the puckering and distortion that happens when fabric is allowed to shift under stitch tension. Some embroiderers use a hoop-adjacent technique for machine work, but tension management of some kind is always necessary.
Yes. Embroidered tote bags sell well through handmade marketplaces, boutique retail, farmer's markets, and online shops. Personalized designs, seasonal collections, and botanical or minimalist aesthetics are currently among the strongest-performing categories.
Running stitch, stem stitch, satin stitch, and French knots cover the majority of tote bag embroidery design work. Mastering these four stitches gives you enough technical vocabulary to execute most popular design styles with confidence.
Apex Embroidery has been embroidering and digitizing for 20 years. All our designs and fonts are digitized by hand, each letter.
Copyright © 2026 - Apexembdesigns.com


