


How to Digitize a Logo for Embroidery: Step-by-Step Guide

A logo is more than just an image—it is the visual identity that makes a brand recognizable. When that logo needs to be stitched onto shirts, jackets, hats, bags, uniforms, or other fabric products, simply uploading a JPG, PNG, or other image file to an embroidery machine is not enough. The artwork must first be converted into a stitch-based embroidery file through a process called digitizing. If you have ever wondered how to digitize a logo for embroidery, this guide will walk you through the entire process, from preparing the original artwork to choosing stitch types, setting stitch density, adjusting underlay, testing the design, and exporting the final embroidery file. With the right techniques, even a simple logo can be transformed into a clean, professional embroidery design that looks sharp, balanced, and ready for production.
What Does It Mean to Digitize a Logo for Embroidery?
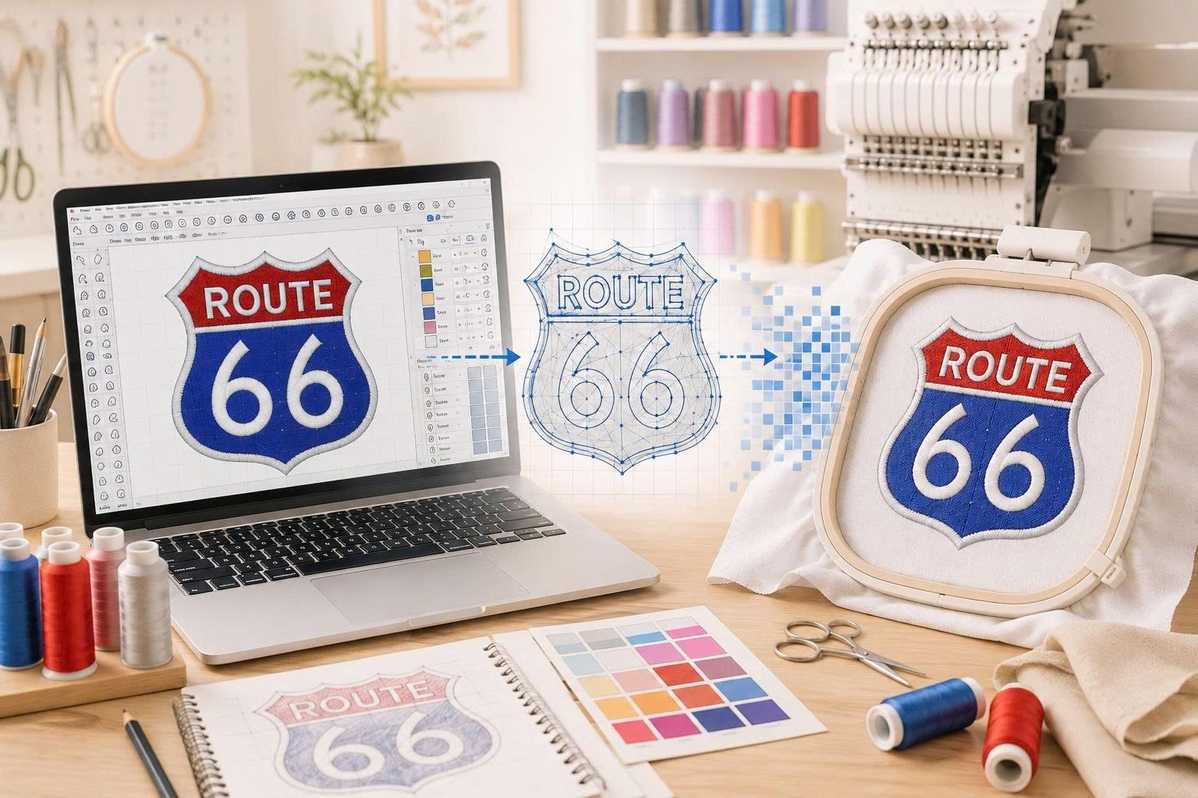
Before learning how to digitize a logo for embroidery, it is important to understand what embroidery digitizing actually means. Unlike a regular digital image that is made from pixels, an embroidery design is made from stitches. Digitizing is the process of translating artwork into a sequence of stitches that an embroidery machine can understand. The digitizer decides where the needle should enter the fabric, which direction the stitches should follow, how dense each area should be, what type of stitch should be used, and in what order different elements should be sewn.
A logo may look perfect on a computer screen, but embroidery introduces physical limitations that do not exist in digital graphics. Thread has thickness, fabric moves, stitches create tension, and very small details can disappear when sewn. This is why learning how to digitize a logo for embroidery requires more than simply converting an image into another file format. A successful embroidery logo is designed around the behavior of thread and fabric, not just the appearance of the original artwork.
Professional embroidery digitizing is essentially where design meets craftsmanship. The goal is not to copy every tiny detail of the original logo. The goal is to recreate the logo in stitches while preserving its identity, readability, proportions, and visual impact.
Why Is Logo Digitizing Important for Embroidery?
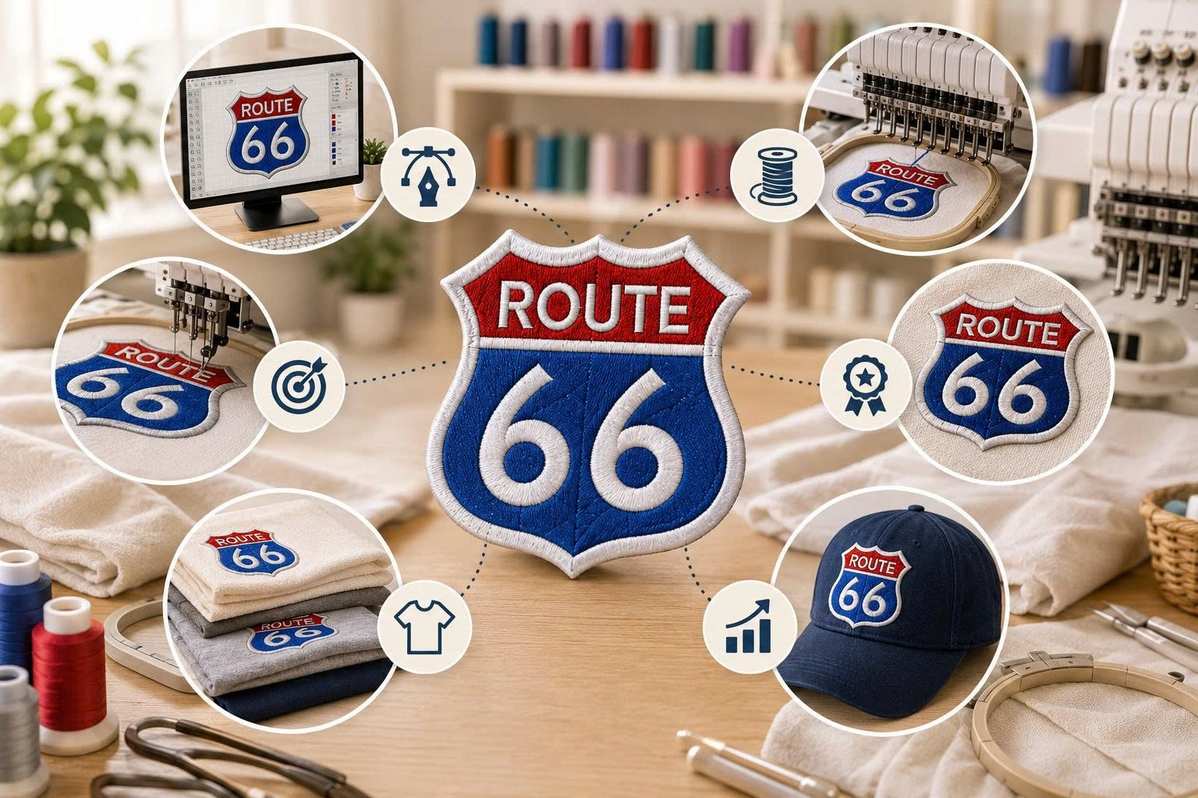
A professionally digitized logo can make the difference between ordinary embroidery and a polished branded product. Poor digitizing can lead to uneven lettering, excessive thread buildup, gaps between objects, distorted shapes, thread breaks, puckering, and other production problems. A well-digitized design, on the other hand, allows the machine to stitch smoothly while maintaining the important details of the logo.
Understanding how to digitize a logo for embroidery is particularly important for businesses that use embroidered uniforms, promotional clothing, corporate apparel, sportswear, hats, workwear, and branded accessories. A logo may need to be embroidered on several different materials and in different sizes, so the design must be flexible enough to perform well under different conditions.
For designers and embroidery enthusiasts, digitizing also creates an opportunity to transform ordinary artwork into something tactile and memorable. The combination of thread color, stitch direction, texture, and fabric can give a logo a completely different character. This is one reason professional embroidery designs continue to be popular for businesses, organizations, schools, clubs, and personal projects.
What You Need Before Digitizing a Logo
Before starting the actual digitizing process, prepare the best possible version of the logo. A high-resolution image, vector artwork, or clean original design will make the process much easier. Ideally, you should have an SVG, AI, EPS, or other vector file when available. High-quality PNG files can also work well, especially when the logo has a transparent background.
The cleaner the artwork, the easier it is to identify individual shapes, borders, text, and color areas. If the original logo contains unnecessary shadows, gradients, extremely thin lines, or tiny decorative details, consider simplifying them before digitizing. Embroidery does not always reproduce these elements exactly as they appear on a screen.
You should also know the final embroidery size, the type of fabric, the embroidery machine, and the intended product. A logo intended for a cotton polo shirt may require different settings from a logo designed for a structured cap. The same artwork may also need adjustments when embroidered at a very small size.
Step 1: Choose and Prepare the Logo Artwork
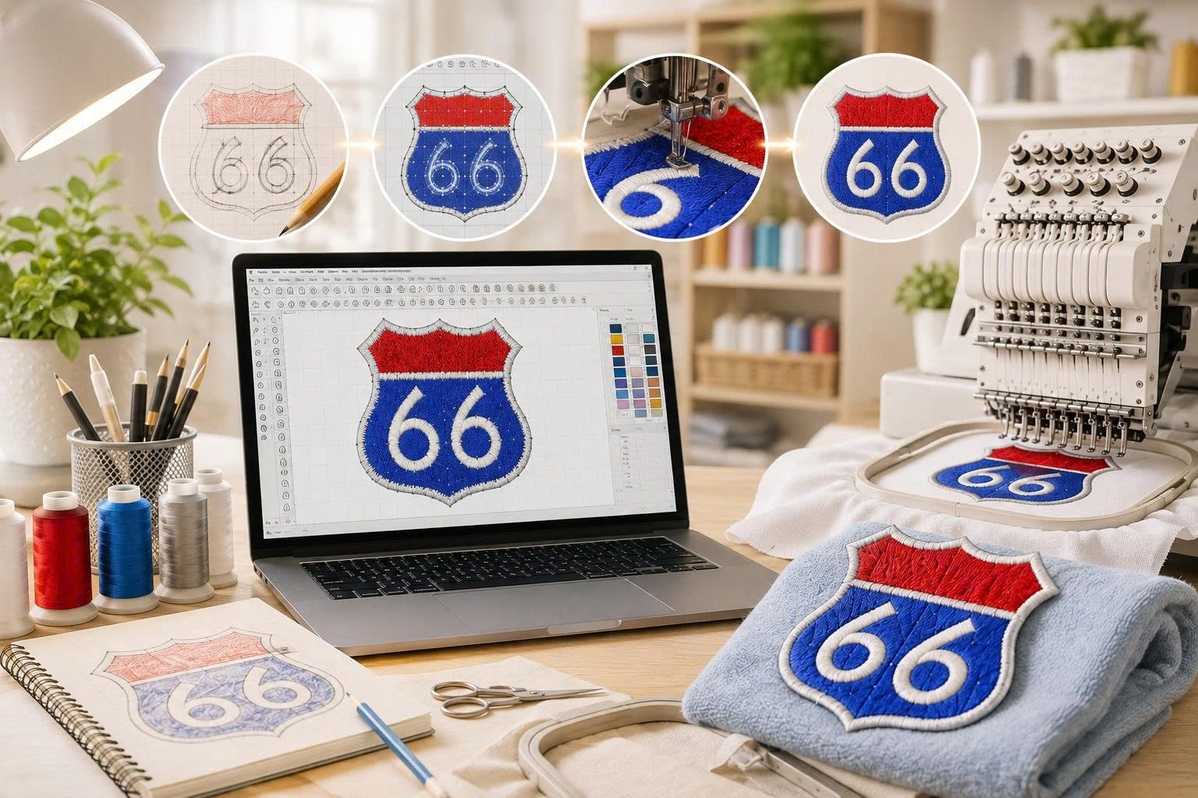
The first step in learning how to digitize a logo for embroidery is preparing the artwork. Open the original logo in your preferred graphics or embroidery software and inspect every element carefully. Identify the main shapes, outlines, lettering, borders, and decorative details.
Remove unnecessary elements that are unlikely to translate well into stitches. Extremely thin lines may need to be thickened, while tiny text may need to be enlarged or simplified. If the logo contains overlapping shapes, determine which elements should appear in front and which should appear behind them.
At this stage, it is useful to think like an embroidery designer rather than a graphic designer. Ask yourself which areas need to be solid, which areas can be represented with lines, and which details can be simplified without changing the identity of the logo. A good digitized design is not necessarily the one with the most stitches—it is the one that uses stitches intelligently.
Step 2: Determine the Embroidery Size
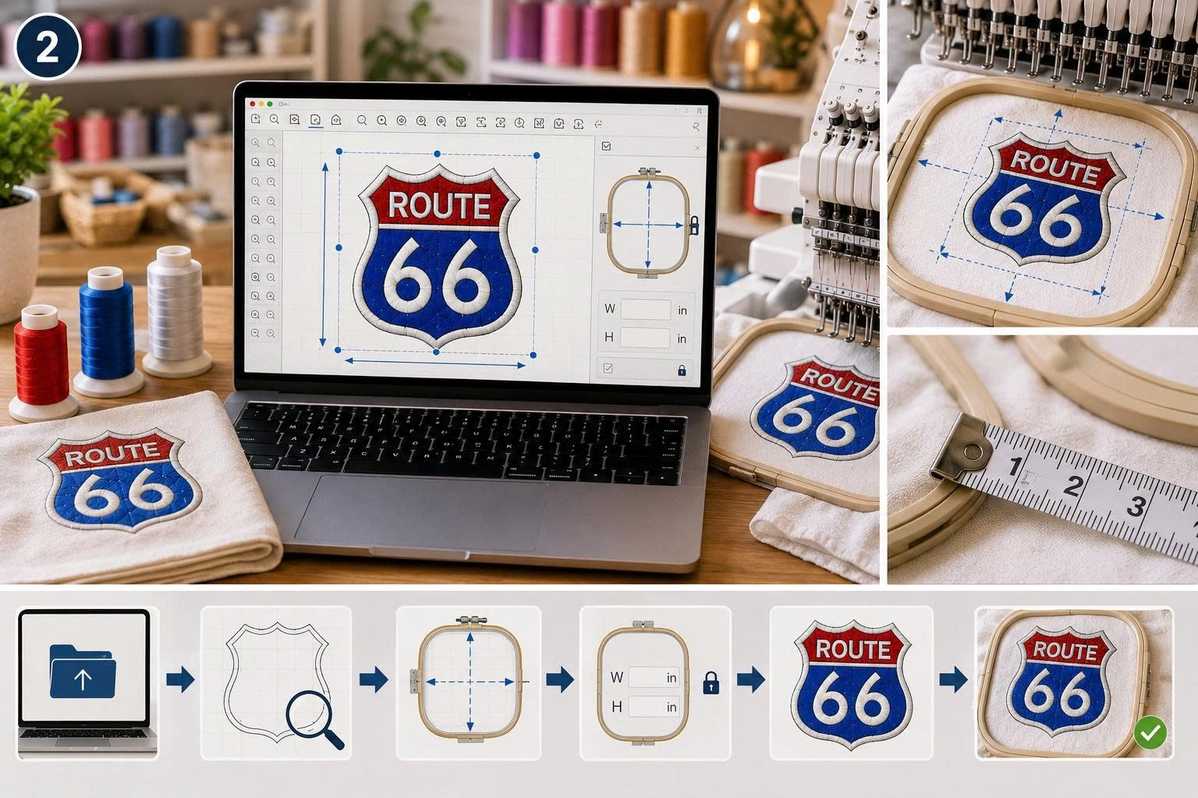
Size plays a major role in determining how to digitize a logo for embroidery. A logo that looks excellent at 5 inches wide may not work at 1.5 inches wide. Small embroidery requires simplified shapes, fewer details, and carefully controlled stitch density.
Before creating stitches, establish the exact dimensions of the finished design. Consider where the logo will be placed and how much space is available. For shirts, the design may need to fit within a specific chest area. For hats, the available embroidery field may be narrower and curved. Bags, jackets, towels, and other products can present their own limitations.
Creating the design at its intended production size helps you make better decisions about stitch width, lettering, spacing, and detail. Avoid designing everything large and simply shrinking it later. Scaling an embroidery design down does not automatically adjust the stitch structure correctly.
Step 3: Divide the Logo Into Individual Objects
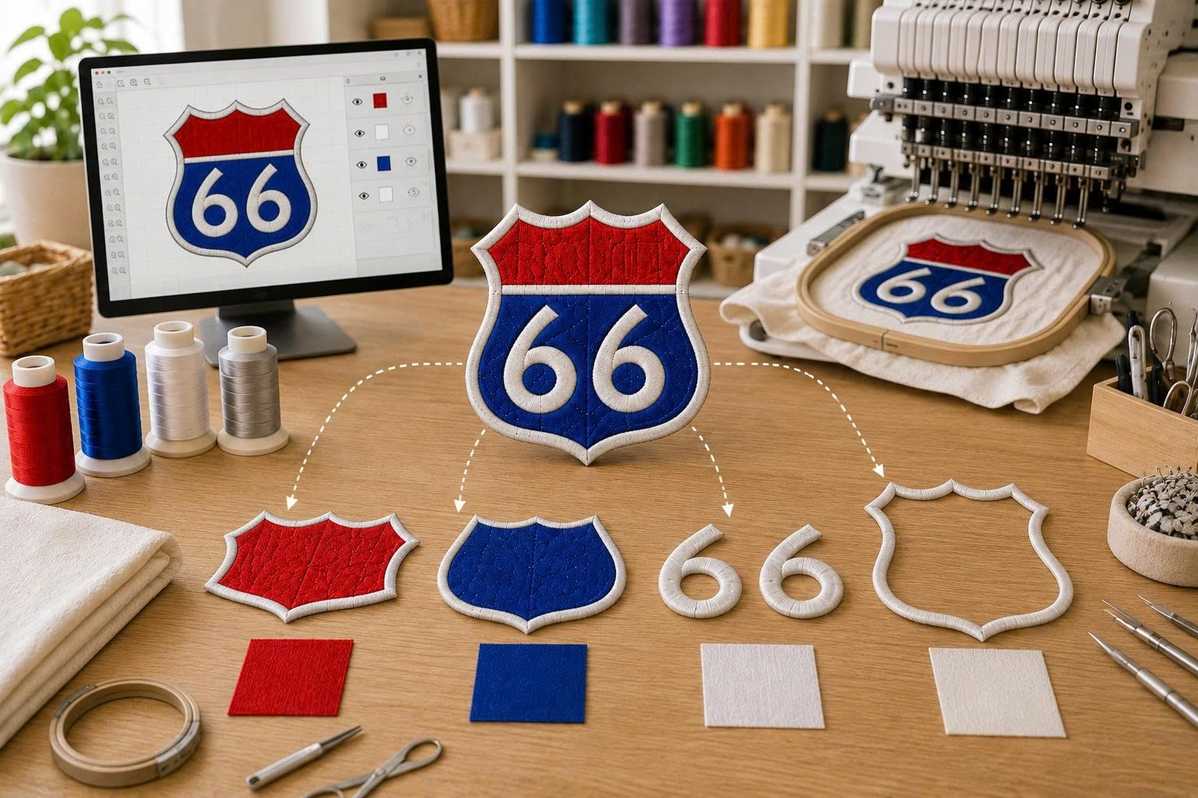
Once the artwork is prepared, divide it into logical embroidery objects. Each object represents an area that will be sewn using a specific stitch type and set of parameters. For example, a logo might contain a background shape, a colored fill, an outline, and lettering.
Breaking the logo into separate objects gives you greater control over stitch direction, density, layering, and sequencing. It also makes it easier to modify individual sections without rebuilding the entire design.
When deciding how to divide the artwork, think about how the machine will actually sew the logo. Areas that overlap should generally be planned in a logical order so that later stitches cover the appropriate edges of earlier objects. Good object planning can make the final embroidery cleaner while also reducing unnecessary jumps and trims.
Step 4: Choose the Right Stitch Types
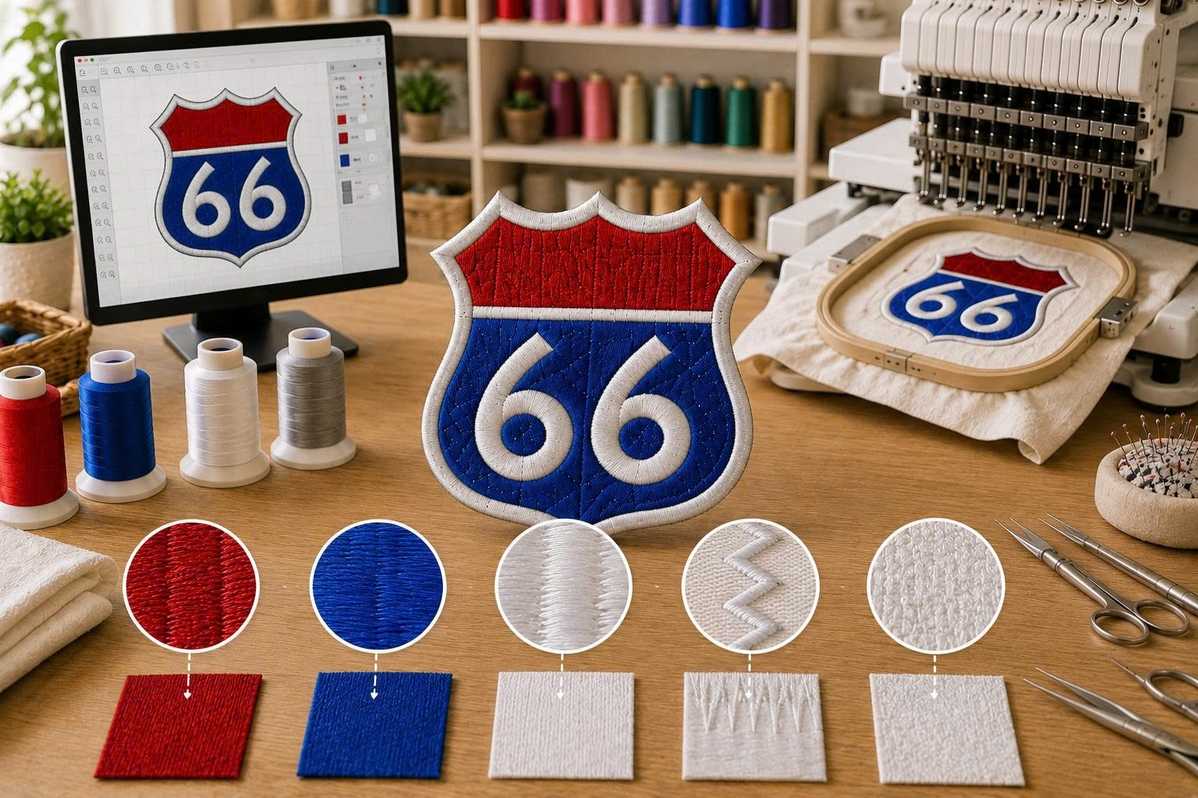
Choosing the correct stitch type is one of the most important parts of understanding how to digitize a logo for embroidery. Different shapes require different stitch structures, and using the wrong stitch can make a logo look flat, bulky, or distorted.
Satin Stitch for Borders and Narrow Shapes
Satin stitch is commonly used for borders, outlines, lettering, and relatively narrow shapes. It creates a smooth, slightly raised appearance that can give embroidered logos a professional finish. Satin stitches work particularly well when the width of the shape remains within a suitable range for the stitch type.
When digitizing lettering, satin stitch can produce clean and attractive characters, but very small letters may become difficult to read. In those cases, adjusting the font, letter size, spacing, and stitch settings may be necessary.
Fill Stitch for Larger Areas
Fill stitch, sometimes called tatami stitch, is generally suitable for larger areas of a logo. Instead of creating a dense row of long stitches across a narrow object, fill stitch distributes stitches throughout a broader surface.
Stitch direction can also be changed to create visual texture and improve the appearance of large areas. Thoughtful stitch direction can help reduce the visual flatness of a design and can also influence how the fabric reacts to embroidery.
Running Stitch for Fine Details
Running stitch is useful for thin lines and delicate details that are too narrow for a traditional fill or satin stitch. It can be used for outlines, small decorative elements, sketch-like details, and fine internal lines.
However, running stitch should be used carefully. If a line is too fine or too short, it may not remain visible after stitching. The goal is always to balance the appearance of the original logo with what can realistically be produced in thread.
Step 5: Set the Stitch Direction
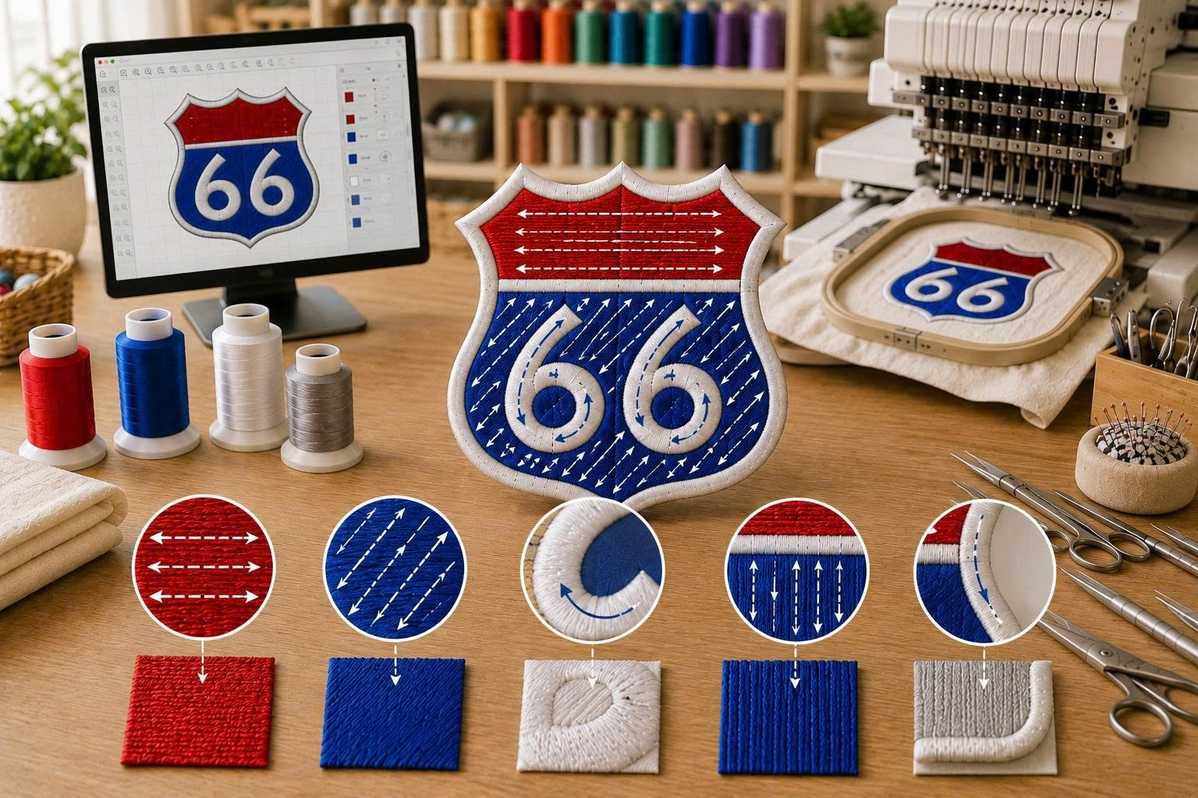
Stitch direction is an often-overlooked part of how to digitize a logo for embroidery, but it can dramatically affect the final result. Stitch direction determines the visual flow of thread across each object and can influence how light reflects from the embroidered surface.
Instead of giving every object the same stitch angle, use different directions when appropriate. Curved shapes may benefit from changing stitch angles that follow their form. Letters may require directions that support their shape and improve readability.
Good stitch direction can make an embroidery logo appear more dimensional and intentional. It can also help control fabric distortion by distributing tension more effectively across different areas of the design.
Step 6: Add Underlay Stitches
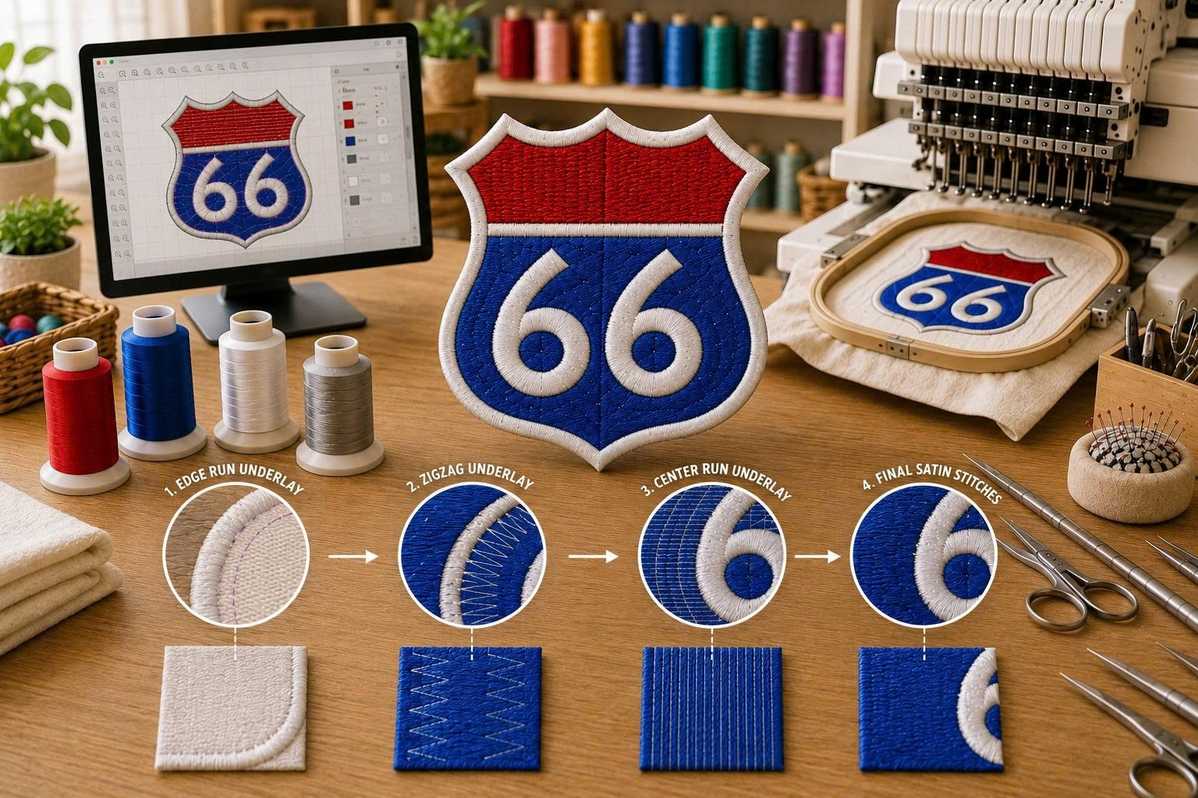
Underlay is a foundational layer of stitches placed beneath the visible stitches. Learning how to digitize a logo for embroidery without understanding underlay can result in designs that look uneven or unstable.
Underlay helps stabilize the fabric, lift the top stitches slightly, and provide a foundation for the visible embroidery. Depending on the object, different underlay structures may be appropriate. Edge-run underlay, center-run underlay, and other foundation techniques can be used depending on the shape and fabric.
The correct underlay depends on several factors, including object size, stitch type, fabric characteristics, and embroidery density. Too little underlay may cause poor coverage and instability, while excessive underlay can contribute to unnecessary bulk.
Step 7: Adjust Stitch Density
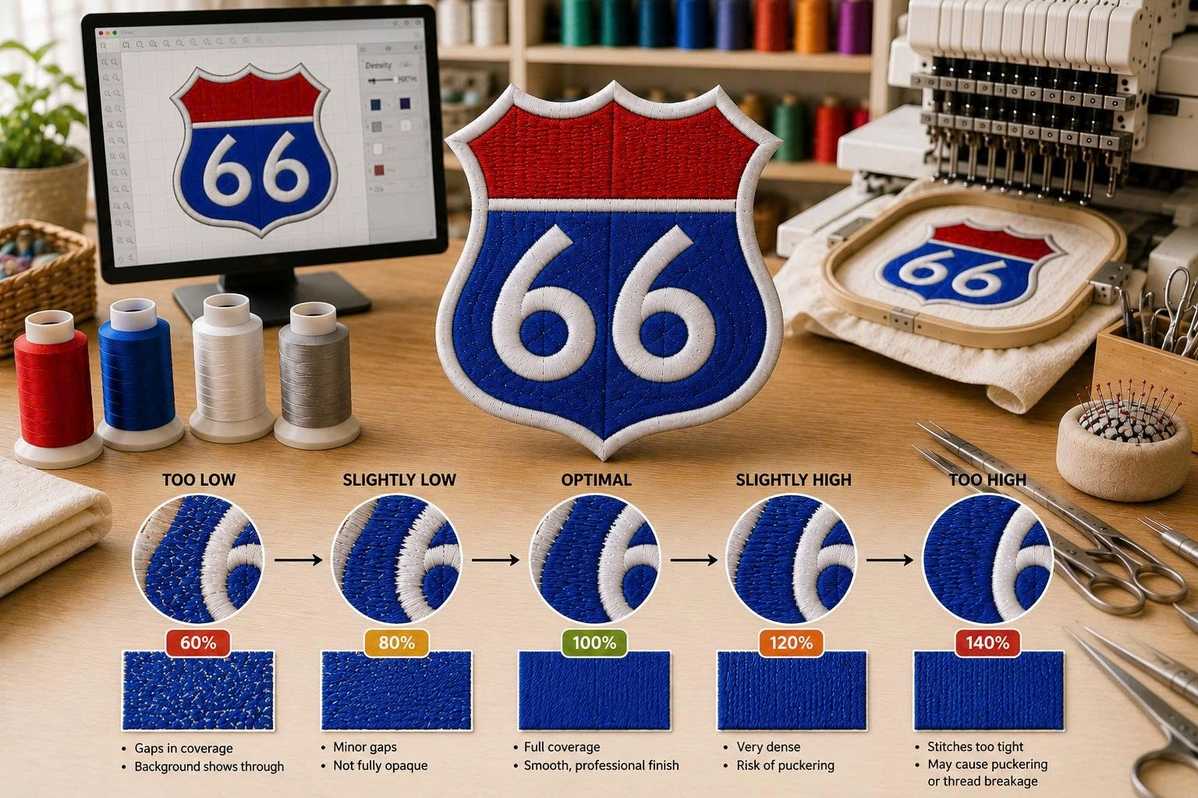
Stitch density refers to how closely stitches are placed together. It is one of the most important settings when learning how to digitize a logo for embroidery because density directly affects coverage, texture, thread consumption, and fabric tension.
If density is too low, the fabric may show through the design and make the logo appear incomplete. If density is too high, the embroidery may become stiff, heavy, or overly crowded. Excessive density can also increase thread usage and contribute to thread breaks.
The ideal density depends on the stitch type, fabric, thread, design size, and machine. Instead of relying on one universal number, professional digitizers evaluate the complete combination of materials and design characteristics.
Step 8: Plan the Stitching Sequence
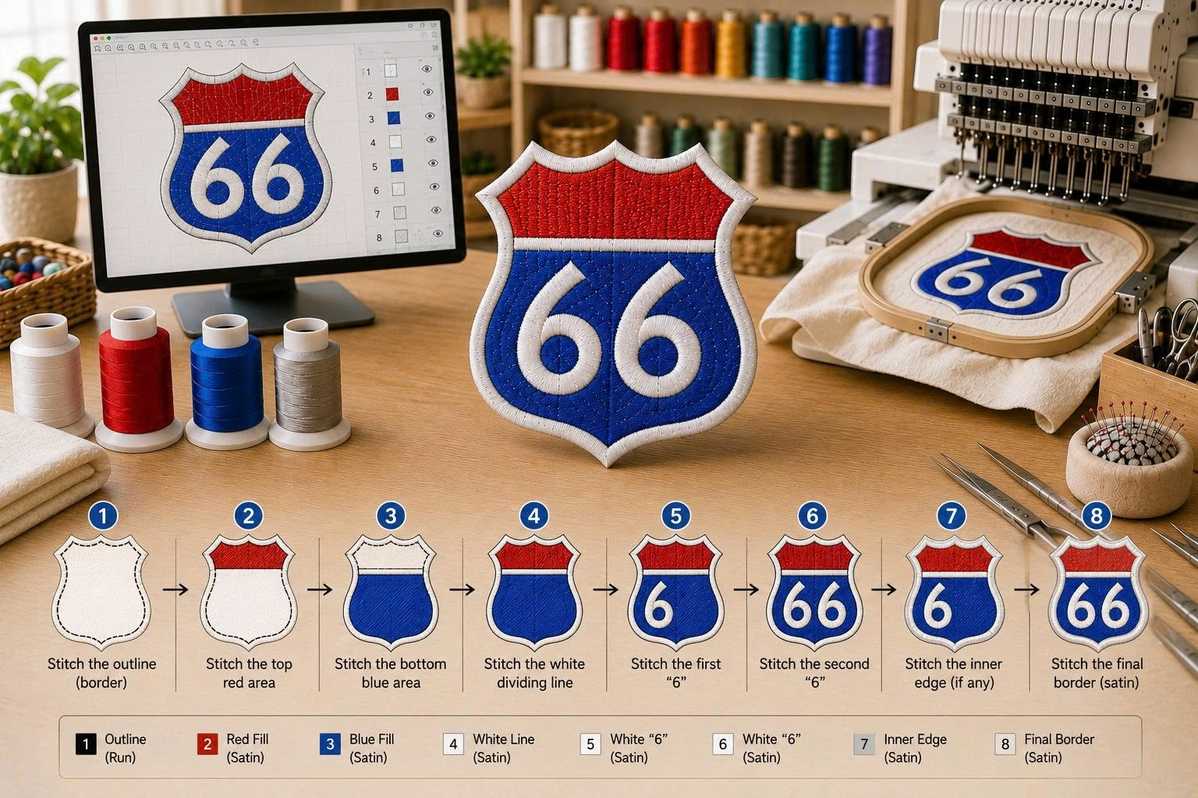
A professional embroidery design should have a carefully planned stitch sequence. The order in which objects are sewn can affect appearance, efficiency, and the overall stability of the design.
Start by identifying which elements should be stitched first and which should sit on top. Background areas are often stitched before foreground details, while borders and small finishing elements may be sewn later.
An efficient stitch sequence can reduce unnecessary jumps and trims, helping the embroidery machine move smoothly through the design. It can also minimize the risk of unwanted gaps between objects.
When learning how to digitize a logo for embroidery, remember that digitizing is not simply drawing with stitches. You are creating a set of instructions for a machine. Every object and every stitch needs a purpose.
Step 9: Add Pull Compensation
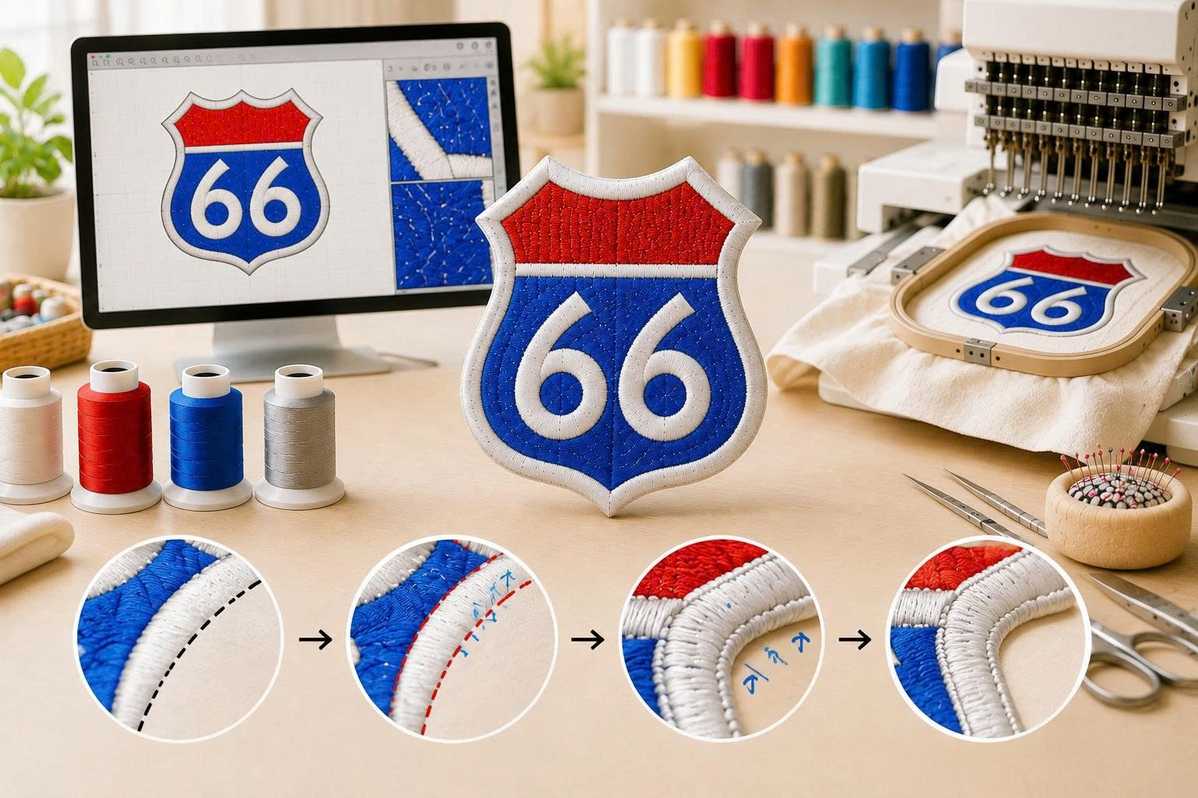
Fabric can move or shift slightly when embroidery stitches are applied. This phenomenon can cause certain objects to become narrower or smaller than expected. Pull compensation is used to account for this behavior.
For example, a satin column may pull inward during stitching, making the finished shape appear smaller than the original digital artwork. Proper compensation can help maintain the intended proportions.
Pull compensation should not be applied blindly. Different fabrics, stitch directions, densities, and object shapes behave differently. Testing is the best way to determine whether the compensation is appropriate for a particular design.
Step 10: Digitize Small Text Carefully
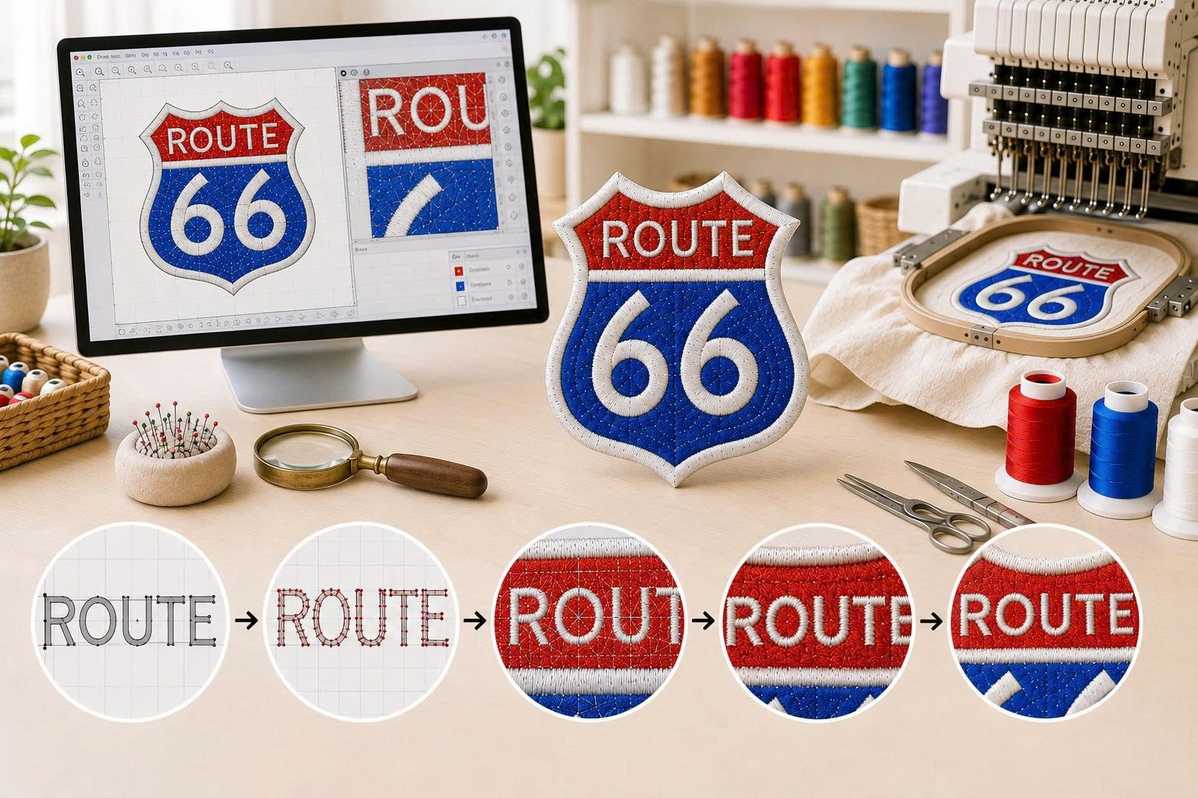
Small lettering is one of the biggest challenges when learning how to digitize a logo for embroidery. Text that looks perfectly readable on a computer screen may become difficult to recognize once converted into stitches.
Choosing the right embroidery font is essential when working with small lettering. Select fonts designed or suitable for embroidery, maintain enough spacing between characters, and avoid extremely thin strokes. Depending on the size, certain letters may need to be simplified so that they remain recognizable.
Always preview small text at the actual embroidery size. Looking at an enlarged design can give you a false sense of confidence because tiny imperfections become much more significant when the design is physically stitched.
Step 11: Preview and Simulate the Embroidery
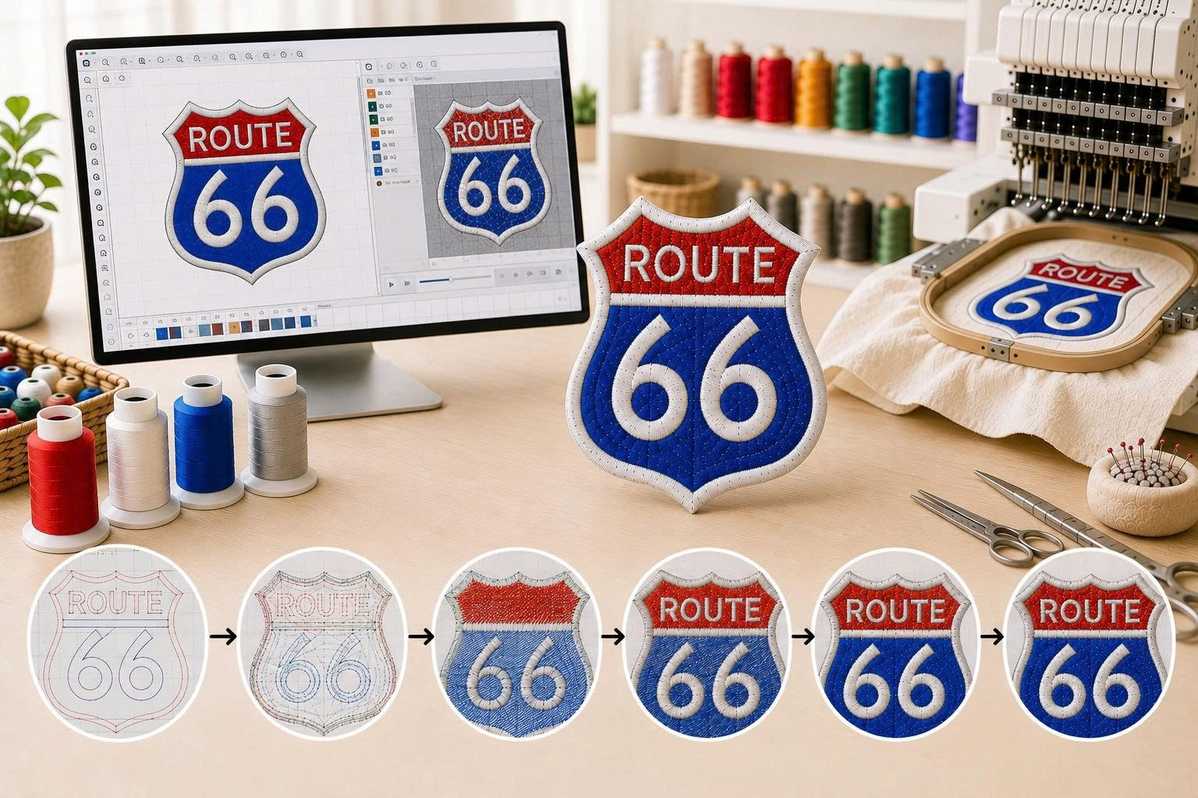
After building the design, use your embroidery software's preview or simulation function. This allows you to see the approximate stitching order, stitch direction, density, trims, jumps, and overall appearance before sending the file to the machine.
Simulation is an essential stage in understanding how to digitize a logo for embroidery because it can reveal problems that are difficult to notice while editing individual objects. Look for unnecessary jumps, excessive trims, sudden changes in stitch direction, dense areas, gaps, and objects that appear out of sequence.
A good simulation should look organized and purposeful. If the machine appears to move randomly across the design, the sequence may need to be improved.
Step 12: Test Stitch the Logo
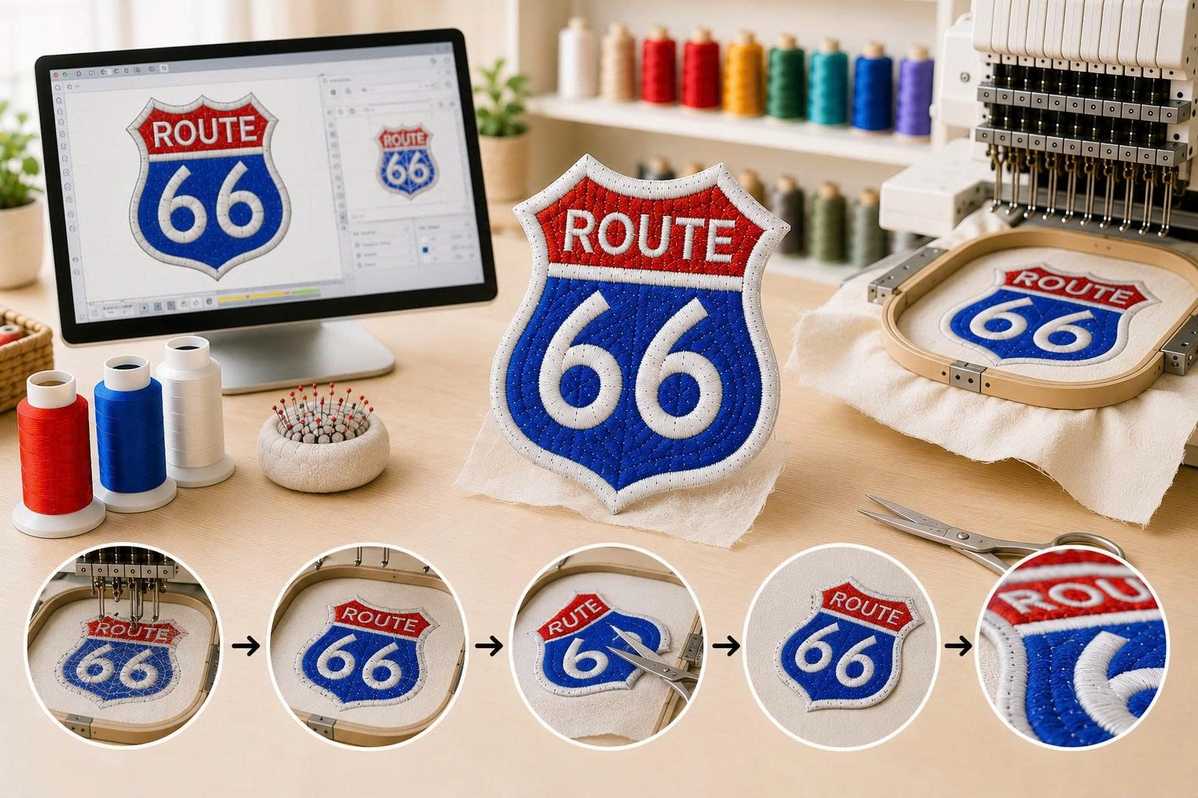
No matter how good a design looks on screen, a physical test stitch is one of the most valuable steps in professional embroidery digitizing. Fabric, thread, stabilizer, needle choice, machine tension, and hooping can all influence the final result.
Use the same or a similar fabric and stabilizer that will be used for production. Stitch the design at the intended size and examine the result carefully. Check the lettering, borders, stitch coverage, alignment, density, thread tension, and overall shape.
If something does not look right, return to the digitizing software and adjust the relevant settings. This process of testing and refining is how a good digital design becomes a reliable production-ready embroidery file.
Common Mistakes When Digitizing a Logo for Embroidery
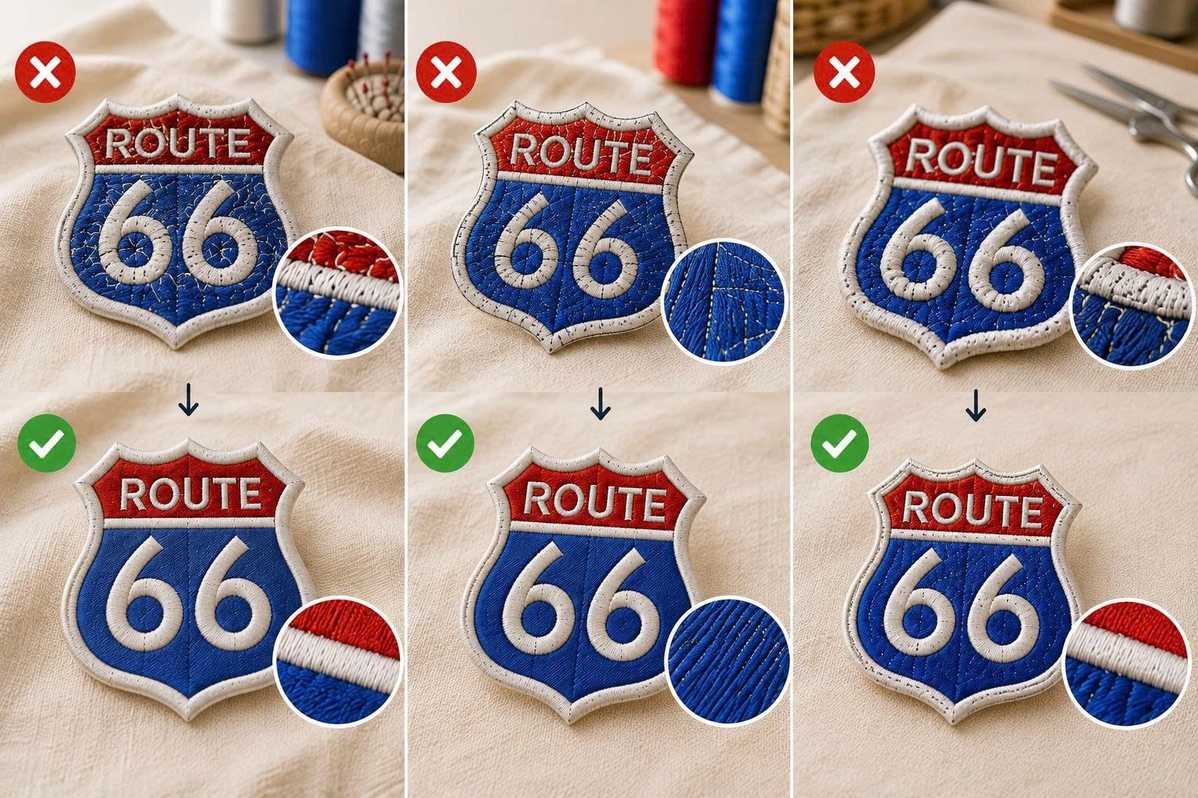
One of the most common mistakes is treating embroidery like printed artwork. A digital image can contain gradients, shadows, tiny lines, and highly detailed textures, while embroidery relies on physical thread. Trying to reproduce every detail can create unnecessary complexity and poor stitch quality.
Another common mistake is using excessive stitch density. More stitches do not automatically mean better embroidery. In many cases, unnecessary stitches make the design heavier and increase the chance of thread breaks or fabric distortion.
Ignoring the final embroidery size is another major problem. A design that works beautifully at a large size may become unreadable when reduced. Always digitize with the intended finished dimensions in mind.
Poor stitch sequencing can also create problems. Excessive jumps, unnecessary trims, and inefficient movement can slow production and negatively affect the finished product. A carefully planned sequence makes the embroidery process smoother and more consistent.
Finally, failing to test the design can lead to avoidable production issues. Even experienced digitizers benefit from test stitching because every combination of artwork, fabric, stabilizer, thread, and machine can behave differently.
How to Make a Digitized Logo Look More Professional
Professional embroidery is about balance. The best designs combine clean shapes, appropriate stitch types, controlled density, effective underlay, suitable compensation, and thoughtful stitch direction.
Keep the embroidery logo recognizable while simplifying details that cannot translate effectively into thread. Prioritize the elements that define the brand. If the logo has a distinctive letterform, symbol, or shape, make sure those elements remain clear.
Consistency is also important. Stitch directions should feel intentional, borders should be clean, and different sections should work together visually. The embroidery should look polished from a normal viewing distance rather than only when magnified on a computer screen.
If you are looking for inspiration for professional embroidery projects, exploring collections of Apex embroidery designs can also help you understand how different shapes, lettering styles, and stitch structures can be translated into embroidery.
How to Digitize a Logo for Different Fabrics
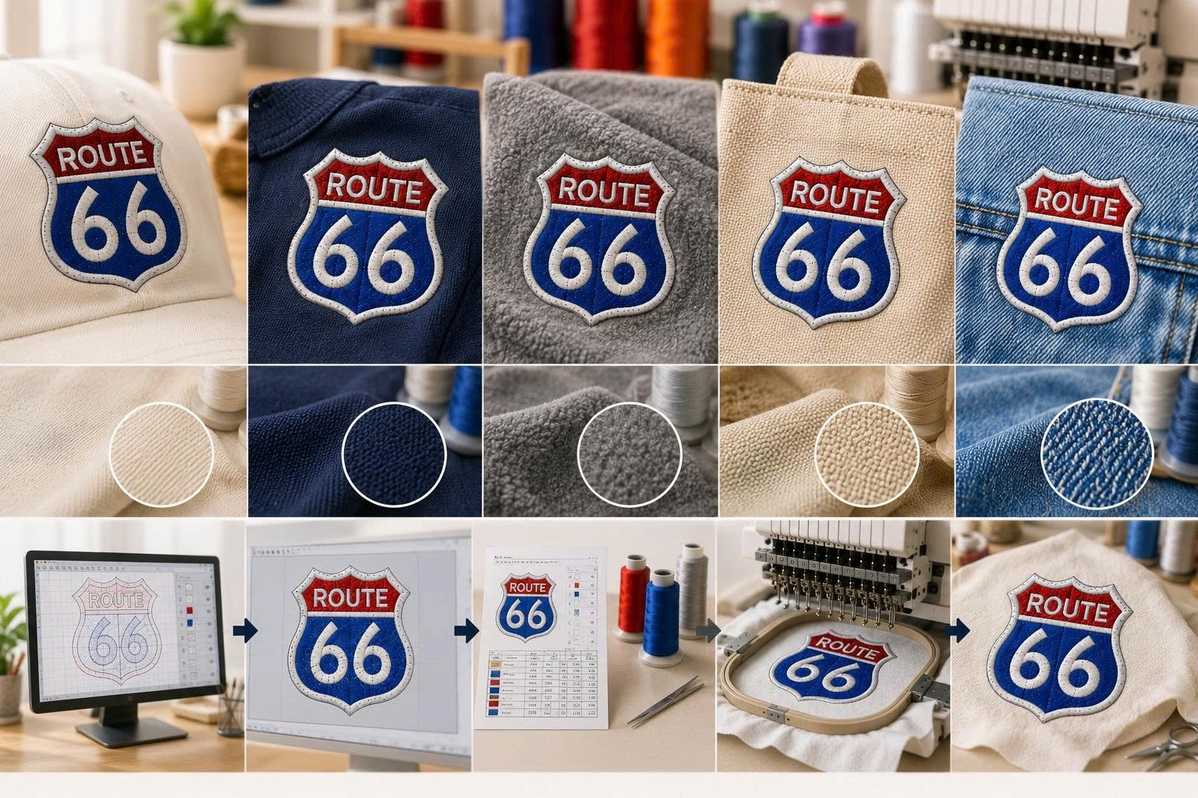
The fabric you choose can significantly influence how to digitize a logo for embroidery. Cotton, denim, fleece, canvas, polyester, performance fabrics, towels, caps, and stretchy garments all respond differently to embroidery.
Stable fabrics generally provide a predictable foundation, while stretchy materials may require additional stabilization and careful density control. Thick fabrics can accommodate certain embroidery structures that may not work well on lightweight materials.
For garments with a soft or flexible surface, avoid creating unnecessarily heavy embroidery. For structured products such as caps, consider the limitations of the embroidery area and the direction of the material.
This is why there is no single perfect digitizing setting for every project. Professional digitizing involves adapting the design to the product rather than forcing every product to use the same settings.
Choosing the Right Embroidery File Format
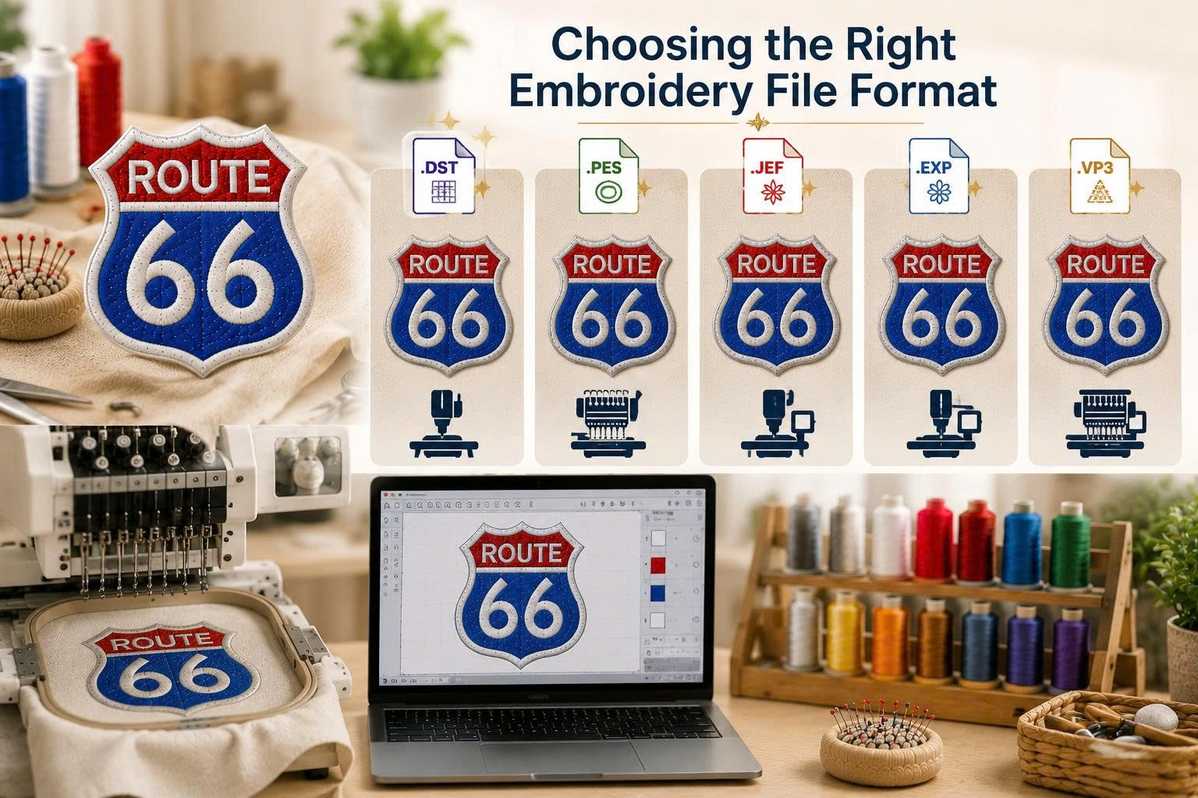
Once you know how to digitize a logo for embroidery, the final step is exporting the design into a format compatible with the embroidery machine. Different machines use different file formats, so always confirm the required format before exporting.
Common embroidery file formats include DST, PES, EXP, JEF, VP3, and HUS. The correct format depends on the machine brand and model. Exporting the wrong format can prevent the machine from reading the design correctly.
It is also important to keep the editable source file. The machine-ready file contains the stitch instructions, but the original working file allows you to make future changes to density, size, lettering, stitch direction, colors, and sequencing.
Why Professional Digitizing Makes a Difference
Learning how to digitize a logo for embroidery gives you valuable control over your embroidery projects, but professional digitizing requires experience and an understanding of how different variables interact. A professional digitizer does not simply convert artwork into stitches. They analyze the logo, fabric, size, machine, thread, and production requirements to create a design that performs reliably.
For businesses, this can be especially important when the same logo is embroidered across different products. A carefully digitized logo creates consistency and helps maintain a professional brand appearance.
Whether you are creating branded uniforms, promotional merchandise, personalized gifts, sports apparel, or commercial embroidery, quality digitizing is the foundation of a successful finished product. If you are exploring more ideas for embroidered artwork, custom embroidery designs can also provide inspiration for adapting logos and decorative concepts into unique stitched products.
Tips for Better Embroidery Logo Digitizing
Start with clean artwork and simplify unnecessary details before creating stitches. Always establish the final embroidery size before making detailed stitch decisions. Choose stitch types according to the shape and width of each object instead of using the same stitch everywhere. Use underlay to provide a stable foundation, but avoid excessive stitching. Adjust stitch density according to the fabric and design rather than relying on a universal setting.
Pay close attention to stitch direction because it affects both appearance and fabric behavior. Plan the stitch sequence carefully to reduce unnecessary jumps and trims. Be especially cautious with small lettering because readability can change dramatically after stitching. Preview the design using embroidery simulation software, then test stitch it on a comparable fabric before beginning full production.
Most importantly, remember that how to digitize a logo for embroidery is a process of translation. You are translating a visual identity from pixels and vectors into thread, texture, movement, and physical material. The better you understand that translation, the more professional your finished embroidery will become.
How to Digitize a Logo for Embroidery: A Quick Checklist
Before sending your logo to an embroidery machine, check the original artwork, final dimensions, stitch types, stitch direction, underlay, stitch density, pull compensation, color sequence, object sequence, small lettering, jumps, trims, and overall stitch count. Run a digital simulation and look for areas that appear too dense or too sparse. Then create a physical test stitch and compare it with the original logo.
If the test does not look right, do not simply blame the machine. The issue may be related to density, underlay, compensation, stitch direction, sequencing, fabric stabilization, or the design itself. Making small adjustments and testing again is often the fastest path to a cleaner result.
Frequently Asked Questions About How to Digitize a Logo for Embroidery
Can I Digitize a Logo for Embroidery From a PNG or JPG?
Yes. PNG and JPG files can be used as references for digitizing, although a clean, high-resolution image makes the process easier. A vector file is often preferable because it provides clearer shapes and edges. Regardless of the original format, the artwork still needs to be manually or automatically converted into embroidery objects and stitch instructions.
What Software Can I Use to Digitize a Logo for Embroidery?
There are several embroidery digitizing programs available, ranging from beginner-friendly software to professional platforms. The most important feature is not simply the software name but whether it gives you sufficient control over stitch types, density, underlay, stitch direction, sequencing, compensation, and embroidery simulation.
Is Logo Digitizing the Same as Converting an Image?
Not exactly. Image conversion and embroidery digitizing are different processes. An image converter may automatically interpret colors and shapes, but professional digitizing requires decisions about how those shapes should actually be stitched. This distinction is especially important when learning how to digitize a logo for embroidery because an attractive image does not automatically produce a good embroidery file.
How Long Does It Take to Digitize a Logo?
The time required depends on the complexity, size, number of colors, lettering, stitch types, and level of detail. A simple logo with a few basic shapes may be relatively quick to digitize, while a detailed logo with small text and multiple layers can require significantly more time for editing and testing.
Can I Use One Digitized Logo for Every Product?
Sometimes, but not always. A logo designed for a shirt may need modifications before being used on a cap, towel, jacket, bag, or stretchy garment. Different materials and embroidery areas can require different densities, underlay settings, dimensions, or stitch structures.
Why Does My Embroidered Logo Look Different From the Original?
Embroidery is a physical medium, so thread thickness, fabric texture, stitch direction, density, tension, and stabilization can change the appearance of a design. This is why professional digitizing focuses on reproducing the visual identity of the logo rather than copying every pixel of the original artwork.
How Do I Prevent My Embroidery Logo From Puckering?
Proper stabilization, suitable underlay, controlled stitch density, correct hooping, appropriate needle and thread choices, and proper machine settings can all help reduce puckering. The digitized design itself also plays an important role because excessive density or poorly planned stitch structures can place unnecessary stress on the fabric.
Should I Use Satin Stitch or Fill Stitch for a Logo?
It depends on the shape and size of the logo. Satin stitch is often effective for narrow shapes, borders, and lettering, while fill stitch is generally more suitable for larger areas. A professional logo may use several stitch types together to create the best result.
Can Small Logo Details Be Digitized?
Yes, but very small details have physical limitations. Tiny text, narrow lines, and miniature shapes may disappear or become difficult to recognize when stitched. In these situations, simplifying the artwork or adjusting the size can produce a much better result.
What Is the Most Important Part of Learning How to Digitize a Logo for Embroidery?
Understanding that embroidery is not simply an image printed with thread is one of the most important lessons. A successful embroidery logo requires careful decisions about stitch type, direction, density, underlay, sequencing, compensation, fabric, and size. When these elements work together, the result is an embroidery design that is clean, durable, recognizable, and ready to make a lasting impression.