


15 Halloween Machine Embroidery Projects to Make in 2026

You've downloaded a few spooky embroidery files. Now what? Instead of stitching another design onto a plain T-shirt, try making something you can decorate with, wear to a Halloween party, or give as a handmade gift. These Halloween machine embroidery projects turn seasonal stitches into finished pieces, from dramatic table linens to tiny lace earrings.
Below, you'll find 15 practical projects organized by how you'll use them. Each idea includes supplies, a straightforward making plan, and a tip to help you avoid common mistakes. Whether you like playful ghosts or moody gothic details, start with a design that suits your fabric and skill level. You can explore Halloween machine embroidery designs at Apex Embroidery Designs as you plan.
Before You Start: Gather Your Embroidery Supplies
Most of these projects begin with an embroidery machine, suitable machine embroidery files, thread, embroidery needles, scissors, and a stabilizer selected for your fabric. You'll also need project-specific supplies such as cotton panels, felt, ribbon, a zipper, or earring hardware. Download the correct format for your machine and read the size information on the product page before you cut fabric.
- Woven cotton or canvas: A stable base for banners, pouches, and wall hangings. Choose backing based on the stitch density and the finished item's use.
- Stretchy garments: Use an appropriate cut-away stabilizer to support the embroidery after washing and wearing.
- Textured towels or fleece: A water-soluble topper can help prevent stitches from disappearing into the pile.
- Appliqué projects: Prepare coordinating fabric scraps and follow the design's placement and tack-down sequence.
- Freestanding lace: Use the stabilizer and thread configuration specified for the lace file; ordinary fabric-backed embroidery instructions do not apply.
Need guidance on which files fit a smaller embroidery field? Our separate guide to Halloween embroidery designs for 4x4 hoops covers sizing and file selection. This article focuses on making the finished project.
Halloween Machine Embroidery Projects for Home Decor
1. Spooky Embroidered Table Runner
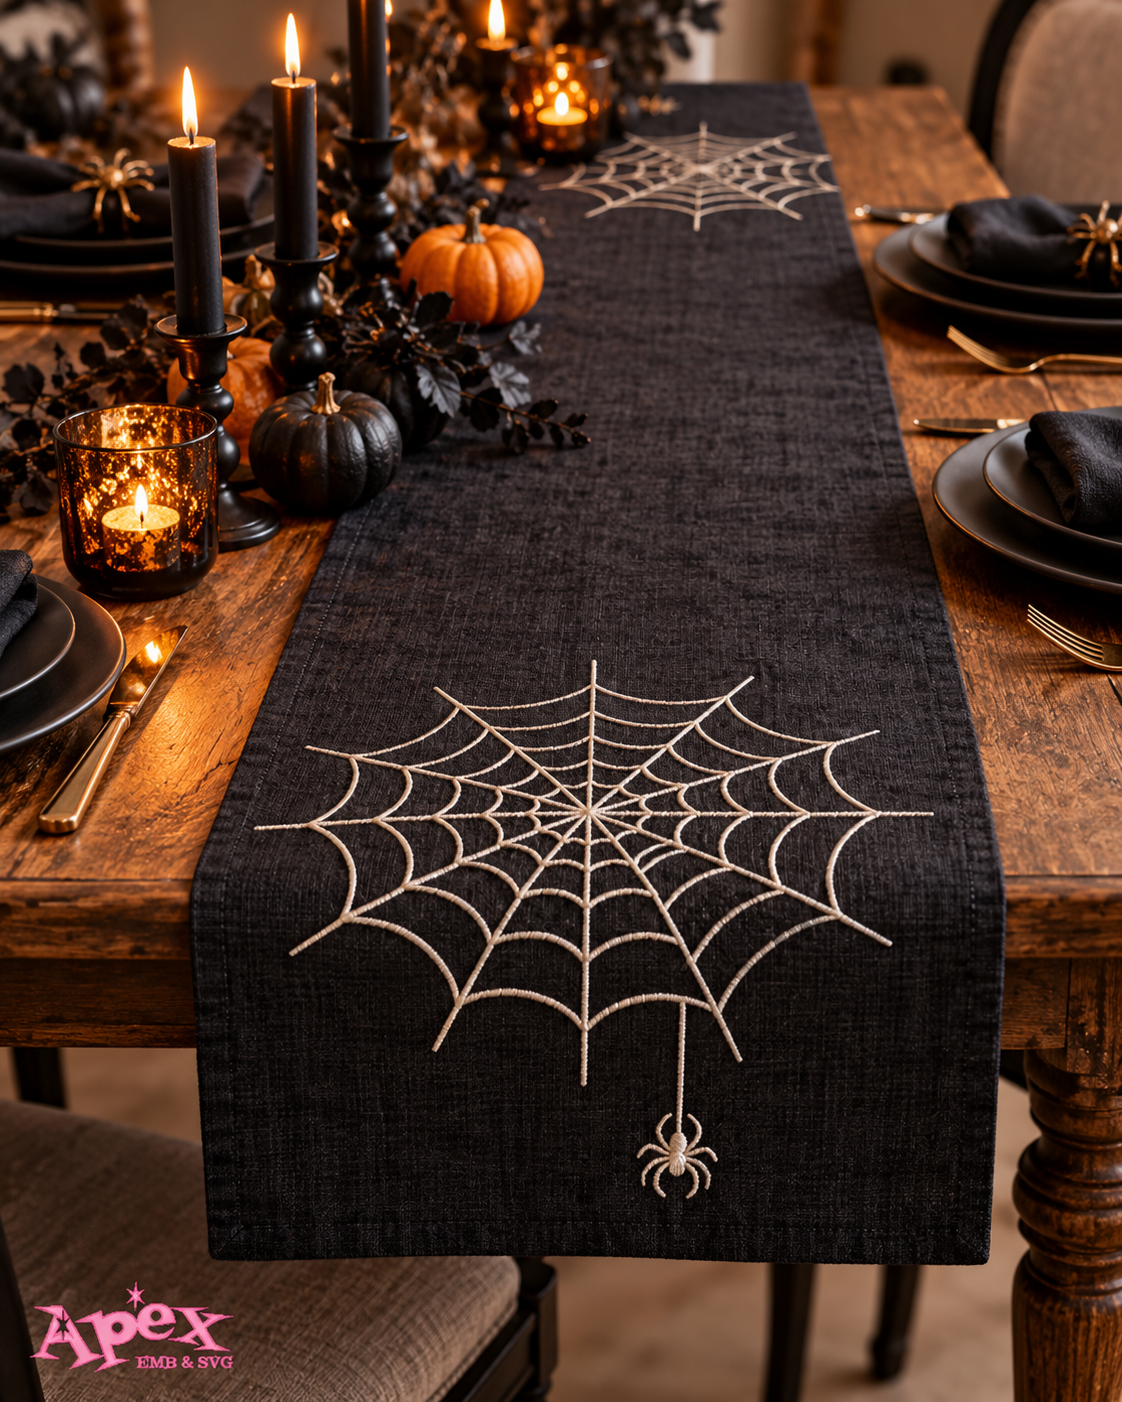
Skill level: Intermediate | Supplies: Linen or cotton runner, stabilizer, measuring tape, temporary fabric marker, thread.
Give your dining table a gothic makeover with spiderwebs stitched near the ends of a dark table runner. Mark a centerline and keep the designs evenly spaced so the runner looks intentional when draped over the table. A silver-gray thread on black linen creates contrast; tone-on-tone plum or charcoal gives a subtler result.
How to make it: Press the runner, mark the design centers, stabilize and stitch one placement at a time, then remove visible markings and press from the reverse over a soft towel. For a coordinated set, repeat a small web on the corners of matching napkins. The Spider Web Embroidery Designs Bundle offers several web styles, including frames and sketch-like options; check each design's actual dimensions before positioning it.
Stitching tip: Test the thread color on a fabric scrap in your dining-room lighting. Fine web lines can disappear on heavily textured material.
2. Halloween Appliqué Throw Pillow
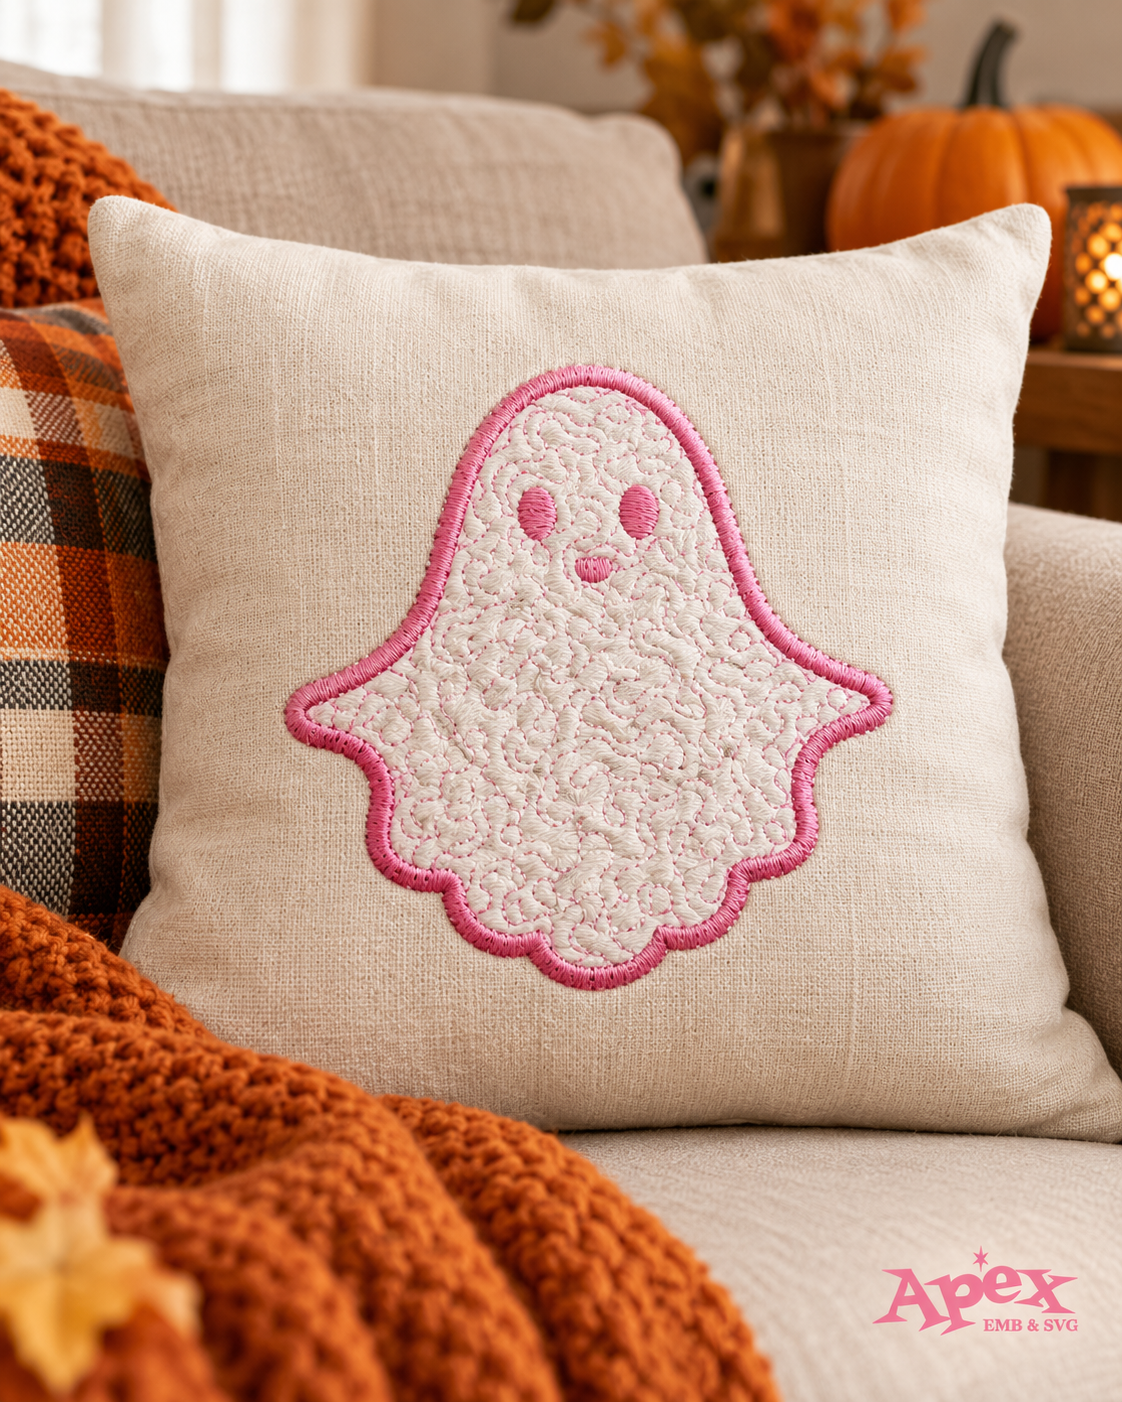
Skill level: Intermediate | Supplies: Pillow-front fabric, appliqué scraps, stabilizer, coordinating backing fabric, pillow insert.
A throw pillow makes a seasonal statement without requiring you to decorate an entire room. Choose a single large appliqué focal point or build a patchwork pillow from smaller stitched panels. Mix matte black, ivory, burnt orange, and muted purple fabrics for depth.
How to make it: Cut a pillow-front panel larger than your final measurement. Stitch the appliqué by following the file's placement, fabric tack-down, trimming, and finishing steps. Press the panel, trim it to size, and sew it to an envelope-style pillow back. For suitable motifs, see the Halloween Quilt Applique Bundle, which includes ghost, pumpkin, bat, cross, and jack-o'-lantern appliqué designs.
Stitching tip: Leave room for seam allowances. A design placed too close to the edge can disappear into the pillow seam.
3. Haunted-Themed Fabric Wall Hanging
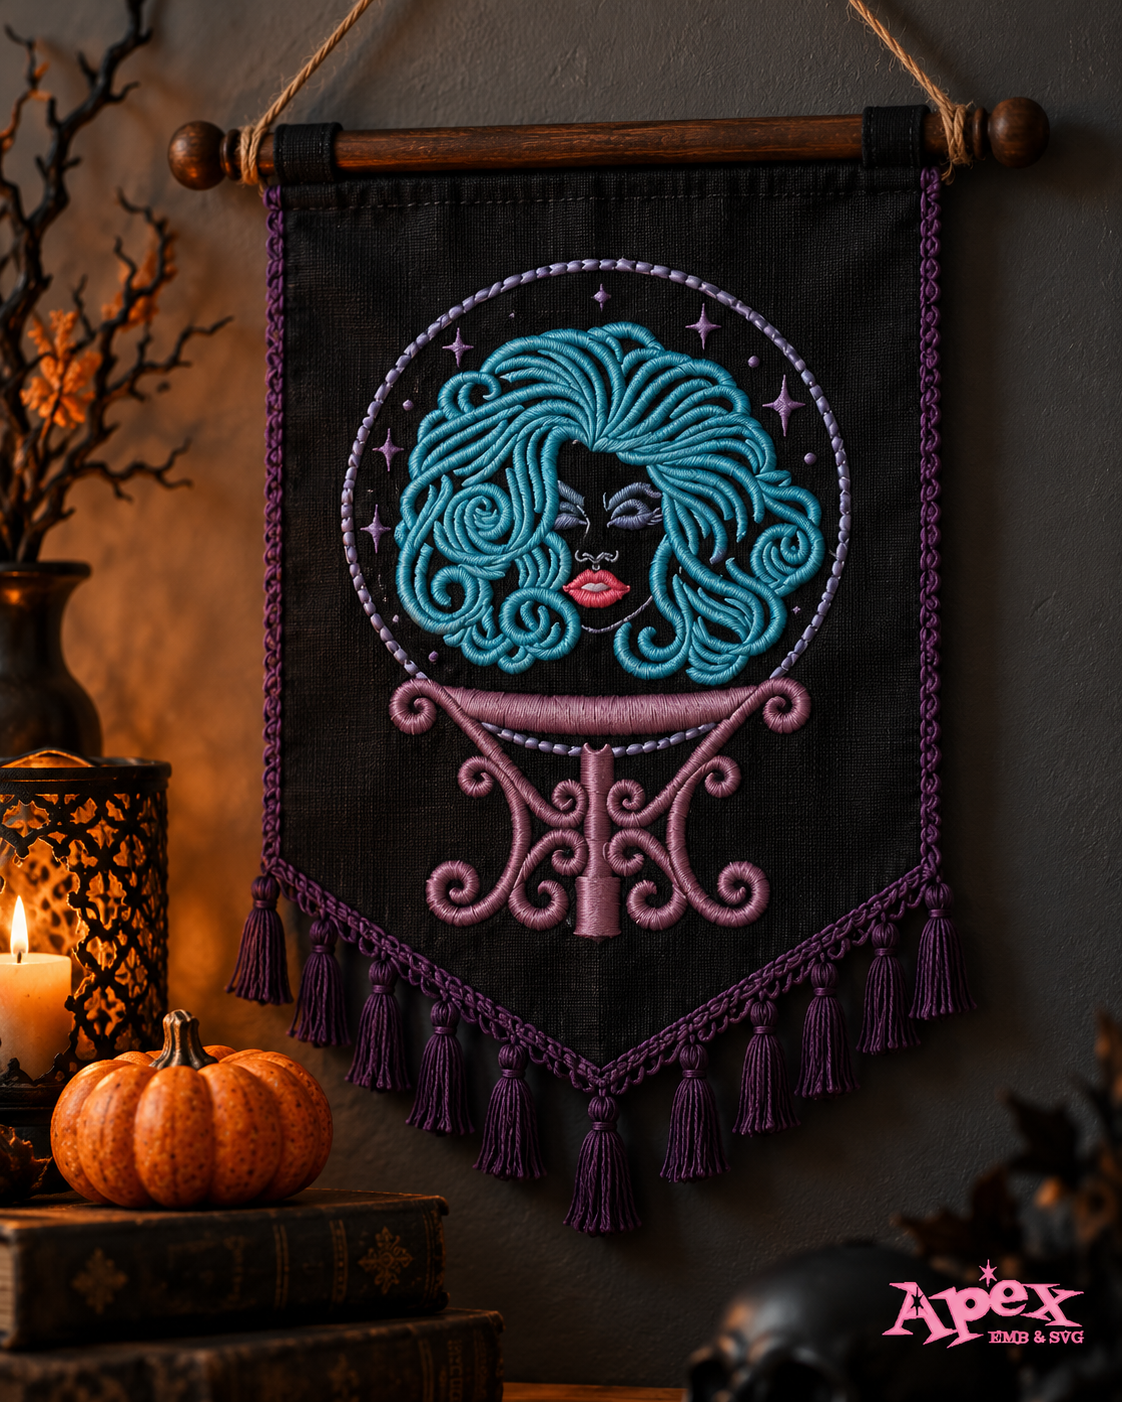
Skill level: Beginner to Intermediate | Supplies: Canvas panel, stabilizer, wooden dowel, ribbon or cord, sewing machine.
Create a wall hanging that can go above a mantel, entryway, or Halloween dessert station. Instead of a busy all-over pattern, place one spooky saying or silhouette near the center, then add a fabric border or fringe to frame it.
How to make it: Embroider the panel while it is flat. Finish the side and bottom edges, sew a casing at the top, and slide in a dowel. The Halloween Haunted Mansion Bundle includes haunted-themed silhouettes and sayings that can inspire the central artwork. Review individual motifs and dimensions to select one that works for your panel.
Stitching tip: Make the top casing after embroidery so the rolled fabric never obstructs your hoop or presser foot.
4. Reusable Embroidered Halloween Bunting
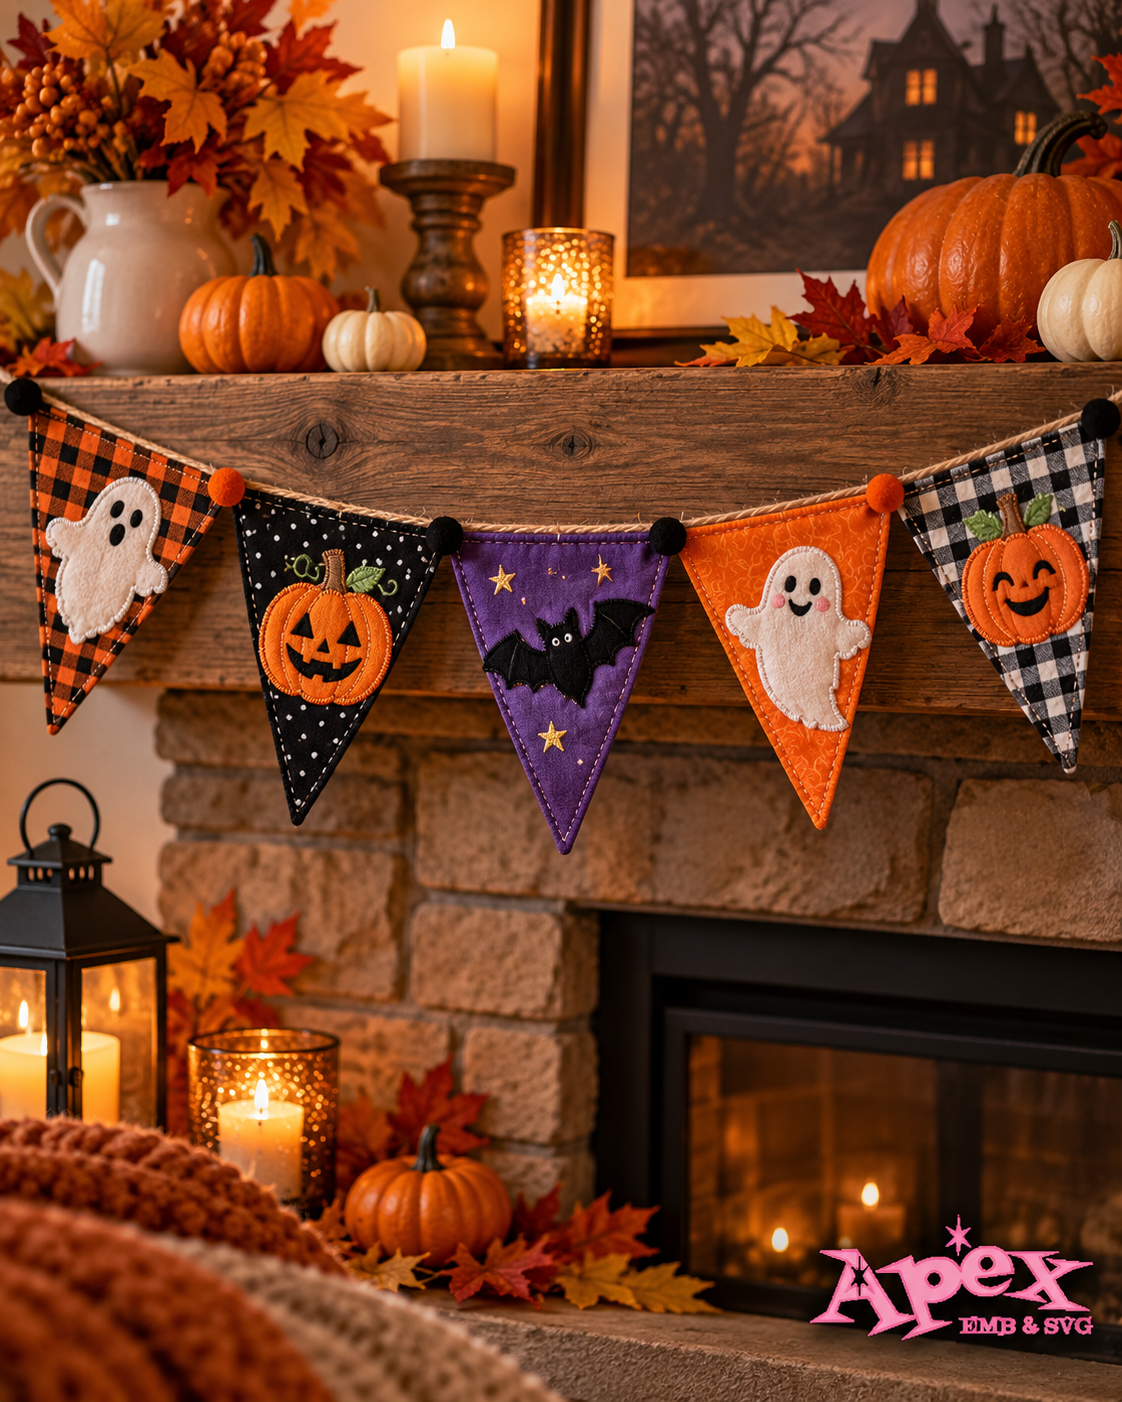
Skill level: Intermediate | Supplies: Cotton fabric, stabilizer, bias tape, ruler, thread.
Fabric bunting looks festive over a fireplace or across a party table, and you can bring it out every October. Stitch a different small motif on each triangular flag, alternating bats, pumpkins, and blank fabric for a balanced rhythm.
How to make it: Cut oversized rectangular blanks first. Embroider each one while the fabric is flat, then trim the stitched panels into identical triangles. Sew each flag right sides together with a backing piece, turn, press, and capture the tops inside bias tape. The Halloween Bat Embroidery Designs Bundle offers a variety of bat styles for repeating or alternating across the garland.
Stitching tip: Make a paper triangle template and mark a safe stitch area before embroidering so the design remains clear of the seams.
Halloween Embroidery Projects for Parties and Entertaining
5. Gothic Halloween Cocktail Napkins
Skill level: Beginner | Supplies: Plain fabric cocktail napkins, stabilizer, embroidery thread.
For an elevated Halloween dinner, stitch a small spiderweb at the same corner of every napkin. Matching placement matters more than using a complicated design: six consistent napkins look like a deliberate set.
How to make it: Prewash washable napkins, press them, and mark one consistent distance from both edges. Use the same design orientation for every napkin and stitch with a color that contrasts with the fabric. A simple option is the Spider Web Sketch, available in multiple sizes; choose one that suits the napkin's usable area.
Stitching tip: Stitch a test napkin first. Dense embroidery can feel stiff on a small piece of table linen.
6. Personalized Halloween Party Favor Bags
Skill level: Beginner to Intermediate | Supplies: Cotton rectangles, drawstring cord, stabilizer, thread.
Small reusable favor bags give Halloween treats a personal touch. Add a guest's name or initial above a tiny seasonal motif, then fill the bags with wrapped candy or party favors. They can double as place settings when arranged on each plate.
How to make it: Cut two bag panels per guest. Embroider the front panel before constructing the bag, keeping the artwork below the drawstring channel and away from side seams. Sew the panels together, create a channel at the top, and thread the cord through. For a seasonal accent, pair a lettering file with a small motif from the Halloween Pumpkin Embroidery Designs Bundle.
Stitching tip: Personalize only after proofreading every guest name and checking the lettering at actual stitch size.
7. Embroidered Halloween Bottle Gift Bags
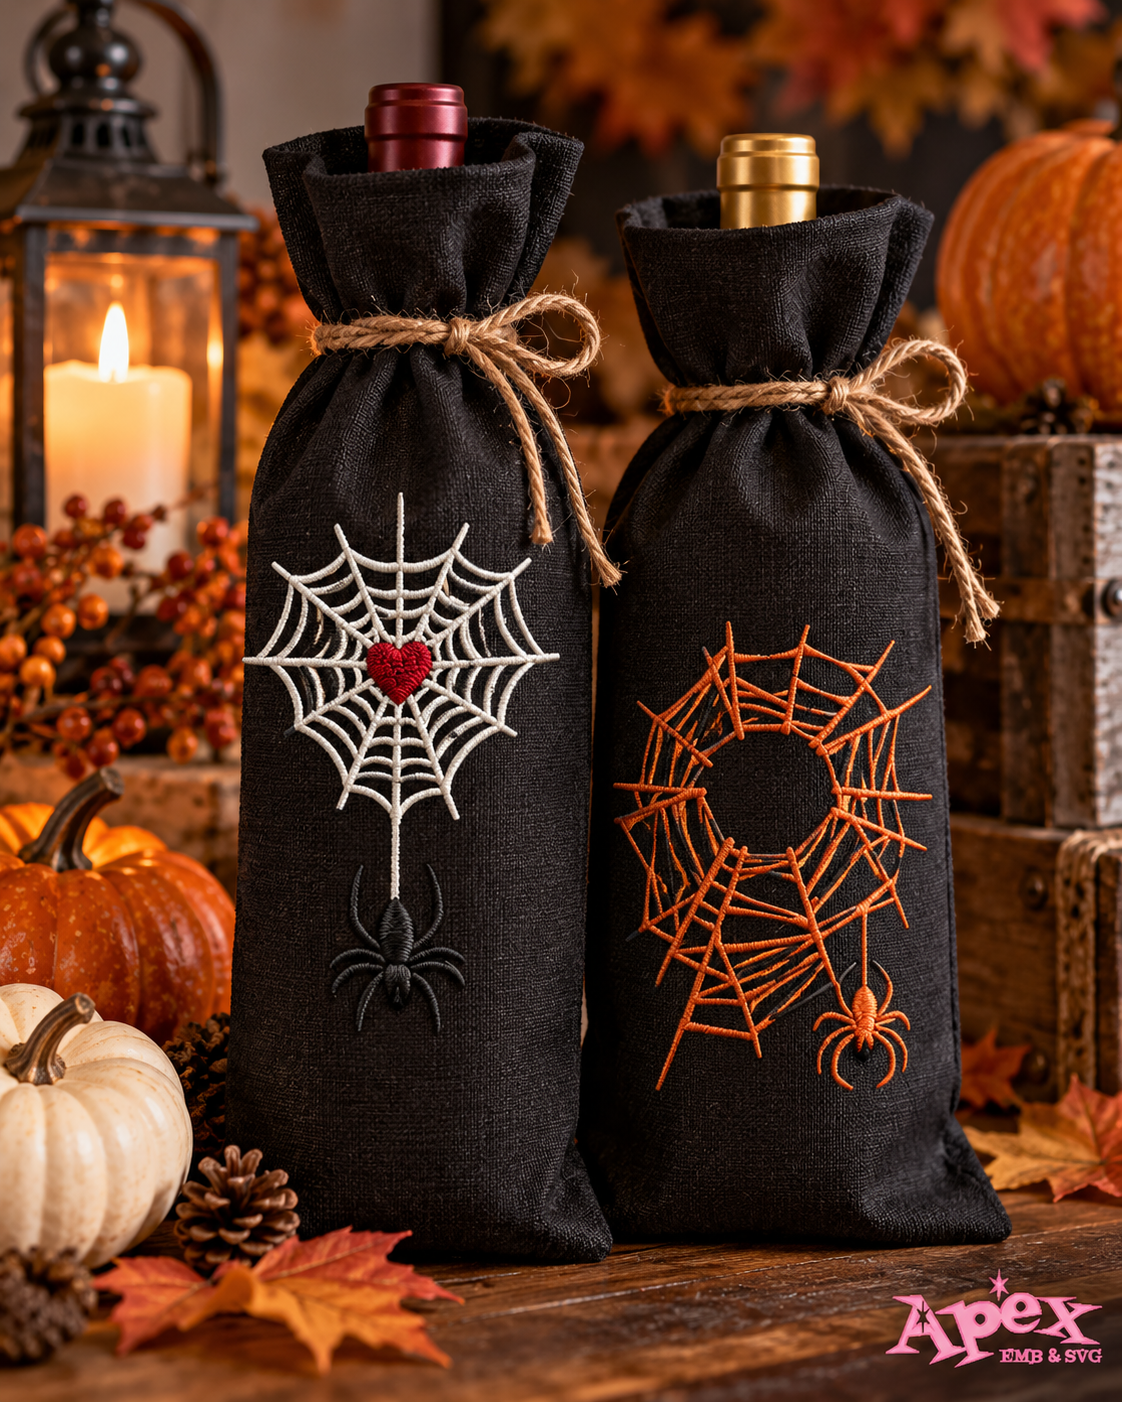
Skill level: Intermediate | Supplies: Heavy cotton or canvas, stabilizer, ribbon, sewing supplies.
Turn a simple fabric bottle sleeve into a hostess gift for a Halloween gathering. A bat silhouette or short spooky phrase works especially well on black or natural canvas. The same pattern can hold sparkling juice, syrup, or another bottled present.
How to make it: Measure the bottle, including extra room for seams and its widest point. Embroider the front fabric panel, sew a sturdy bottom and side seam, then finish the top with a folded hem or ribbon tie. For a playful direction, the Halloween Squad Ghouls Embroidery Design is one option to consider if the finished sleeve provides adequate space.
Stitching tip: Put the design on the front before sewing the narrow bag. Stitching into an already assembled sleeve is often much harder.
8. Reusable Embroidered Halloween Place Cards
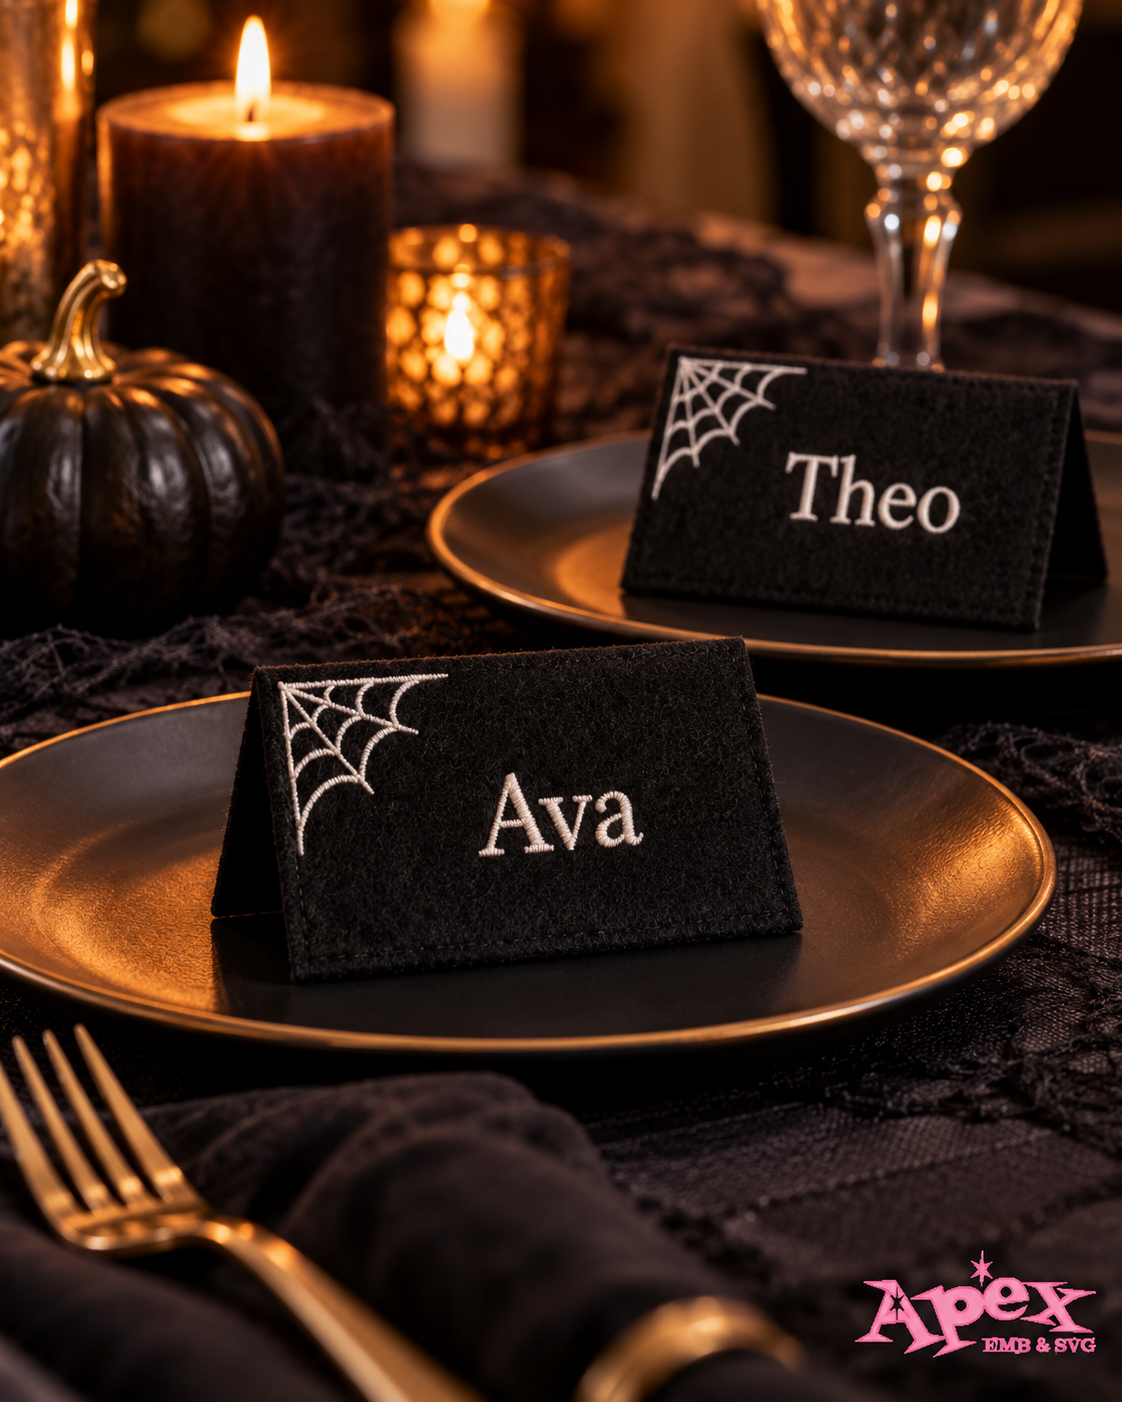
Skill level: Intermediate | Supplies: Firm felt or cotton, stabilizer, embroidery lettering, fusible interfacing as needed.
Skip disposable paper name cards and make fabric place markers instead. Stitch a short name or initial on each small rectangular panel, then pair it with an understated Halloween motif. Use neutral colors so the markers can be stored and reused for future themed gatherings.
How to make it: Embroider multiple name panels on larger fabric pieces, then cut them into uniform cards. Back each piece with interfacing or a second layer of fabric and finish the edges with a tight zigzag or neat topstitch. The Halloween Bat Monogram Embroidery Frame can frame an initial when its dimensions fit your planned card; lettering is a separate design component.
Stitching tip: For very small place cards, an initial may read better than a long first name.
Wearable Halloween Machine Embroidery Projects
9. Custom Halloween Denim Jacket
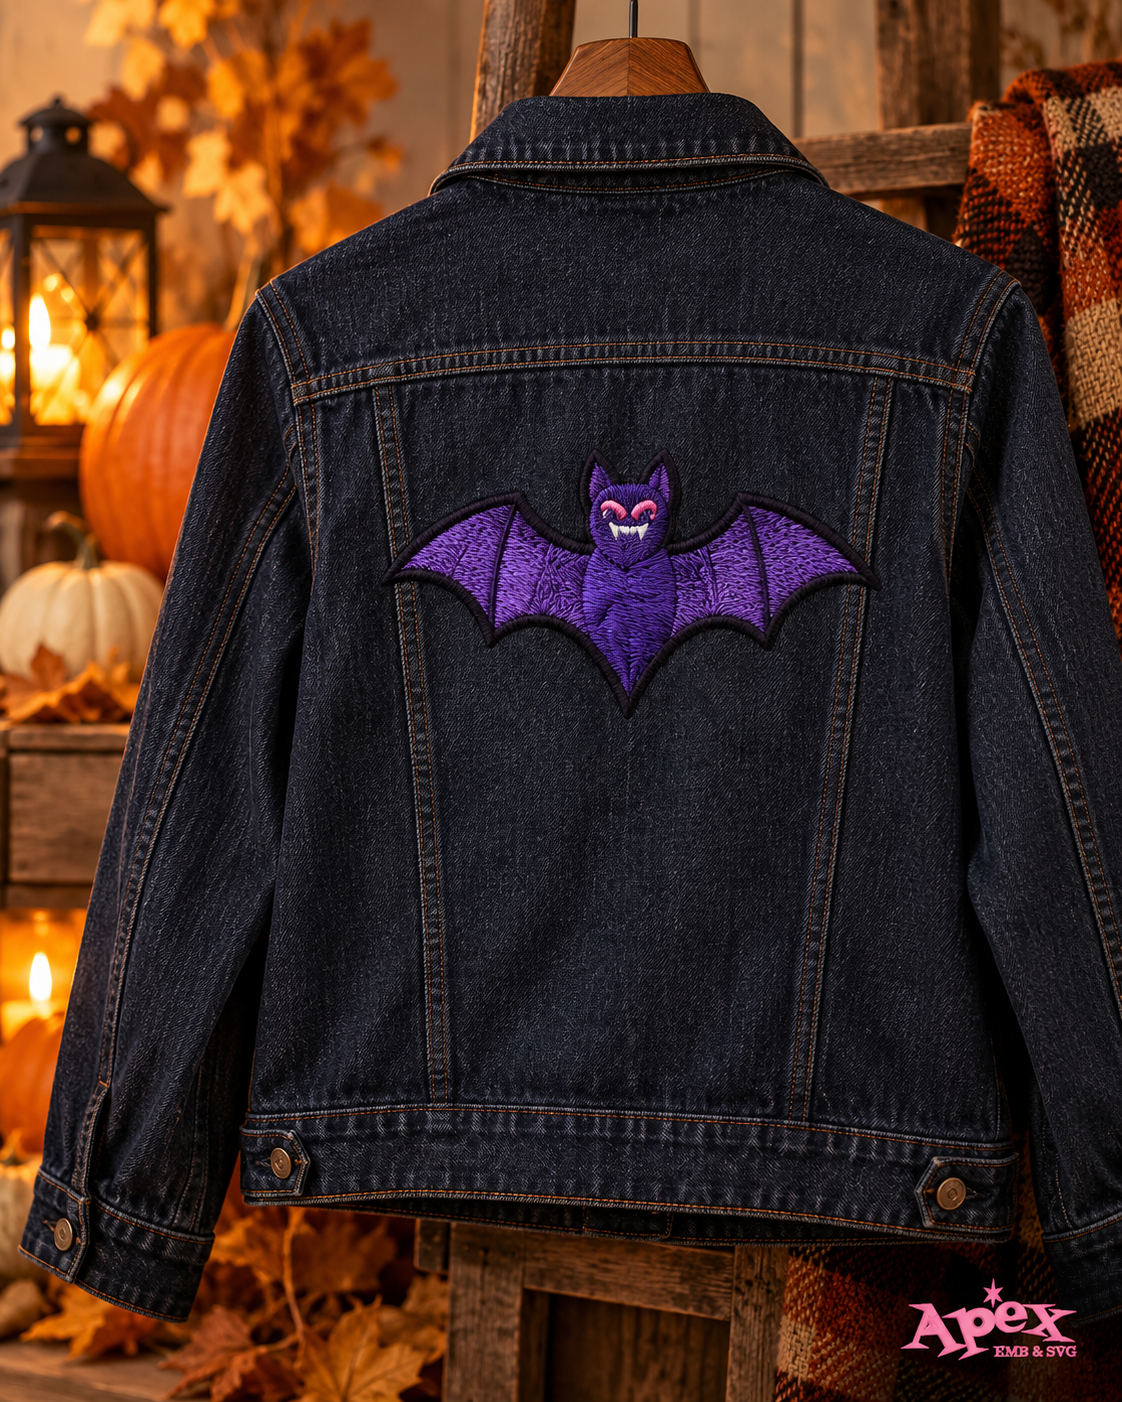
Skill level: Intermediate | Supplies: Denim jacket, cut-away stabilizer as appropriate, placement tools, embroidery thread.
A denim jacket can become a Halloween outfit on its own. Place one motif on a back panel or arrange several small patches along the upper back or sleeves. Orange, bone-white, and muted lavender thread stand out on indigo denim.
How to make it: Try the jacket on and mark the visible embroidery area. If the back panel can be positioned safely in the hoop without catching other layers, stabilize and stitch. Otherwise, embroider separate fabric patches and sew them to the jacket. The Halloween Monster Embroidery Designs Bundle offers different seasonal characters for a collage effect.
Stitching tip: Keep pockets, seams, and heavy hardware away from the needle path. Do not force a bulky jacket into a hoop that cannot accommodate it.
10. Embroidered Halloween Bucket Hat
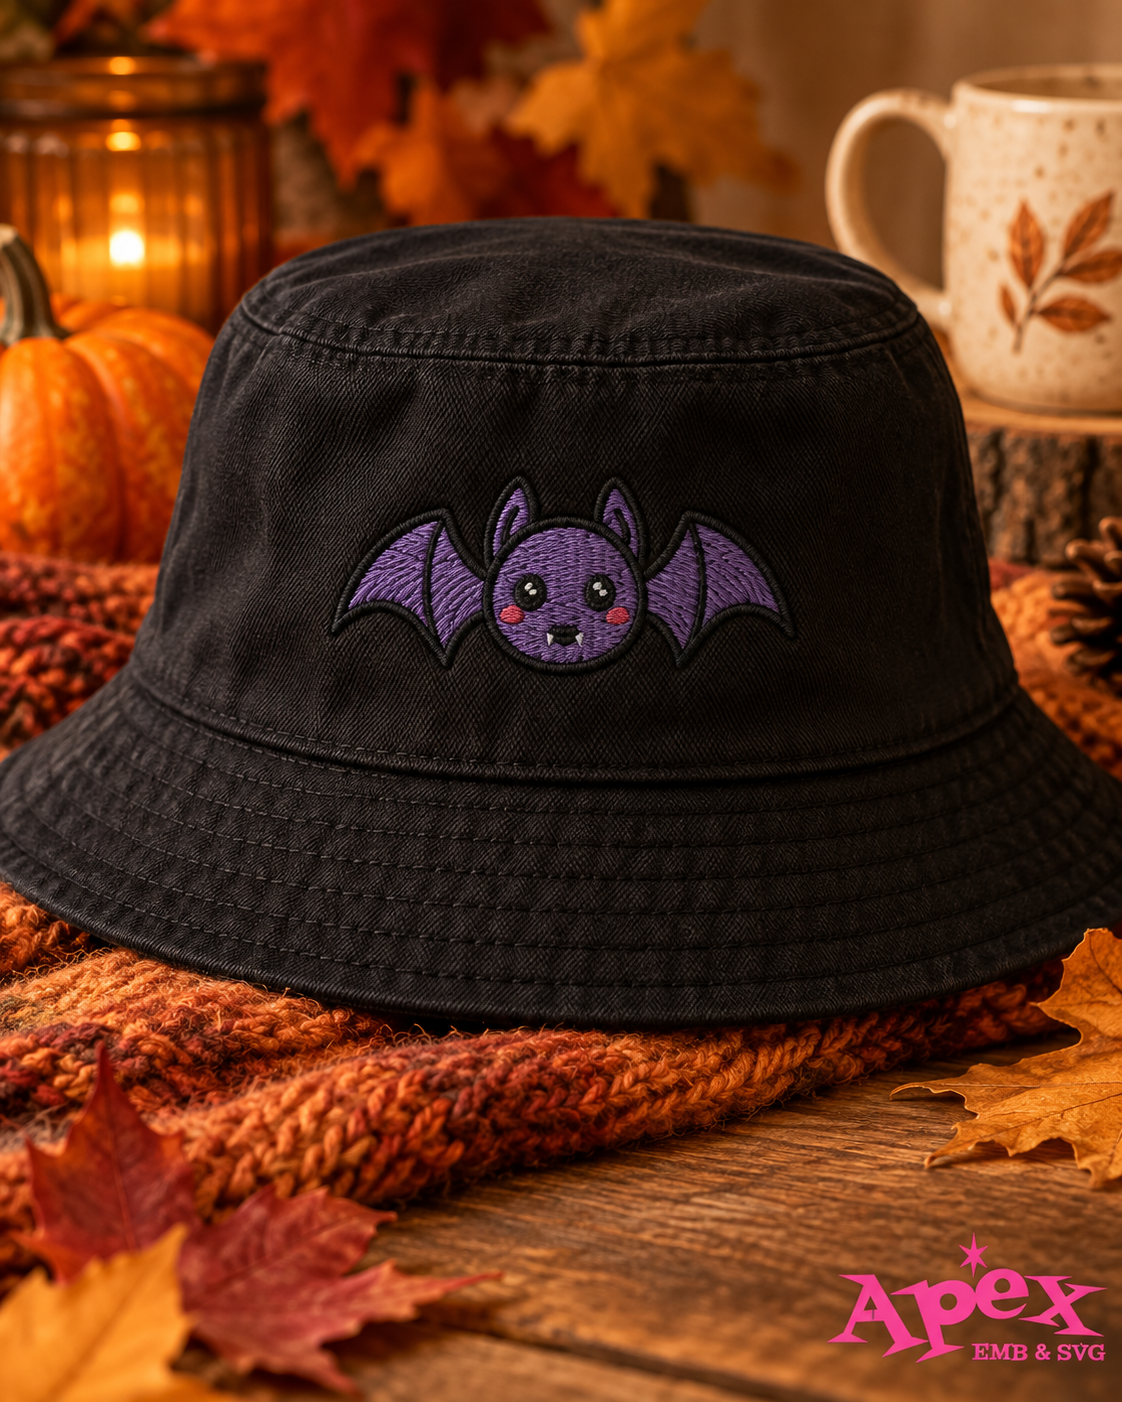
Skill level: Intermediate | Supplies: Bucket-hat pattern or suitable blank, cotton twill, stabilizer, small design.
A subtle pumpkin or bat near the front of a bucket hat makes a wearable Halloween accessory without requiring a full costume. If you're sewing the hat yourself, embroider the crown panel before assembling it.
How to make it: Trace the hat pattern, mark the front-panel center, and stitch the artwork while the piece lies flat. Then assemble the crown, brim, and lining according to your sewing pattern. Consider a compact motif from the Halloween Witch Pumpkin Embroidery Design listing after confirming the stitch field fits the panel.
Stitching tip: A ready-made hat may require specialty cap equipment; flat-panel embroidery is usually easier on a standard home machine.
11. Halloween Embroidered Hair Clips
Skill level: Intermediate | Supplies: Felt or cotton scraps, suitable small motif, clip hardware, backing material.
Decorative fabric hair clips are a small weekend project and a fun accessory for a costume or school celebration. Think of tiny bats or pumpkins mounted on a neatly finished fabric shape.
How to make it: Stitch the motif onto a stable fabric blank, cut it out with a generous border, and attach a second backing piece to hide the reverse. Secure it to the clip hardware using a suitable attachment method. Small bat options from the Halloween Bat Embroidery Designs Bundle can serve as decorative motifs; the files are not necessarily complete in-the-hoop clip projects.
Stitching tip: Avoid loose embellishments for young children, and check that any clip attachment is secure before use.
12. Custom Halloween Canvas Shoes
Skill level: Advanced | Supplies: Fabric shoe panels or suitable removable fabric pieces, stabilizer, thread, shoe-assembly supplies.
Canvas shoes can carry a small Halloween accent on the side panel or tongue. This is best treated as a construction project, not a promise that your machine can stitch directly into a finished sneaker.
How to make it: If you're working from a shoe-making pattern, stitch the fabric panel before assembly. Another option is to create a separate embroidered patch and attach it securely to a compatible shoe surface. A clean Halloween Pumpkin Embroidery Design #3 could work as the artwork for a patch, provided the chosen size suits the available space.
Stitching tip: Don't embroider through a shoe's rubber sole, reinforced toe, or inaccessible layers. When in doubt, choose a removable patch instead.
Handmade Halloween Embroidery Gifts and Keepsakes
13. Freestanding Lace Ghost Earrings
Skill level: Intermediate | Supplies: Appropriate water-soluble stabilizer, embroidery thread, earring hooks or findings, jewelry pliers.
For a small gift with a big Halloween personality, try ghost earrings made with freestanding lace. Unlike standard embroidery on fabric, the lace itself becomes the finished piece once the stabilizer is removed.
How to make it: Follow the specific stitch and stabilizer instructions for the Ghost Earrings Free Standing Lace ITH Embroidery Design. Rinse or dissolve the stabilizer as directed, let the lace dry flat, then add jewelry findings through a suitable attachment point.
Stitching tip: Don't pull or stretch the lace while wet. Let both earrings dry completely before comparing their final shape and attaching hardware.
14. Embroidered Halloween Fabric Bookmarks
Skill level: Beginner to Intermediate | Supplies: Cotton fabric, lightweight interfacing, thin backing fabric, narrow ribbon (optional).
A handmade bookmark is a thoughtful gift for book-loving friends and teachers. Use an outline-style spooky motif rather than a bulky, high-density fill so the finished bookmark can sit more comfortably between pages.
How to make it: Embroider a motif on a fabric rectangle slightly larger than your finished bookmark. Add a backing fabric, stitch around the edges, turn or trim neatly, and press flat. A simple Spider Web Sketch can create a graphic look, but confirm its smallest version is appropriate for the bookmark width before cutting your materials.
Stitching tip: Avoid thick foam, bulky satin borders, or prominent knots that can distort a closed book.
15. Personalized Halloween Zipper Pouch
Skill level: Intermediate | Supplies: Canvas or quilting cotton, zipper, lining fabric, stabilizer, embroidery font or monogram, thread.
A zipper pouch works for makeup, craft tools, stationery, or small gifts. Add an initial within a web-inspired frame for a practical piece that feels made for its recipient.
How to make it: Mark the pouch front before assembly and stitch the monogram frame and lettering with enough space above the zipper seam. Construct the exterior, add the zipper and lining, and finish the corners. The Spider Web Embroidery Designs Bundle includes monogram-frame options; check whether your selected frame requires a separate embroidery font.
Stitching tip: Sew the zipper only after embroidery so the pull and zipper teeth cannot interfere with hooping or stitching.
How to Choose the Right Halloween Embroidery Project
The best project is the one you can finish with the fabric, hoop, and sewing tools you already own. If you're new to machine embroidery, start with a flat fabric item and one uncomplicated placement. More involved projects add construction steps after stitching.
| Your goal | Project to try | Why it works |
|---|---|---|
| Beginner-friendly decoration | Cocktail napkins | Flat fabric and repeatable placement |
| Statement home decor | Appliqué pillow or wall hanging | Room for a larger design and creative fabric choices |
| Party personalization | Favor bags or name cards | Easy to customize for individual guests |
| Wearable accessory | Bucket hat or jacket | Turns embroidery into an everyday item |
| Small handmade gift | FSL ghost earrings | Compact finished keepsake |
| Advanced construction challenge | Canvas shoes | Requires careful planning of panels or patches |
Before starting, ask yourself: Can I hoop the fabric safely? Is the design appropriately sized for the panel? Do I know which stabilizer the material needs? And can I complete any sewing or assembly after the embroidery is done? Those four questions prevent many frustrating mid-project surprises.
Where to Find Halloween Machine Embroidery Files
Once you've chosen a project, select the file for the item you're making—not just the first motif you like. A delicate napkin calls for a different design approach than a large appliqué pillow, and a freestanding lace accessory needs a purpose-built FSL file. Always confirm the listed dimensions and a file format supported by your embroidery machine. Some projects also require a separate sewing pattern, embroidery font, or hardware.
Browse the Halloween Embroidery Designs collection at Apex for seasonal motifs and bundles. Apex products are digital machine embroidery files, not finished physical items; check each listing for its included designs and available formats.
Frequently Asked Questions About Halloween Machine Embroidery Projects
What can I make with Halloween machine embroidery designs?
You can create finished home decorations, table linens, fabric banners, pillows, favor bags, custom accessories, gifts, and personalized pouches. Choose your project first so the embroidery file works with the intended fabric and assembly method.
What is the easiest Halloween embroidery project for beginners?
A flat, woven-fabric project such as a cocktail napkin is a practical place to start. You can mark one design location, stitch it on an accessible surface, and spend less time on complicated sewing or construction.
Can I embroider Halloween designs on ready-made items?
Often, yes, provided the fabric can be hooped or floated securely and the item can move safely in your machine without catching seams, hardware, or extra layers. For difficult shapes such as hats and shoes, stitching fabric panels before assembly—or using embroidered patches—may be more reliable.
What Halloween embroidery projects make good handmade gifts?
Personalized zipper pouches, fabric bookmarks, lace ghost earrings, and small reusable favor bags make thoughtful gifts. Consider the recipient's age and how the item will be used, especially when adding clips, jewelry hooks, or other small hardware.
Make Something Spooky This Halloween
A Halloween embroidery file becomes much more memorable when it's part of something you'll actually use. Start with one realistic project, stitch a test sample, and allow time for pressing, sewing, and finishing. Then build a matching collection of decorations, accessories, or gifts at your own pace.
Explore Halloween Machine Embroidery Designs at Apex Embroidery Designs →