Hidden


Every embroidery project begins in a place most people never see. Before a single stitch touches fabric, before the machine hums to life, there is a digital process happening that determines whether the final result looks polished and professional or falls apart in puckered fabric and broken thread. That process is embroidery digitizing, and understanding it is what separates embroidery that genuinely impresses from embroidery that merely exists.
This guide covers how to digitize embroidery designs completely — from fundamental concepts through technical decisions to practical steps that produce embroidery files ready for real production.
A common misconception among beginners is that digitizing simply means converting an image file into a stitch file automatically. It does not, and understanding this distinction early saves considerable frustration.
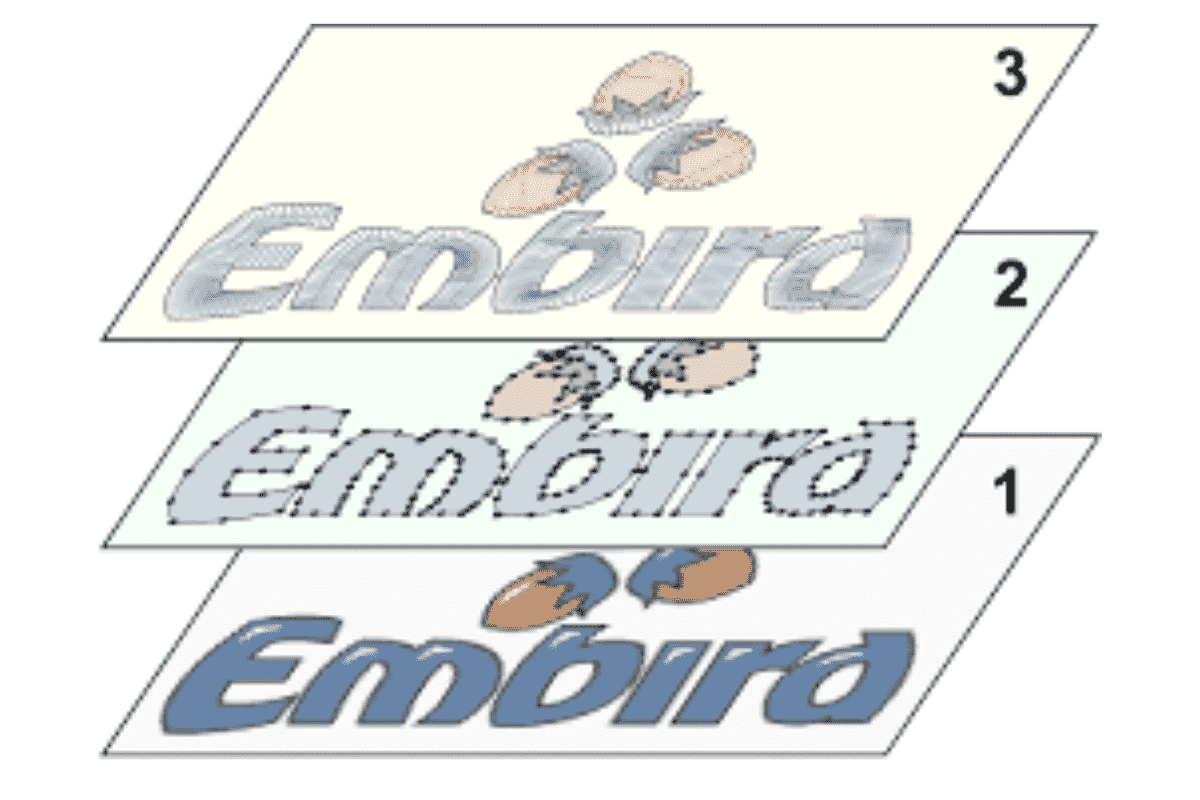
An embroidery machine cannot read a JPG, PNG, or even a clean vector graphic. It reads specialized embroidery file formats containing detailed, sequential stitch instructions — telling the machine exactly where to place each stitch, what direction the thread should travel, how densely stitches should be packed, which stitch type suits each section, and in what order different elements should be sewn.
The critical truth about digitizing is this: the machine executes instructions faithfully. If the instructions are flawed, the result is flawed. No embroidery machine, regardless of quality or price, can correct a badly digitized file. The skill of the digitizer determines the ceiling of what the machine can produce.
Different programs suit different users depending on experience level, production scale, and budget.
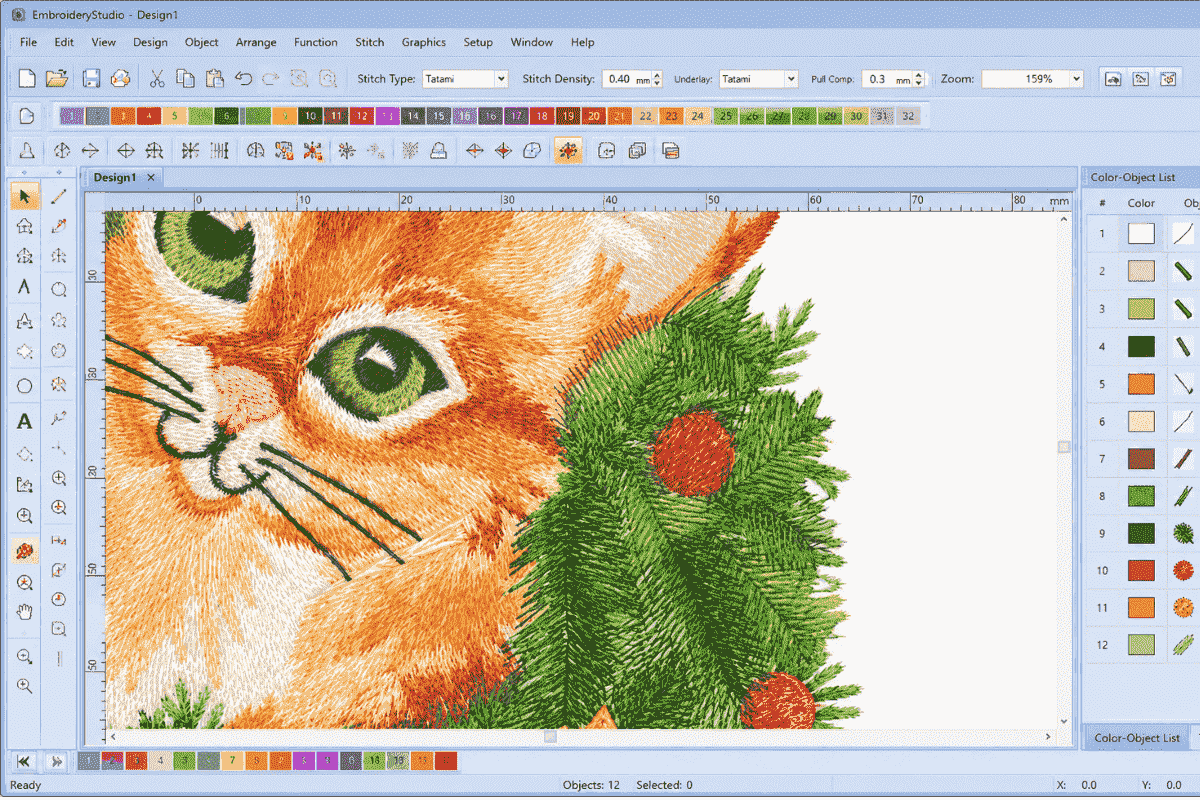
Wilcom Embroidery Studio is widely considered the professional industry standard for commercial production. Its manual digitizing tools offer exceptional precision and its object-based workflow gives experienced digitizers full control over every design element. The learning curve is steep and the cost is substantial, but for serious embroidery businesses it justifies both.

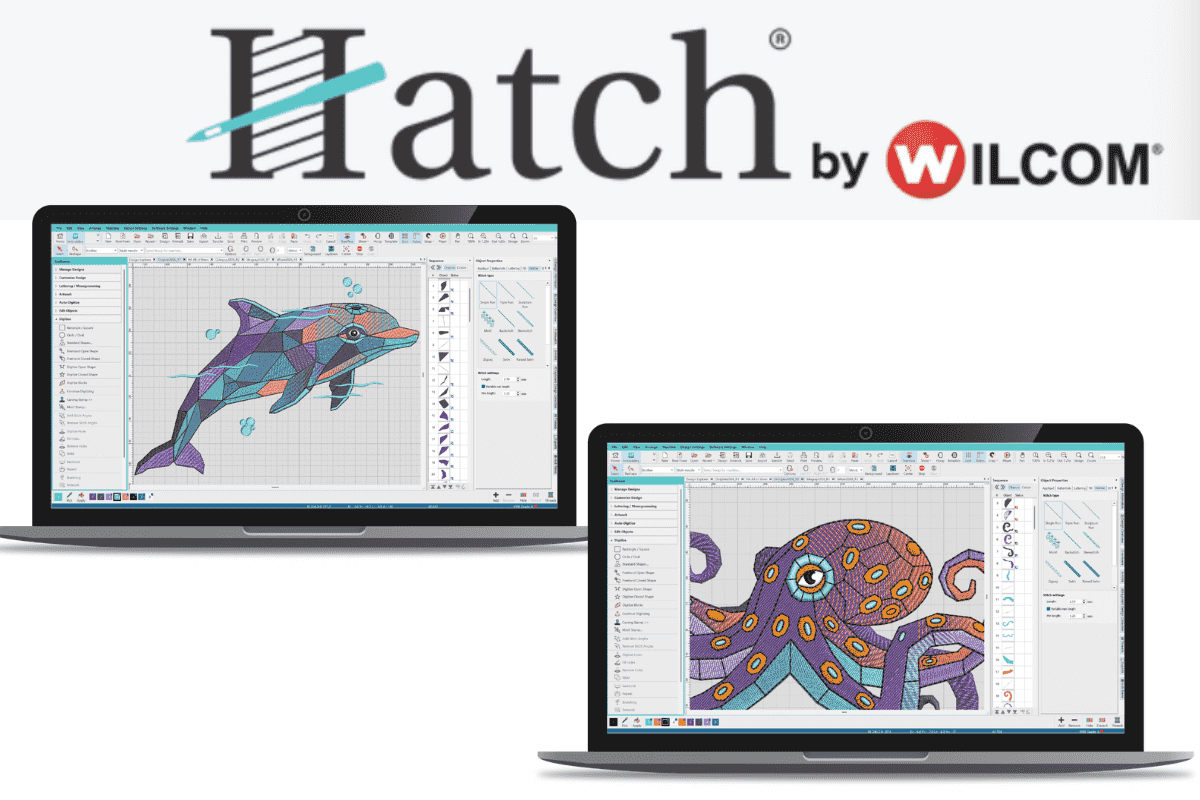
Hatch Embroidery, developed by Wilcom for home and semi-professional use, offers a more accessible entry point without sacrificing too much capability. Many embroiderers grow through Hatch before graduating to full Wilcom as their production needs expand.
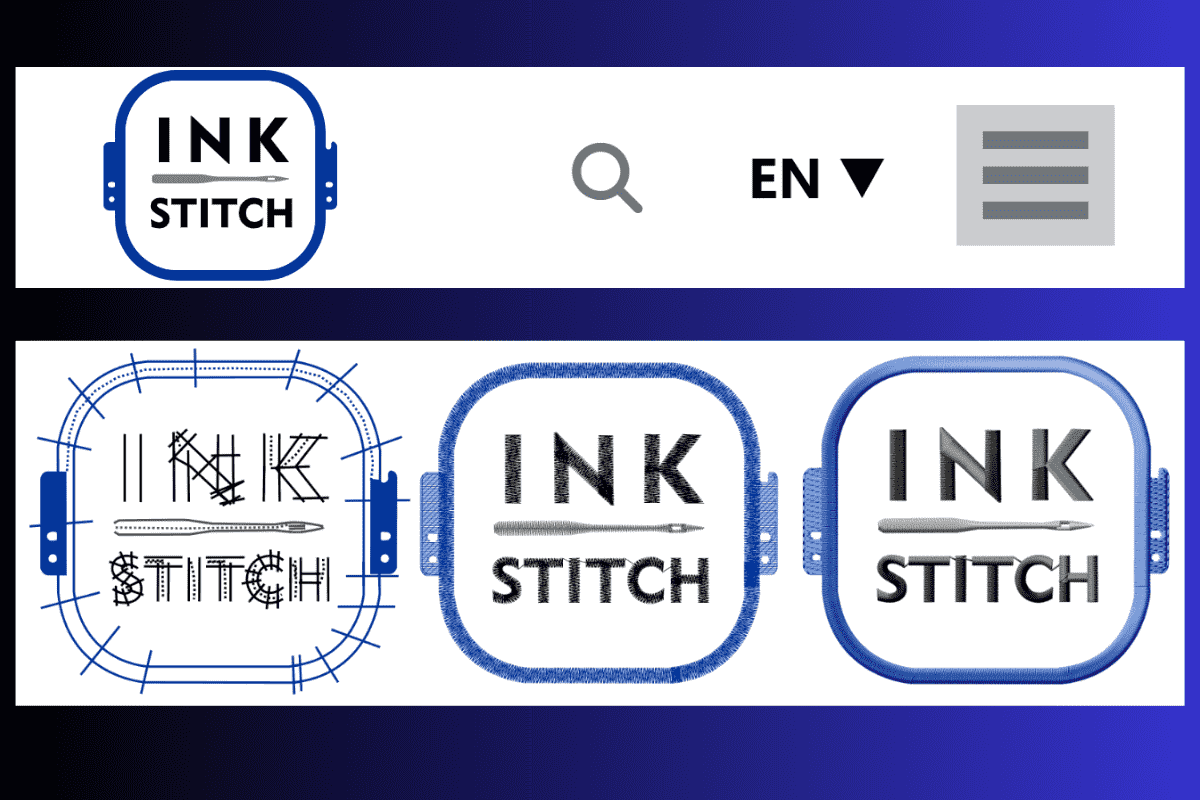
Ink/Stitch is a free open-source extension built on Inkscape. For beginners testing whether digitizing is a skill worth developing, its zero cost makes it a reasonable starting point. Stitch quality requires more careful manual adjustment than paid alternatives, but the fundamentals are fully learnable through it.
Regardless of which software you choose, the underlying principles of how to digitize embroidery designs correctly remain the same. Software provides the interface — knowledge of stitch behavior and fabric interaction is what produces quality.
Clean, well-prepared source artwork makes digitizing faster and produces cleaner stitch results.
Strong contrast between design elements and background lets you clearly define each area during digitizing. Smooth, clean edges translate into more precise stitch paths. Simple, defined shapes hold their visual integrity when translated into thread far more successfully than photographs or highly complex illustrations.
Vector artwork — files created in Illustrator or Inkscape and saved as SVG, AI, or EPS — is the ideal starting point. Vector graphics scale without quality loss, their edges are mathematically clean, and their shapes map naturally onto embroidery objects.
A practical rule experienced digitizers apply consistently: if you cannot see a detail clearly when the design is printed at the size it will be embroidered, the machine cannot reproduce it in thread. Simplifying artwork for embroidery is not failure — it is professional judgment.
Stitch type selection is one of the most significant technical decisions in digitizing. Using the wrong type in a given area creates problems that no machine adjustment can resolve.
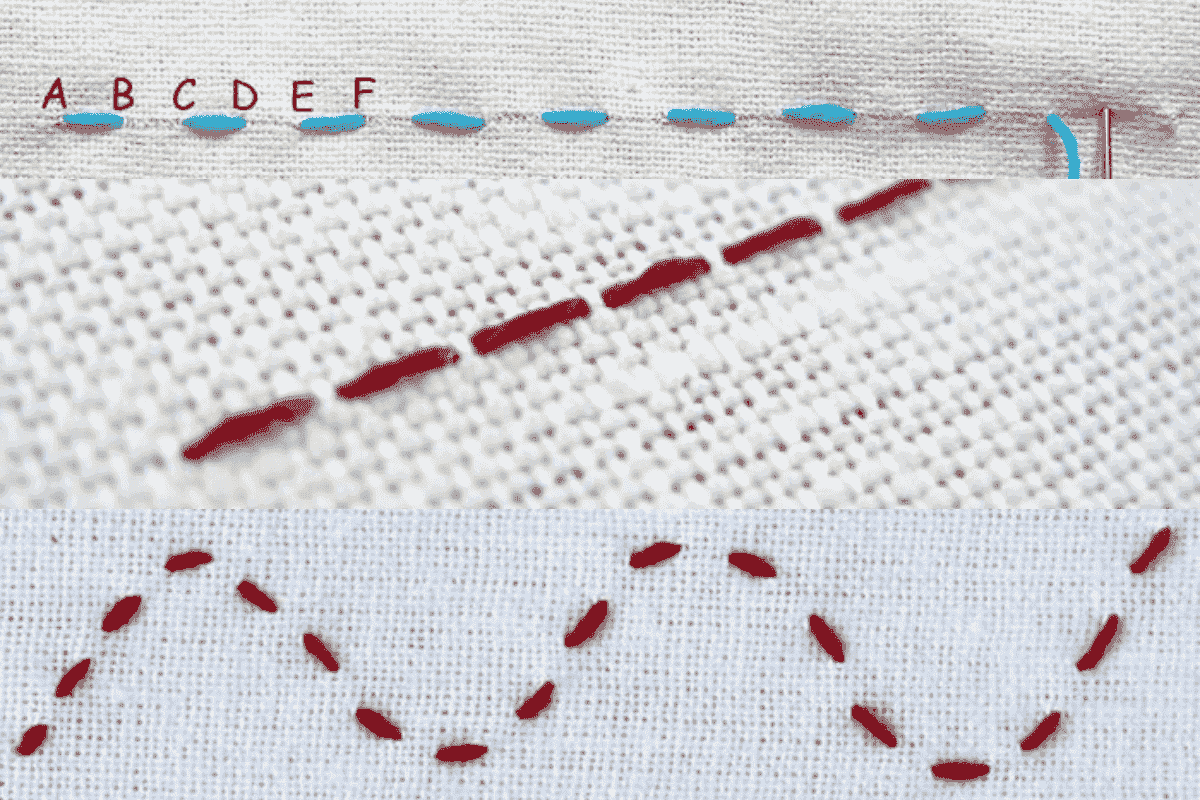
Running stitch places individual stitches in a single line along a defined path. It is the lightest stitch type in terms of thread density and fabric impact, making it ideal for outlines, detail work, fine accents, and small lettering where heavier stitching would overwhelm the design. Running stitch is also the foundation of underlay structures.
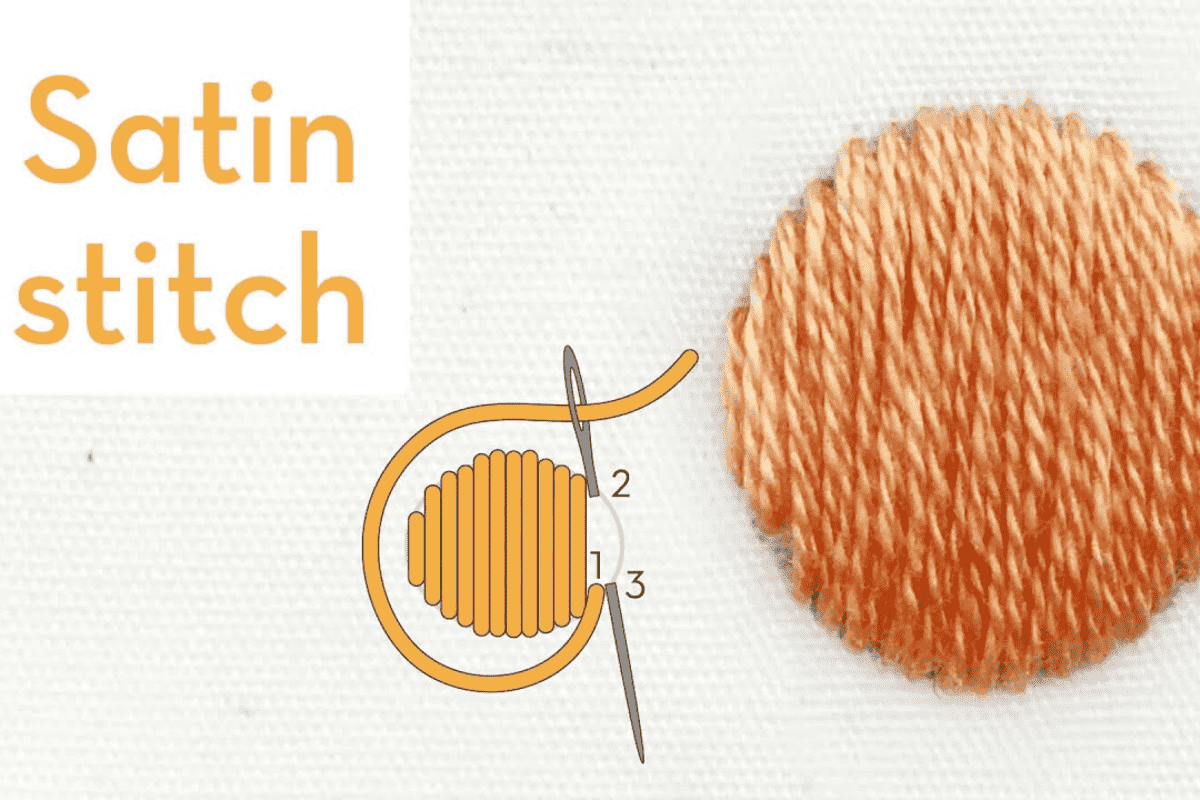
Satin stitch lays parallel threads across a defined shape, creating a smooth, dense, and visually reflective surface. It produces the most elegant appearance of any stitch type and suits lettering, monograms, borders, and narrow shapes where a lustrous finish is the goal. The practical limitation is width — satin stitches become difficult to control cleanly beyond approximately twelve millimeters, where longer stitches begin to snag and shift.
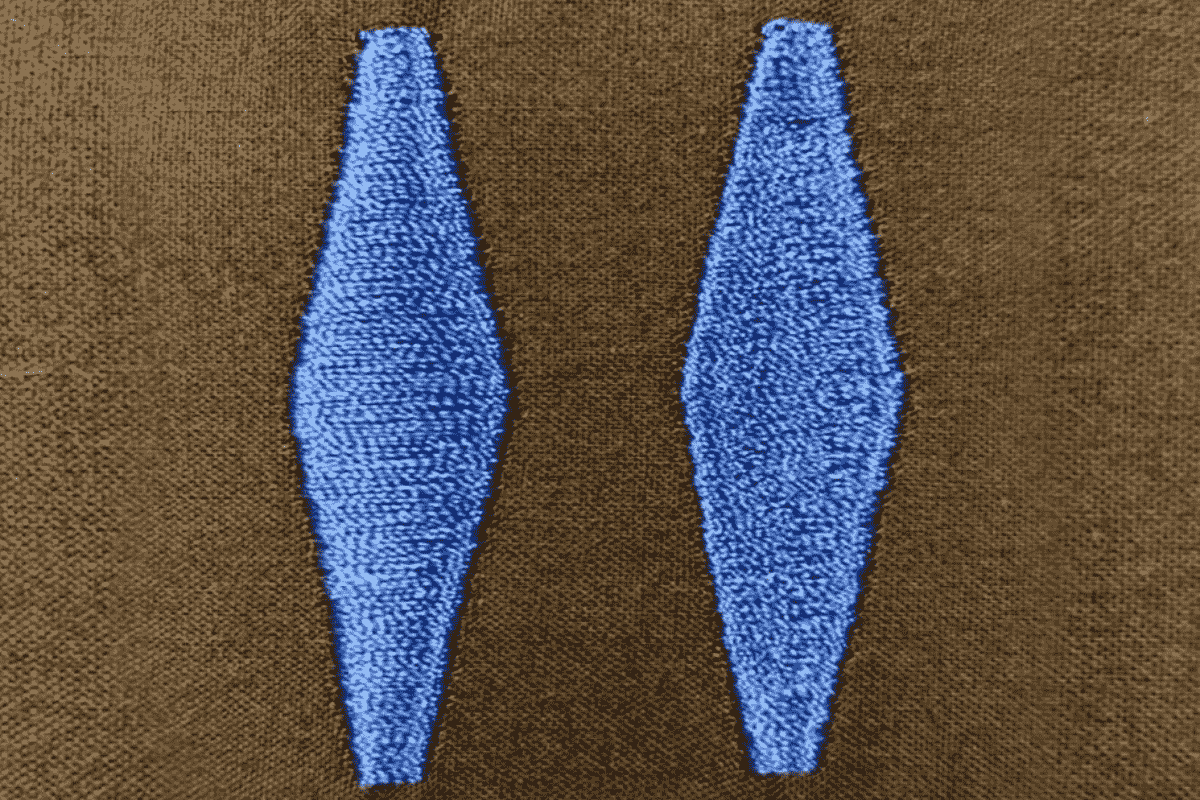
Fill stitch covers large areas with rows of running stitches laid in a structured pattern. It handles expansive design areas that satin stitch cannot cover practically, providing stable and even coverage across wide shapes. Stitch angle, pattern, and density can all be adjusted within fill stitch to create different visual textures and the impression of depth and dimension.
Underlay is the element of professional digitizing that beginners most consistently underestimate, and poor underlay is behind a significant proportion of embroidery problems that get incorrectly blamed on machines, thread, or needle choice.
Underlay stitches are sewn into the fabric before the visible top stitches. They simultaneously compress and stabilize the fabric surface, create a structural foundation that top stitches lock into, push down pile on textured fabrics like terry cloth and fleece, and help maintain registration as complex areas are stitched.
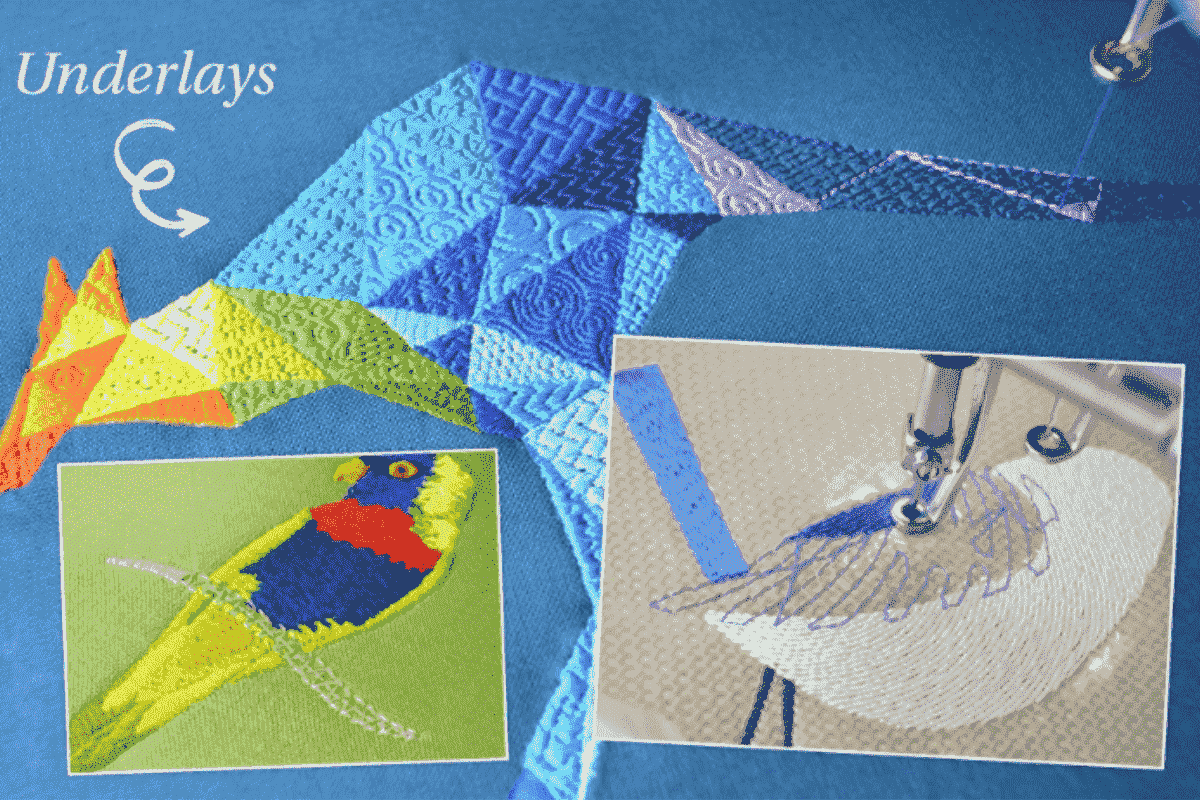
Center run underlay — a single running stitch line down the center of narrow shapes — provides basic stabilization for thin satin stitch elements. Zigzag underlay travels back and forth across a satin stitch column for greater support on medium-width areas. Tatami underlay lays full rows of running stitch across large fill areas and is standard practice for any expansive embroidery on unstable or textured fabrics.
The type of underlay needed depends on fabric type, stitch type, and design density. Building a strong intuition for underlay selection is one of the most valuable things a digitizer can develop through practical production experience.
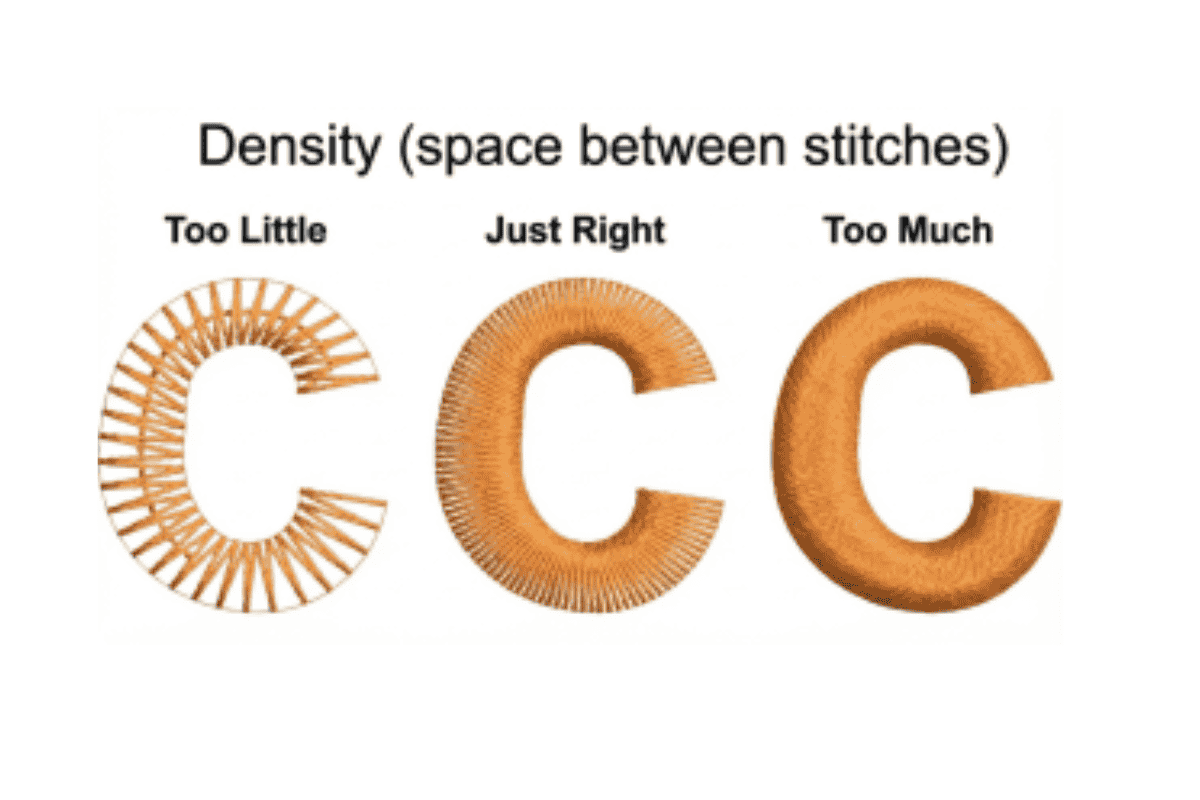
Density determines how closely stitches are placed together within any embroidery area, and it is one of the most consequential settings in the entire digitizing process.
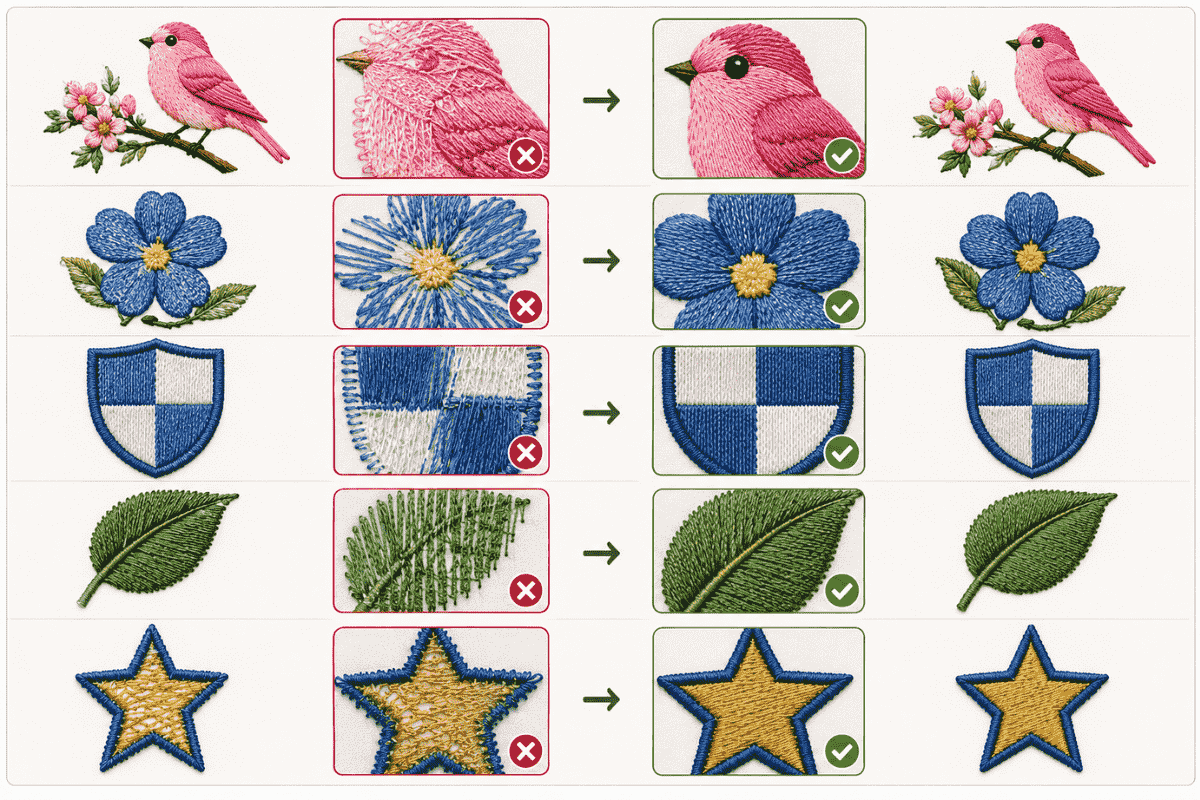
Too high a density packs stitches so tightly that embroidery becomes stiff and heavy. Excessive thread buildup creates an irregular surface that catches light unevenly, and high stitch counts at close density can weaken the fabric itself through repeated needle penetration. Too low a density leaves visible gaps between stitch rows, allowing the fabric color to show through where solid coverage is intended.
The appropriate density depends on fabric type, stitch type, design element size, and thread weight. Denser, more stable fabrics like canvas and denim tolerate higher stitch density than lightweight knits or thin cotton. Learning to judge density correctly comes largely from stitching test samples and examining results critically.
Pull compensation addresses a separate but related challenge. Embroidery thread is always under tension during stitching, and this tension pulls fabric inward as each stitch locks into place — an effect invisible stitch by stitch but significant accumulated across hundreds of stitches. Without compensation, embroidered shapes appear narrower than intended. Circles stitch as compressed ovals. Letterforms lose their clean structure.
Pull compensation widens embroidery shapes slightly within the software in the direction the thread will pull, so the finished embroidery arrives at the intended dimensions after tension effects are accounted for. The degree of compensation needed varies with fabric type, stitch type, and machine tension settings. Stretchy fabrics require more aggressive compensation than stable woven materials.
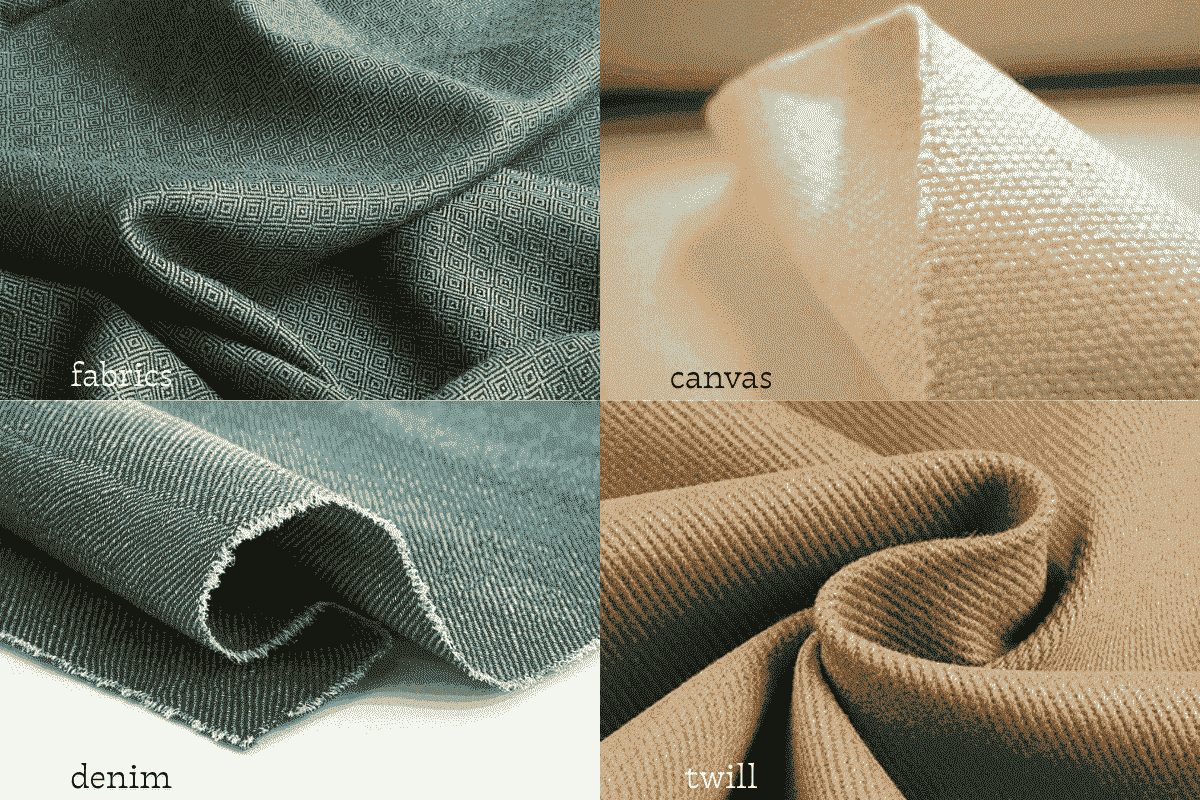
One of the most important things to understand is that a single file does not automatically perform equally well on every fabric type. Professional digitizing accounts for the specific behavior of the material being embroidered.
Stable woven fabrics, canvas, denim, twill are the most forgiving embroidery substrates. They resist movement under stitch tension, support a wide range of stitch types, and hold registration well. Standard density settings and moderate underlay work reliably on these materials, making them ideal for building foundational digitizing skills.
Knit and stretch fabrics require reduced stitch density to avoid creating stiff embroidery in areas that need to flex during wear. Underlay weight is typically increased to compensate, and pull compensation values increase to offset the greater movement of stretch materials under thread tension.
Terry cloth and fleece present a specific challenge because fabric pile rises between stitches, breaking up the visual continuity of the embroidery. Using a water-soluble topping stabilizer placed on the fabric surface before stitching holds the pile down while stitches are laid. The topping dissolves or tears away cleanly after stitching, leaving embroidery sitting clearly on top of the fabric.
Cap embroidery is technically among the most demanding because the curved structure creates tension across the embroidery area that flat garments do not have. This increases registration drift during stitching, making strong underlay, careful sequencing, and sometimes simplified designs more important than on flat fabric.
The order in which embroidery elements are sewn affects both production efficiency and final design quality in ways that are easy to overlook when approaching digitizing primarily from an artistic perspective.
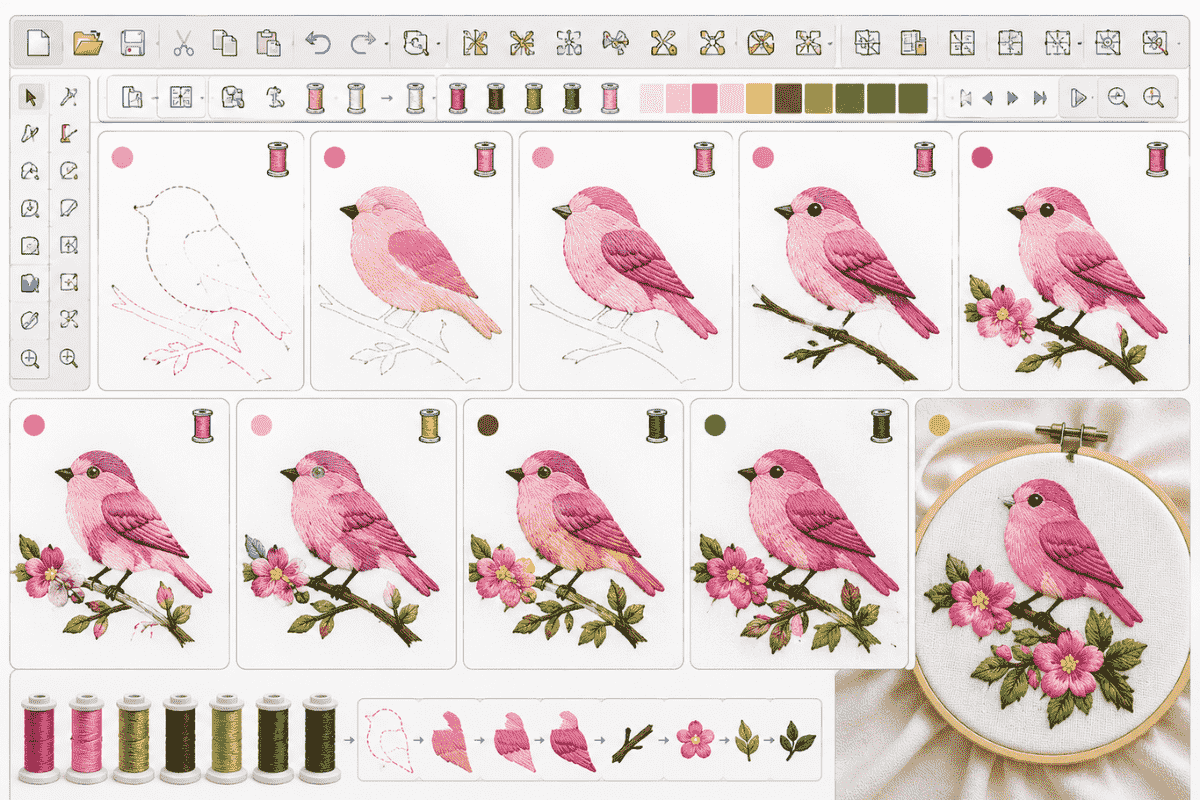
Logical stitch sequencing minimizes the number of thread trims required between elements, reducing both production time and the potential points of failure in the finished embroidery. Designs that require the machine to jump repeatedly between distant elements accumulate trim counts that slow production unnecessarily.
Sequencing should also account for how elements overlap. Elements that sit visually beneath others should be sewn first, so upper elements cover any registration imprecision in lower layers. Backgrounds before foregrounds. Outlines generally after fills. Lettering typically last, since its precision is particularly sensitive to any fabric distortion accumulated during prior stitching.
The final step in digitizing is exporting the design in the file format required by the embroidery machine that will stitch it. Different machine brands use different proprietary formats, and an incompatible file means the design simply cannot be loaded.
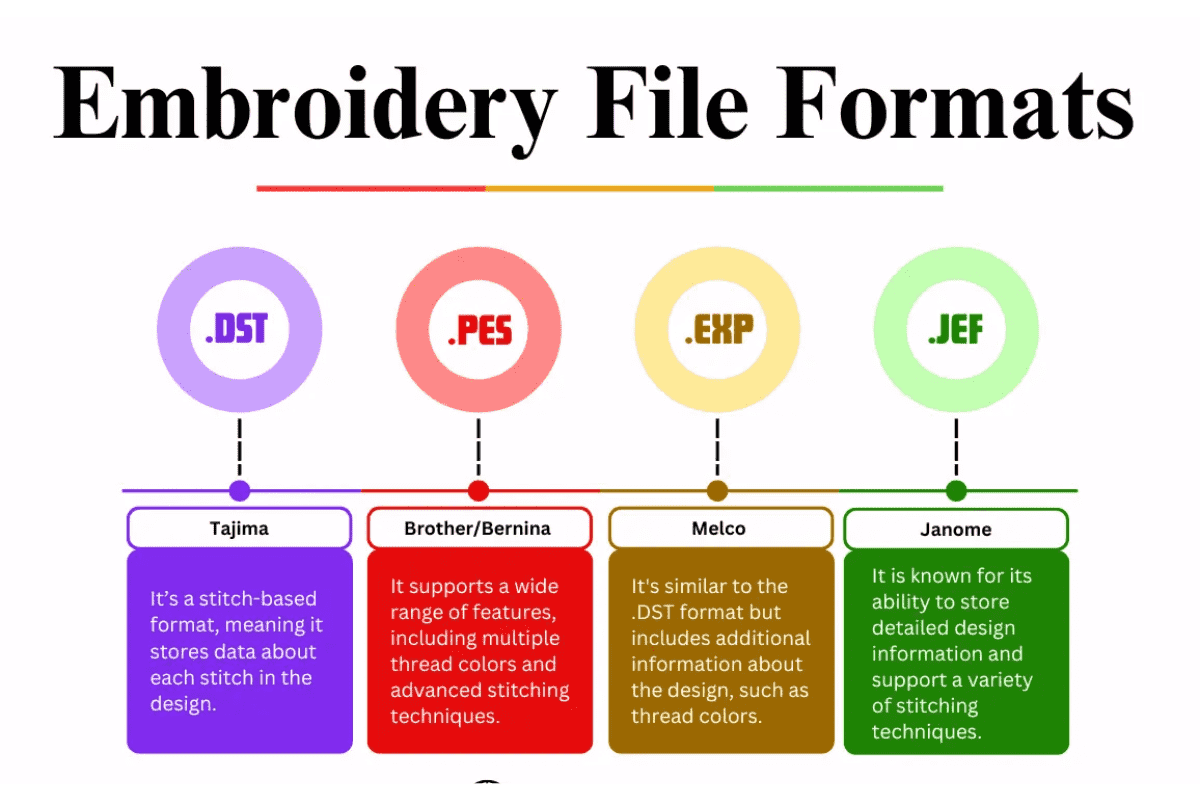
PES is the format for Brother and Babylock machines. DST is the Tajima format and also one of the most universally accepted across commercial machine brands. JEF is used by Janome machines. VP3 covers Husqvarna Viking and Pfaff. EXP is used by Melco.
Most professional digitizing software exports to multiple formats from a single design file. When providing files to customers or production teams, confirming their machine brand before exporting prevents compatibility issues that delay production.
Over-relying on auto-digitizing is the most frequent error among beginners. Auto-digitizing tools typically generate excessive thread trims, poor stitch sequencing, unbalanced density, and weak underlay. Using auto-digitizing as a starting point and then correcting its output manually is reasonable. Treating unreviewed auto-digitized files as production-ready is a consistent source of quality problems.
Ignoring minimum size limitations creates another common failure point. The practical lower limit for legible embroidered text is approximately four to five millimeters in letter height. Below this threshold, thread diameter prevents the machine from accurately reproducing fine letterform details regardless of how cleanly the design is digitized.
Skipping test stitching is perhaps the most avoidable professional mistake. Every new design should be stitched out on the actual intended fabric before production begins. Fabric variables, thread behavior, and machine tension all interact with digitized settings in ways that software simulation does not fully predict. The cost of a test stitch-out is always less than the cost of a failed production run.
Basic embroidery digitizing — simple monograms, clean logos, straightforward text — can be learned to a functional standard within several weeks of consistent daily practice. At this level, designs stitch acceptably and produce presentable results on stable fabrics.
Professional-level digitizing, which produces consistently excellent results across a range of design types and fabric categories, typically develops over months to years of real production experience. The most efficient way to accelerate the learning curve is to stitch out designs frequently and study the results analytically. Every finished piece is a record of the decisions made during digitizing — what worked, what needs adjustment, and why.
Hatch Embroidery and Ink/Stitch are both well-suited to beginners. Hatch offers professional-quality tools in a more accessible interface, while Ink/Stitch is free and functional for basic learning. Wilcom Embroidery Studio is the professional standard for commercial production.
Puckering is most commonly caused by excessive stitch density, inadequate stabilizer for the fabric being used, incorrect machine thread tension, or insufficient underlay beneath dense embroidery areas.
Auto-digitizing can accelerate initial setup, but the output requires manual review and correction to reach professional production quality. Unreviewed auto-digitized files consistently produce sequencing inefficiencies and density imbalances that affect finished embroidery quality.
The correct format depends on your machine. Brother and Babylock use PES. Tajima uses DST, which is also broadly compatible across many commercial machine brands. Janome uses JEF. Husqvarna Viking and Pfaff use VP3.
Underlay stabilizes fabric before top stitches are placed, creates a structural foundation for top stitches to lock into, and reduces registration drift across complex designs. Poor underlay is responsible for a significant proportion of embroidery quality problems that are mistakenly attributed to other causes.
Apex Embroidery has been embroidering and digitizing for 20 years. All our designs and fonts are digitized by hand, each letter.
Copyright © 2026 - Apexembdesigns.com


